How to Install and Configure Squid Proxy on Arch Linux
April 17, 2023 by Hitesh Jethva ( 680 ) under Dedicated Server Hosting
0 Comments
Squid is a free, open-source, fully featured proxy server that provides proxy and cache services for Hyper Text Transport Protocol. It reduces bandwidth, reduces server load, and improves response times by caching and reusing frequently-requested web pages. It also offers access control features that help you to filter Internet traffic. Generally, Squid proxies only HTTP connections and supports other protocols including FTP, Gopher, SSL, and WAIS.
In this post, we will show you how to install the Squid proxy server on Arch Linux.
In This Article
Step 1 – Configure Repository
By default, the default repository is outdated in Arch Linux, so you will need to modify the default mirror list. You can do it by editing the mirrorlist configuration file:
nano /etc/pacman.d/mirrorlist
Remove all lines and add the following lines:
## Score: 0.7, United States
Server = http://mirror.us.leaseweb.net/archlinux/$repo/os/$arch
## Score: 0.8, United States
Server = http://lug.mtu.edu/archlinux/$repo/os/$arch
Server = http://mirror.nl.leaseweb.net/archlinux/$repo/os/$arch
## Score: 0.9, United Kingdom
Server = http://mirror.bytemark.co.uk/archlinux/$repo/os/$arch
## Score: 1.5, United Kingdom
Server = http://mirrors.manchester.m247.com/arch-linux/$repo/os/$arch
Server = http://archlinux.dcc.fc.up.pt/$repo/os/$arch
## Score: 6.6, United States
Server = http://mirror.cs.pitt.edu/archlinux/$repo/os/$arch
## Score: 6.7, United States
Server = http://mirrors.acm.wpi.edu/archlinux/$repo/os/$arch
## Score: 6.8, United States
Server = http://ftp.osuosl.org/pub/archlinux/$repo/os/$arch
## Score: 7.1, India
Server = http://mirror.cse.iitk.ac.in/archlinux/$repo/os/$arch
## Score: 10.1, United States
Server = http://mirrors.xmission.com/archlinux/$repo/os/$arch
Save and close the file then update all the package indexes with the following command:
pacman -Syu
Step 2 – Install Squid Proxy Server
By default, the Squid package is included in the Arch Linux default repository. You can install it using the following command.
pacman -S squid
After installing the Squid proxy, start and enable the Squid service using the following command.
systemctl start squid
systemctl enable squid
By default, Squid listens on port 3128. You can check it with the following command.
ss -antpl | grep squid
You will get the following output.
LISTEN 0 0 *:3128 *:* users:(("squid",pid=52872,fd=12))
Step 3 – Configure Squid Authentication
Before deploying Squid proxy in your organization, it is recommended to configure user-based authentication on Squid so only valid users can access the internet via Squid proxy.
First, install the Apache package with the following command.
pacman -S apache
Next, create a file to store the Squid user and password.
touch /etc/squid/squid_passwd
chown proxy /etc/squid/squid_passwd
Next, create a new user and set a password.
htpasswd /etc/squid/squid_passwd squiduser
Set your password as shown below:
New password:
Re-type new password:
Adding password for user squiduser
Next, edit the Squid configuration file and enable the authentication.
nano /etc/squid/squid.conf
Add the following lines at the beginning of the file.
auth_param basic program /usr/lib64/squid/basic_ncsa_auth /etc/squid/squid_passwd
acl ncsa_users proxy_auth REQUIRED
http_access allow ncsa_users
Save and close the file, then restart the Squid proxy service to apply the changes:
systemctl restart squid
Step 4 – Configure Squid to Anonymize Traffic
Next, you will also need to configure Squid to mask client IP addresses and anonymize the traffic. You can do it by editing Squid’s main configuration file.
nano /etc/squid/squid.conf
Add the following lines at the beginning of the file.
forwarded_for off
request_header_access Allow allow all
request_header_access Authorization allow all
request_header_access WWW-Authenticate allow all
request_header_access Proxy-Authorization allow all
request_header_access Proxy-Authenticate allow all
request_header_access Cache-Control allow all
request_header_access Content-Encoding allow all
request_header_access Content-Length allow all
request_header_access Content-Type allow all
request_header_access Date allow all
request_header_access Expires allow all
request_header_access Host allow all
request_header_access If-Modified-Since allow all
request_header_access Last-Modified allow all
request_header_access Location allow all
request_header_access Pragma allow all
request_header_access Accept allow all
request_header_access Accept-Charset allow all
request_header_access Accept-Encoding allow all
request_header_access Accept-Language allow all
request_header_access Content-Language allow all
request_header_access Mime-Version allow all
request_header_access Retry-After allow all
request_header_access Title allow all
request_header_access Connection allow all
request_header_access Proxy-Connection allow all
request_header_access User-Agent allow all
request_header_access Cookie allow all
request_header_access All deny all
Save and close the file, then restart the Squid proxy service to apply the changes:
systemctl restart squid
Step 5 – Verify Squid Proxy
Now, your Squid proxy is installed and configured. It’s time to verify whether Squid is working or not.
To test the Squid proxy, you will need to define your Squid proxy on your desktop computer’s browser settings.
On the desktop system, open Mozilla Firefox and click on Edit => Preferences as shown below:
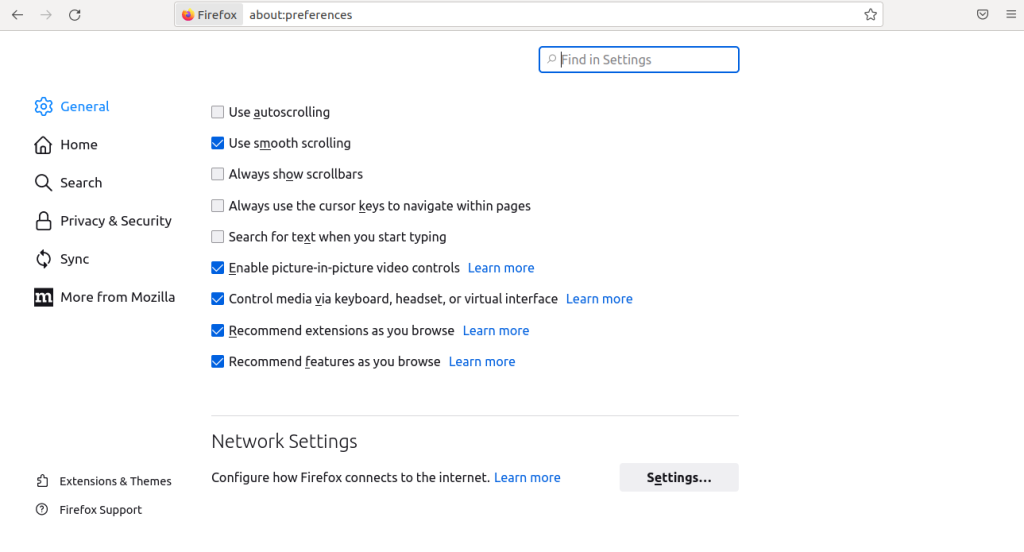
Scroll down to the Network Settings section and click on Settings. You should see the following page:
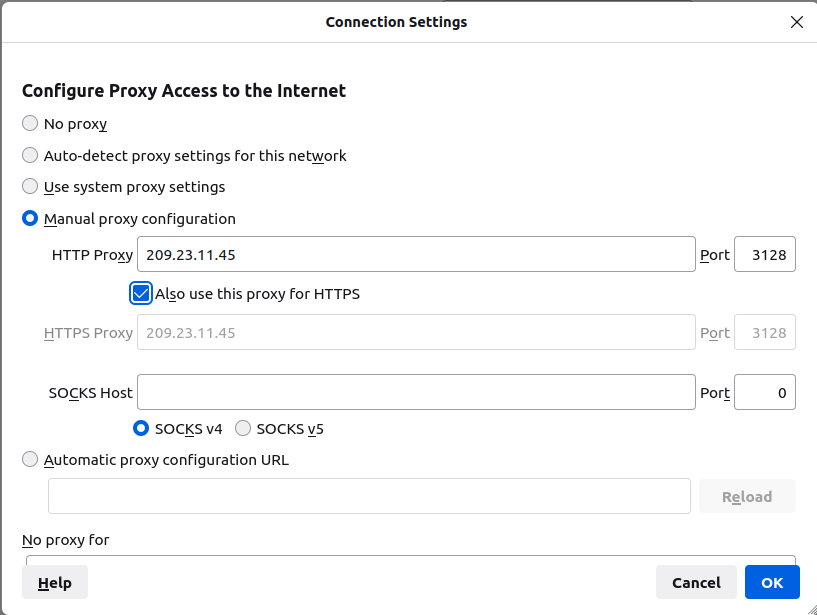
Select the Manual proxy configuration radio button, enter your Squid server IP address in the HTTP Host field and 3128 in the Port field, select the “Use this proxy server for all protocols” check box, and click on the OK button to save the settings.
Your browser is now configured to browse the Internet through the Squid proxy.
To verify it, type the URL https://www.whatismyip.com/. You will be asked to provide a username and password as shown below:
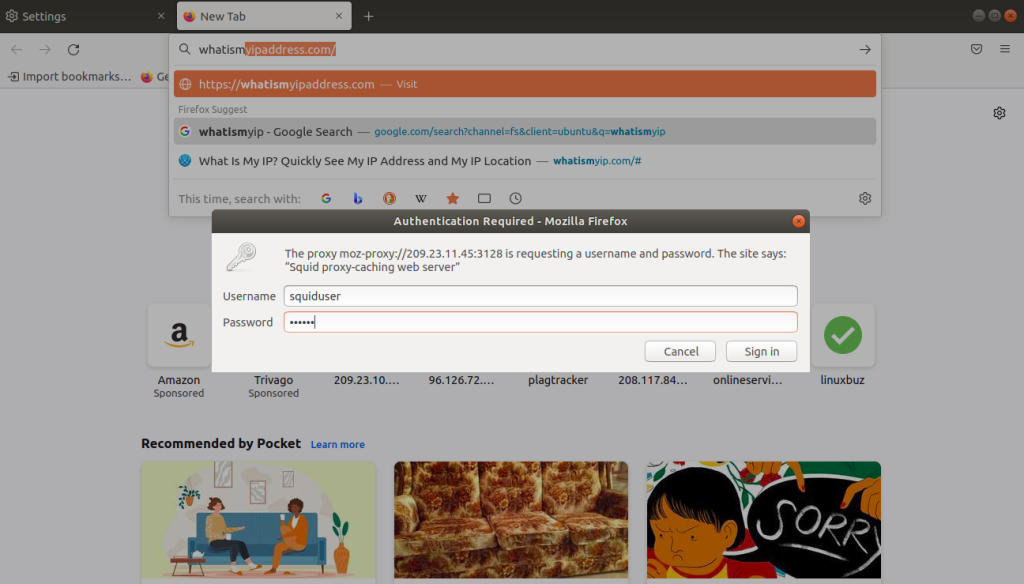
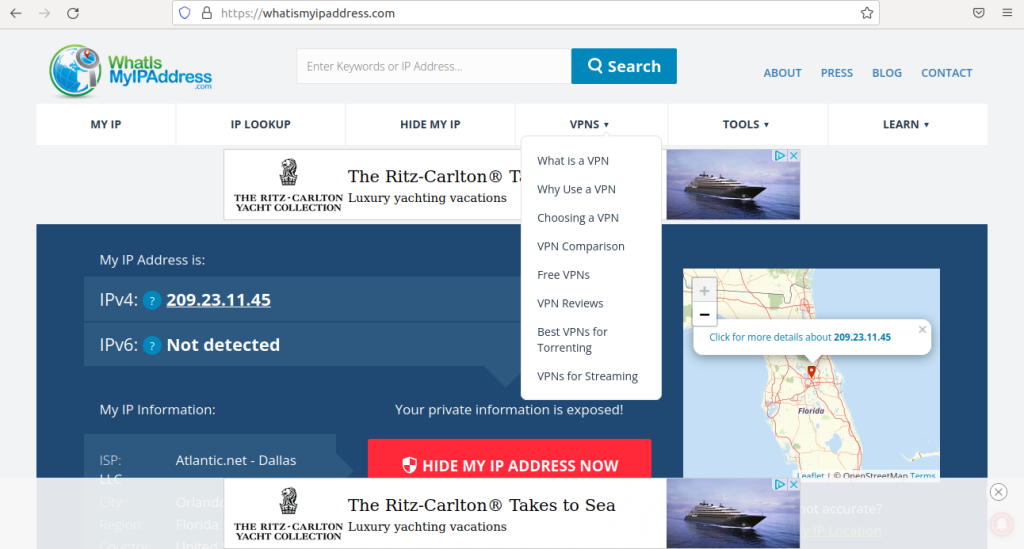
Provide your Squid proxy server username and password which you created earlier and click on the OK button. You should see the following page:
Conclusion
Congratulations! You have successfully installed the Squid proxy server on Arch Linux. You can now implement Squid proxy in your organization to cache the content and filter the internet traffic. You can try the Squid proxy server on dedicated server hosting from Atlantic.Net!
Get a $250 Credit and Access to Our Free Tier!
Free Tier includes:
G3.2GB Cloud VPS a Free to Use for One Year
50 GB of Block Storage Free to Use for One Year
50 GB of Snapshots Free to Use for One Year