How to Configure NGINX on a CentOS 7 Server
September 22, 2015 by Editorial Team ( 450 ) under VPS Hosting
0 Comments
 NGINX Car by Walker Cahall
Verified and Tested 02/04/2021
Introduction
This how-to will help you install and configure NGINX so you can run high traffic websites while maintaining the high level of performance your customers expect. We are also going to install additional software in order to get the most out of NGINX, so this guide will also include the installation and configuration of MySQL, PHP-APC, and PHP-FPM.
Why NGINX? There’s a long back and forth debate over whether you should use Apache or NGINX, and while the overall performance of the two web server platforms is roughly the same, NGINX’s event-based processing model shines by being simple, lightweight and simply better at handling large amounts of concurrent hits for static content without overly taxing your server hardware.
In This Article
What Do You Need?
– You need a CentOS 7 server configured with a static IP address. If you do not have a server already, you can visit our VPS Hosting page and spin a new server up in under 30 seconds.
Server Preparation
To get started, login to your CentOS server via SSH. Atlantic.Net Cloud servers are setup as minimal installations in order to avoid having unnecessary packages from being installed and never used. Because of this, we’re going to start out by installing a couple of packages not there by default.
yum install wget
yum install nano
Once you are logged in, make sure that your server is fully up-to-date.
yum update
With the server up-to-date, we can continue the process and install NGINX. Since NGINX is not included in the default CentOS repositories, we’re going to use the Extra Packages for Enterprise Linux (EPEL) repo. We are also going to use packages from the REMI repositories further in the process, so let’s download and install that as well.
You can install the latest version of EPEL using the following command:
yum install epel-release -y
Before we move on, we’re also going to make a new user and group that will be used by NGINX and PHP-FPM. If you leave users and groups using default settings, everything should still work for you, but to help provide that little bit of extra security we’ll be making the change.
groupadd www-data
useradd -g www-data www-data
While we are working on server preparation, let’s go ahead and set up a new directory for our web server. Normally people use /var/www/html for their sites, but I’ve always been more comfortable having site files in /home/domainname.tld/html, so that’s what we’ll use. For the walkthrough, we will be using example.tld as our domain — make sure to update the bold entries so they match the domain that you are configuring.
mkdir -p /home/example.tld/html
chown -R www-data:www-data /home/example.tld/
chmod -R 0755 /home/example.tld/html
Now that we have finished preparing the server, we can move on to the installation of our software packages.
Install and Configure MariaDB on CentOS 7
First, install the MariaDB server package with the following command:
yum install mariadb-server -y
After installing MariaDB, start the MariaDB service and enable it to start at system reboot:
systemctl start mariadb
systemctl enable mariadb
Next, secure the MariaDB installation with the following command:
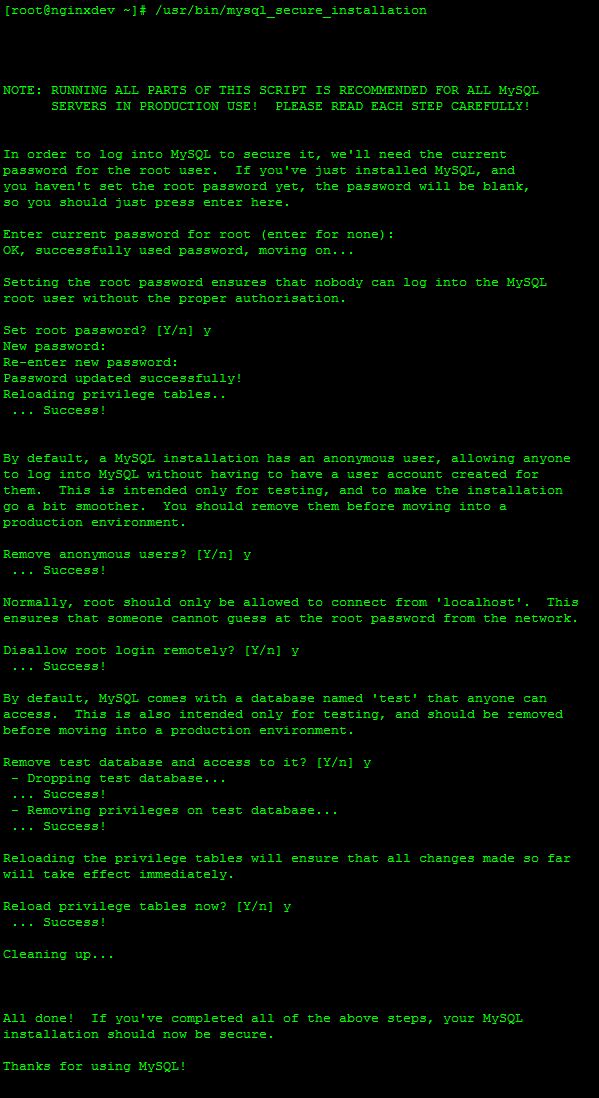
mysql_secure_installation
The MySQL Secure Installation process will walk you through initial security changes that should be put into place for your new MySQL instance.
Note: Chose a secure password and limit root access to localhost only.
 mysql_secure_installation
Edit the /etc/my.cf file to match the following, limiting the server only to listen to local connections:
[mysqld]
bind-address = 127.0.0.1
datadir=/var/lib/mysql
socket=/var/lib/mysql/mysql.sock
user=mysql

# Disabling symbolic-links is recommended to prevent assorted security risks
symbolic-links=0

[mysqld_safe]
log-error=/var/log/mysqld.log
pid-file=/var/run/mariadb/mariadb.pid
We’re going to restart all services at the end, so let’s move on.
Install and Configure NGINX on CentOS 7
yum install nginx
Once installed, we need to check to see how many CPU logical cores are available on your server. To do this, run the following command:
grep -c 'model name' /proc/cpuinfo
Make note of the result as this is what you are going to see the worker_processes setting too. Open /etc/nginx/nginx.conf and replace the current contents with the following:
user    www-data;
worker_processes  2;

pid        /var/run/nginx.pid;

events {
        worker_connections  1024;
}

http {
        include       /etc/nginx/mime.types;
        default_type  application/octet-stream;

        server_names_hash_bucket_size 64;

        error_log  /var/log/nginx/error_log;

        log_format  main  '$remote_addr - $remote_user [$time_local] "$request" '
                '$status $body_bytes_sent "$http_referer" '
                '"$http_user_agent" "$http_x_forwarded_for"';

        sendfile        on;

        keepalive_timeout  30;
        server_tokens off;

        gzip on;
        gzip_disable "MSIE [1-6]\.(?!.*SV1)";
        gzip_http_version 1.1;
        gzip_vary on;
        gzip_proxied any;
        gzip_comp_level 6;
        gzip_buffers 16 8k;
        gzip_types text/plain text/css application/json application/x-javascript text/xml application/xml application/xml+rss text/javascript application/javascript text/x-js;

        # enabled sites
        include /etc/nginx/conf.d/*.conf;
}
Next, we need to set up our domain configuration file. This is done by creating a new file named /etc/nginx/conf.d/example.conf. Again, make sure to update the bold entries to match the domain you are adding.
server {
        listen  80;

        server_name     example.tld;

        client_max_body_size 5m;
        client_body_timeout 60;

        access_log /var/log/nginx/example.tld_access;
        error_log  /var/log/nginx/example.tld_error error;

        root /home/example.tld/html/;
        index  index.html index.php;

        ### SEO sitemaps ###
        rewrite ^/sitemap_index\.xml$ /index.php?sitemap=1 last;
        rewrite ^/([^/]+?)-sitemap([0-9]+)?\.xml$ /index.php?sitemap=$1&sitemap_n=$2 last;

        ### www directory ###
        location / {
                try_files $uri $uri/ /index.php?$args;
        }

        ### security ###
        error_page 403 =404;
        location ~ /\. { access_log off; log_not_found off; deny all; }
        location ~ ~$ { access_log off; log_not_found off; deny all; }
        location ~* wp-admin/includes { deny all; }
        location ~* wp-includes/theme-compat/ { deny all; }
        location ~* wp-includes/js/tinymce/langs/.*\.php { deny all; }
        location /wp-content/ { internal; }
        location /wp-includes/ { internal; }
        location ~* wp-config.php { deny all; }

        ### disable logging ###
        location = /robots.txt { access_log off; log_not_found off; }
        location = /favicon.ico { access_log off; log_not_found off; }

        ### caches ###
        location ~* \.(jpg|jpeg|gif|css|png|js|ico|html)$ { access_log off; expires max; }
        location ~* \.(woff|svg)$ { access_log off; log_not_found off; expires 30d; }

        ### php block ###
        location ~ \.php?$ {
                try_files $uri =404;
                include fastcgi_params;
                fastcgi_pass unix:/var/run/php-www.socket;
                fastcgi_param SCRIPT_FILENAME $document_root$fastcgi_script_name;
                fastcgi_intercept_errors on;
                fastcgi_split_path_info ^(.+\.php)(.*)$;
                fastcgi_hide_header X-Powered-By;
        }
}
Because we changed the user that NGINX runs as, we need to make a change ownership permissions for the NGINX temp files.
chown -R www-data:www-data /var/lib/nginx/
chmod 700 /var/lib/nginx/
Again, we’re going to restart all services at the end. Moving on, instead of installing a full version of PHP on the server, we’re going to PHP-FPM – an alternative PHP FastCGI implementation.
Install and Configure PHP-FPM on CentOS 7
Note: After the install, we need to update the “cgi.fix_pathinfo” setting to disable a potential vulnerability that could allow a 3rd party to execute their own PHP code on your new server.
First, install the Remi repository with the following command:
yum install http://rpms.famillecollet.com/enterprise/remi-release-7.rpm
Next, install PHP-FPM with other required extensions using the following command:
yum --enablerepo=remi-php74 install php-fpm php-mysql
nano /etc/php.ini
Change
;cgi.fix_pathinfo=1
to
cgi.fix_pathinfo=0
Open /etc/php-fpm.d/www.conf and change the configuration to the following:
[www]
listen = /var/run/php-www.socket

user = www-data
group = www-data

listen.owner = www-data
listen.group = www-data
listen.mode = 0660
listen = /var/run/php-www.socket
request_slowlog_timeout = 5s
slowlog = /var/log/php-fpm/blogcms_log
listen.allowed_clients = 127.0.0.1

pm = dynamic
pm.max_children = 10
pm.start_servers = 3
pm.min_spare_servers = 2
pm.max_spare_servers = 4
pm.max_requests = 400
listen.backlog = -1
pm.status_path = /status

request_terminate_timeout = 120s
rlimit_files = 131072
rlimit_core = unlimited

catch_workers_output = yes

php_value[session.save_handler] = files
php_value[session.save_path] = /var/lib/php/session
php_admin_value[error_log] = /var/log/php-fpm/www-error_log
php_admin_flag[log_errors] = on
Save your changes.
Install and Configure PHP-APC on CentOS 7
The final piece of the puzzle is going to be installing a PHP accelerator to further improve static file load times.
yum --enablerepo=remi-php74 install php-pecl-apc
Once the install has been completed, open /etc/php.d/50-apc.ini and replace the contents with the following:
extension = apc.so
apc.enabled=1
apc.shm_segments=1
apc.shm_size=128M
apc.num_files_hint=1024
apc.user_entries_hint=4096
apc.ttl=7200
apc.use_request_time=1
apc.user_ttl=7200
apc.gc_ttl=3600
apc.cache_by_default=1
apc.filters
apc.mmap_file_mask=/tmp/apc.XXXXXX
apc.file_update_protection=2
apc.enable_cli=0
apc.max_file_size=1M
apc.stat=1
apc.stat_ctime=0
apc.canonicalize=0
apc.write_lock=1
apc.report_autofilter=0
apc.rfc1867=0
apc.rfc1867_prefix =upload_
apc.rfc1867_name=APC_UPLOAD_PROGRESS
apc.rfc1867_freq=0
apc.rfc1867_ttl=3600
apc.include_once_override=0
apc.lazy_classes=0
apc.lazy_functions=0
apc.coredump_unmap=0
apc.file_md5=0
apc.preload_path
Final Touches
Now that everything is done, we can verify our NGINX configuration by running:
nginx -t
If the configuration comes back with “nginx: configuration file /etc/nginx/nginx.conf test is successful”, we can start (or restart) all services and make sure that all services are set to start on system startup.
systemctl start mariadb ; systemctl enable mariadb
systemctl start nginx ; systemctl enable mariadb
systemctl start php-fpm ; systemctl enable php-fpm
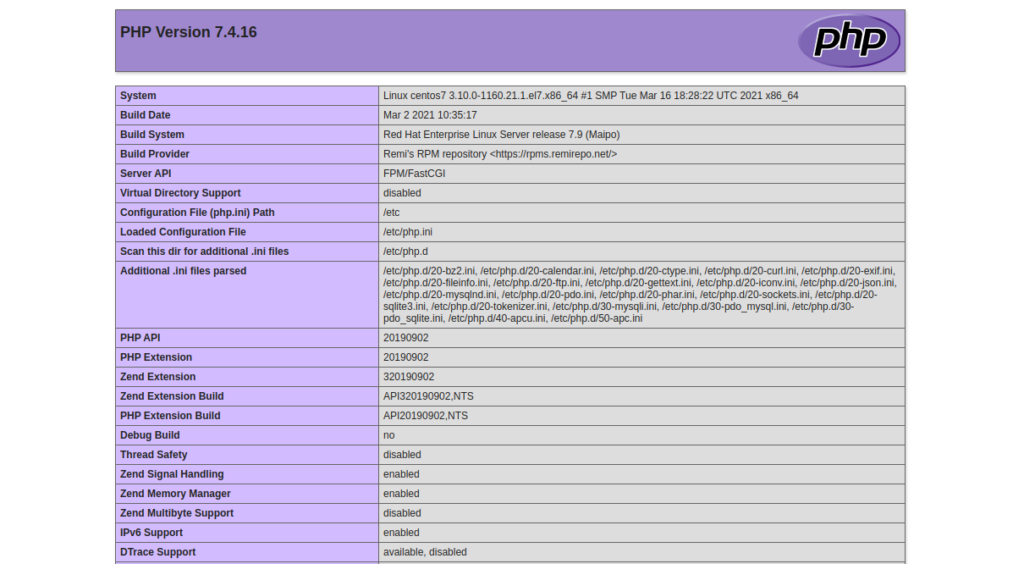
As our final step, we’re going to verify that the configuration is working by making an info.php test page, and moving a copy of the default index.html to our sites home directory. As before, make sure to update the bold entries with the domain that you are setting up.
cp -R /usr/share/nginx/html/* /home/example.tld/html/
nano /home/example.tld/html/info.php
<?php

// Show all information, defaults to INFO_ALL
phpinfo();

?>
Testing Everything
Visiting http://example.tld should show the default index.html file. Visiting http://example.tld/info.php should show information about PHP.
With that, you now have a server running all the necessary components to run your website!
Please check back here for more updates, and to consider a market-leading virtual private server from Atlantic.Net.
Get a $250 Credit and Access to Our Free Tier!
Free Tier includes:
G3.2GB Cloud VPS a Free to Use for One Year
50 GB of Block Storage Free to Use for One Year
50 GB of Snapshots Free to Use for One Year