How to: FreeBSD Remote Administration
September 30, 2015 by Editorial Team ( 450 ) under VPS Hosting
0 Comments
Verified and Tested 08/31/15
Introduction
Remote administration has become more popular, than ever before. Due to the rise of virtualization and Cloud VPS Servers, it has become a necessity in many small to large scale networks. In this How-to, we will be going over the Remote Administration in FreeBSD.
In This Article
- Prerequisites
- Verifying Open SSH in FreeBSD
- Enabling SSH in FreeBSD
- Starting Open SSH in FreeBSD
- Stopping Open SSH in FreeBSD
- Restarting Open SSH in FreeBSD
- Allowing Root Login in FreeBSD
- Testing OpenSSH in FreeBSD
- Copying Files Securely FreeBSD
- Copying Directories Securely in FreeBSD
- Copying Remote Files Securely in FreeBSD
- Copying Remote Directories Securely in FreeBSD
- What Next?
Prerequisites
You need a FreeBSD server that is configured with a static IP address. If you do not have a server already, visit our page for fast and reliable VPS Hosting and spin a new server up in under 30 seconds.
Verifying Open SSH in FreeBSD
In order for you to access your FreeBSD server remotely, we must verify that the SSH service is currently enabled. To check if SSH is enabled on your server, you can accomplish this by typing the following command:
less /etc/rc.conf
Enabling SSH in FreeBSD
If Open SSH is not enabled on your server, you could enable it by first opening the /etc/rc.conf file:
vi/etc/rc.conf
Than locate the sshd_enable line and set sshd_enable to YES.
sshd_enable="YES"
Starting Open SSH in FreeBSD
After making the above change, we need to make sure that SSH is enabled and running. Start it with the following command:
/etc/rc.d/sshd start
Stopping Open SSH in FreeBSD
If you wish to stop the Open SSH service, you could accomplish this with the following command:
/etc/rc.d/sshd stop
Restarting Open SSH in FreeBSD
If you would like to restart the Open SSH service, you could accomplish this with the following command:
/etc/rc.d/sshd restart
Allowing Root Login in FreeBSD
vi /etc/ssh/sshd_config
PermitRootLogin yes
/etc/rc.d/sshd restart
Testing OpenSSH in FreeBSD
If you are using the a Linux server to remote into your FreeBSD server, you can accomplish this with the following command replacing the IP address with the IP of your FreeBSD server.
ssh [email protected] -p 1050
If you are using the a Windows system to remote into your FreeBSD server, you will need to download a 3rd party SSH client. Putty is the most common Open SSH Windows Client and could be downloaded here. There are 3 things that you need to have in mind. The Host Name (IP address) section where your FreeBSD server’s IP will go, the Port section where by default is set to 22(it can be changed to your custom port also) and the Connection type section where SSH must be selected. Below is a screen shot of how the putty interface looks like.
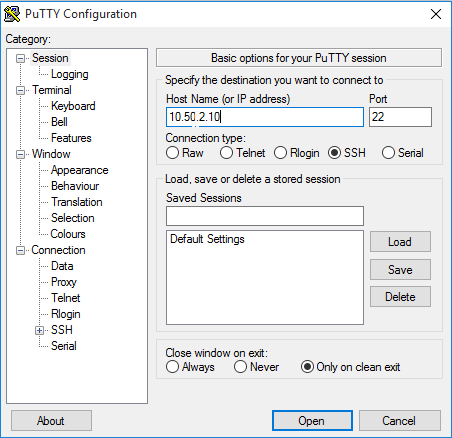
This is the Putty interface when using SSH in a Windows System
Copying Files Securely FreeBSD
Since security is a big concern nowadays, FreeBSD had a built-in feature that allows you to securely copy files from a private or public network using encryption. This feature is called SCP! There is a similar tool for use on Windows systems called WinSCP, make sure to check it out as well!
Our first task is to copy a file from a remote location to my local root directory. Give it a try with the following command where Remote IP=10.50.2.10, Remote File=myremote.file and /root/ being your local root directory.
scp [email protected]:/root/myremote.file /root/
scp [email protected]:/root/myremote.file ./
scp -P 1050 [email protected]:/root/myremote.file ./
Copying Directories Securely in FreeBSD
TO copy a directory from a remote location to your local root directory. Give it a try with the following command where -r =Directory variable, Remote IP=10.50.2.10, Remote File=myremotedb and /root/ being your local root directory. How to copy a directory from another client to your machine
scp -r [email protected]:/root/myremotedb /root/
scp-rP 8000 [email protected]:/root/myremotedb /root/
Copying Remote Files Securely in FreeBSD
If you want to copy a file from another system into yours, you can accomplish this with the following command. To understand the command, Remote File=myremote.file, Remote IP=10.50.2.10 and /root/ being your local root directory.
scp myremote.file [email protected]:/root/
scp -P 8000 database.backup [email protected]:/root/
scp myremote.file myremote.file2 [email protected]:/root/
Copying Remote Directories Securely in FreeBSD
scp -r myremotedb [email protected]:/root/
scp -rP 8000 myremotedb [email protected]:/root/
What Next?
Congratulations! This completes this tutorial on FreeBSD Remote Administration. I hope that you find this information useful just like it was to me. Thank you for following along this how-to! Check back with us for further updates and, try a reliable VPS solution from Atlantic.Net.
Get a $250 Credit and Access to Our Free Tier!
Free Tier includes:
G3.2GB Cloud VPS a Free to Use for One Year
50 GB of Block Storage Free to Use for One Year
50 GB of Snapshots Free to Use for One Year