How to Import a VM Export on Windows Server 2012
July 17, 2015 by Editorial Team ( 450 ) under VPS Hosting
0 Comments
Verified and Tested 03/31/2015
Introduction
In this how-to, we will walk you through importing a VM in Windows Server 2012. Click here for more information on how to export a Virtual Machine.
Prerequisites
– A Server with Windows Server 2012 running Hyper-V.
– The exported VM must be copied to the local host server before starting the import.
Importing a VM Export on Windows Server 2012
From Hyper-V Manager, Click on Hyper-V server and select Import Virtual Machine.
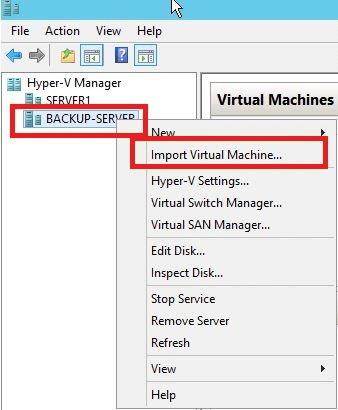
This is the output of the Import option in the Hyper-V Manager
Select the virtual machine folder path (The folder contains the exported machine files).

This is the output that you will see to specify the Import location.
Once you’ve selected the path, the next page will show the machine name on the Import Virtual Machine page. Select your VM and click next.
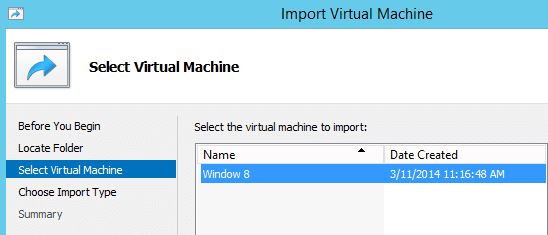
This is the screenshot that you will see to select your virtual machine
Select the Import mode.
Exported files can be reused to clone additional VMs only by using the “Copy The virtual machine (create a new unique ID)” option.
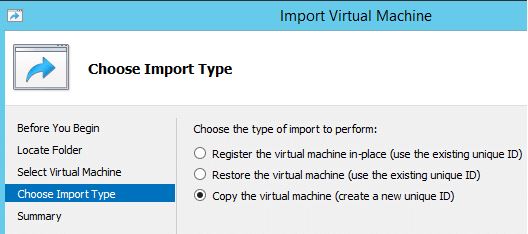
This is the screenshot that you will see to Choose your Import Type
– Register the virtual machine in-place
– Restore the virtual machine
– Copy the virtual machine (because we want to reuse the export, we’re using this option)
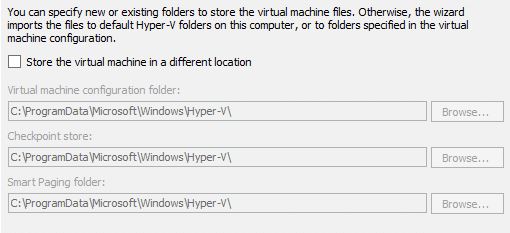
This is the screenshot that you will see to specify the location that you want to import your VM
Select the Virtual Machine storage path to store virtual machine files. We’re using the default values here, but if you want to keep your VMs in a specific folder, this is where you would make the change.
This is the screenshot that you will see after you Choose your VM location
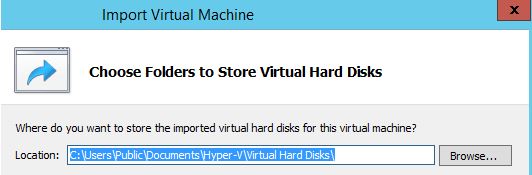
Select the folder path to store the Virtual Machine hard disk.
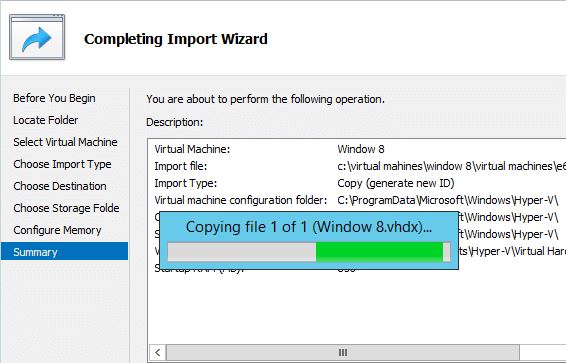
This is the screenshot you will see after reviewing and confirming your options.
Review your configuration selection, and click on Finish to complete the import.
Congratulations! You have just Imported A VM in Windows Server 2012. Thank you for following along in this How-To! Check back for any new updates, and try a VPS hosting solution.
Learn more about our VPS hosting services and VPS hosting price.
Get a $250 Credit and Access to Our Free Tier!
Free Tier includes:
G3.2GB Cloud VPS a Free to Use for One Year
50 GB of Block Storage Free to Use for One Year
50 GB of Snapshots Free to Use for One Year