How to Install File Server Resource Manager (FSRM) on Windows 2012 R2 with Quota Enforcement
February 8, 2015 by Andrew Mora ( 6 ) under VPS Hosting
0 Comments
Introduction
Installation procedure for File Server Resource Manager (FSRM) on Windows 2012 R2 and Quota Enforcement example.
In This Article
Installing File Server Resource Manager (FSRM) on Windows 2012 R2 with Quota Enforcement
Open Server Manager -> Manage -> Add Roles and Features
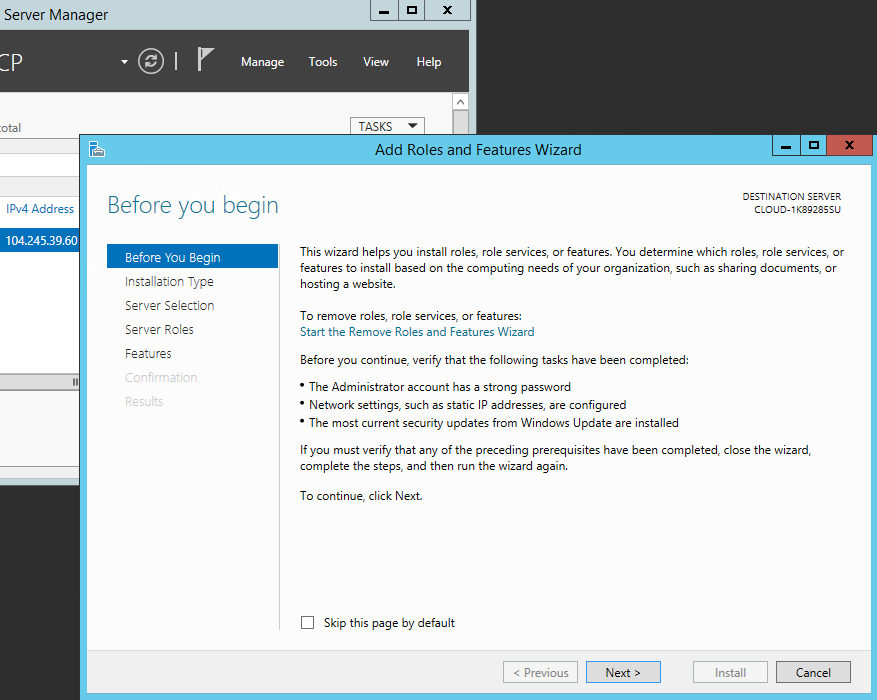 Add roles and features wizard
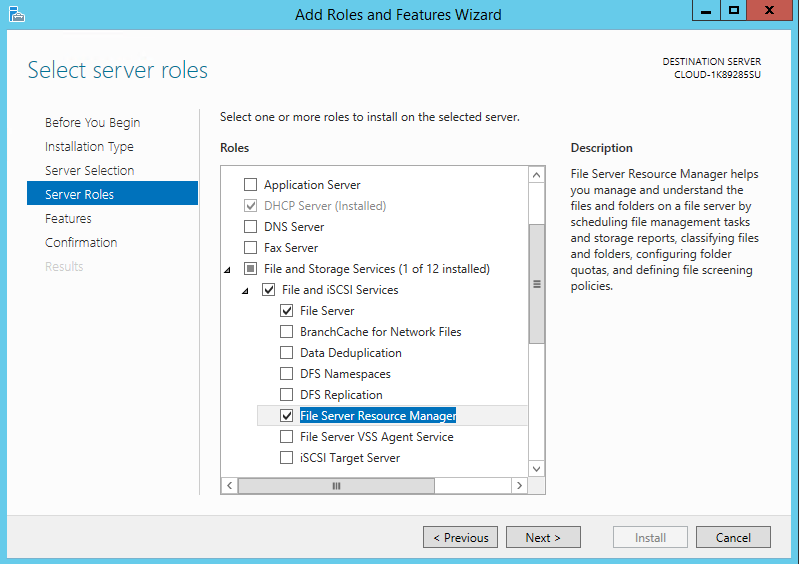
Select “Next” until you arrive at the “Server Roles selection”, expand “File and Storage Services” section and select “File Server Resource Manager”. A popup window will appear, simply leave the defaults and select “Add features”. At this time, you’ll be dropped back into the main window.
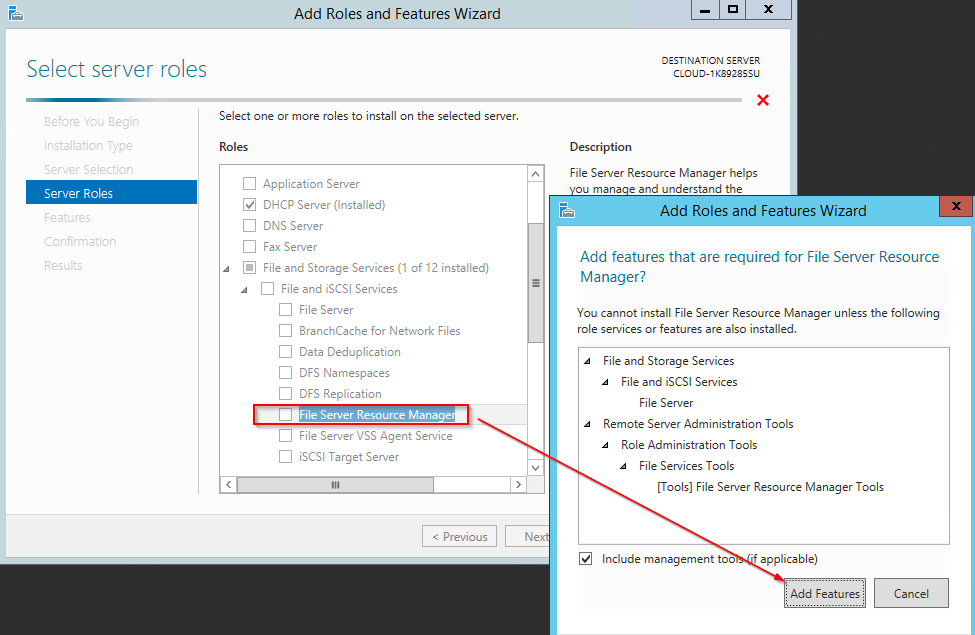 Select Server Roles
Select “Next” until you reach the “Confirmation” Page and select “Install”
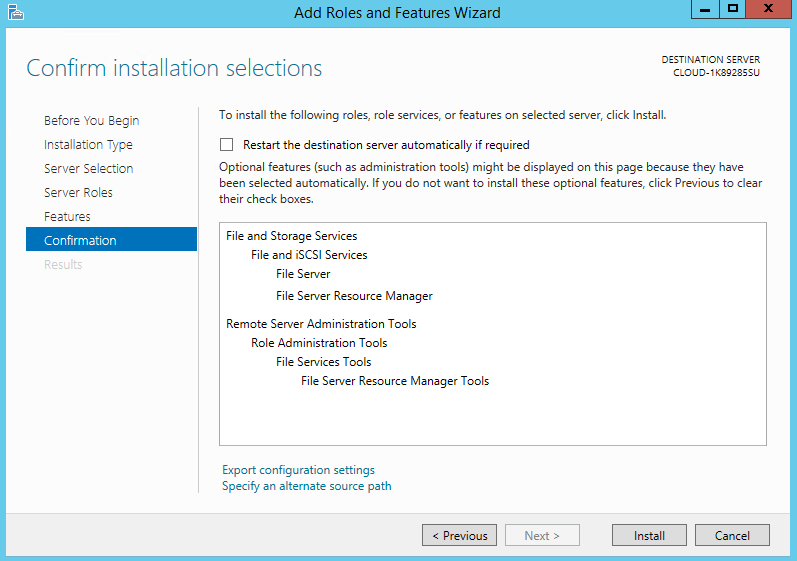 Confirm Installation Selection
Once the installation completes, you may close the resulting Installation Summary window.
Now we’ll setup “Quota Enforcement”. This function allows the server administrator to restrict the size of a folder so that it cannot grow past a certain size. This is useful for mitigating FTP users such that no one user consumes an excessive amount of storage space.
 Server Manager: File Server Resource Manager
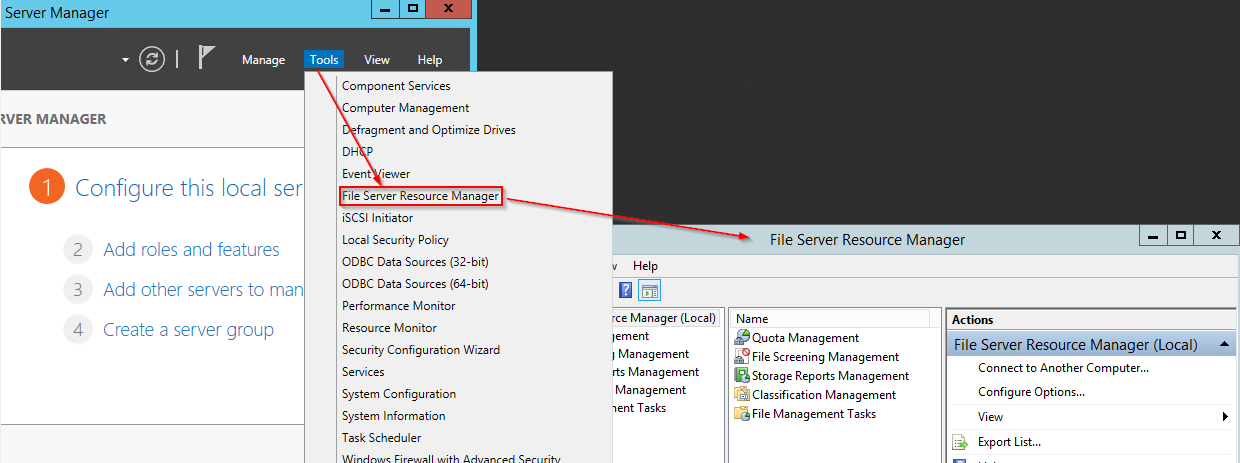
Open Server Manager -> Tools -> Select “File Server Resource Manager”
Under File Server Resource Manager, expand “Quota Management” and select “Create Quota” as seen below:
 File Server Resource manager: Create Quota
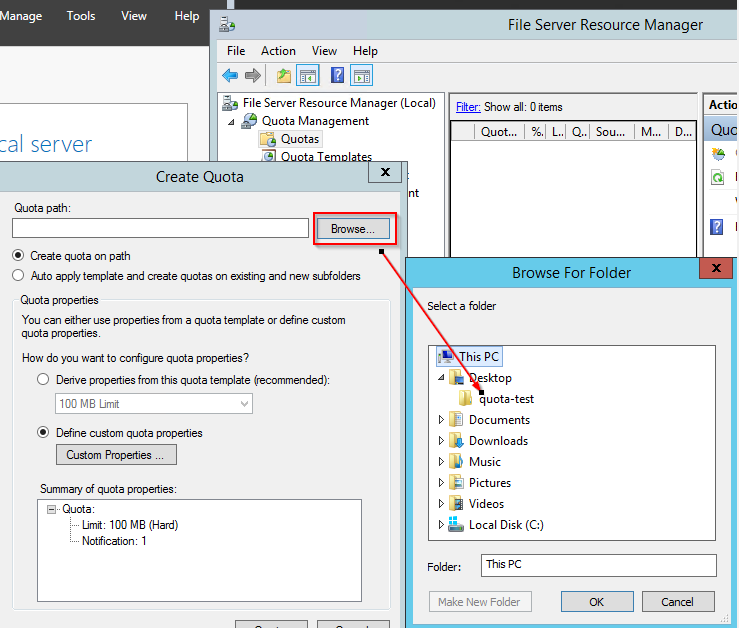
Select the folder you’d like to place a quota on under “Quota Path”. For this example a folder named “quota-test” has been created on the desktop. We will place a 100MB limit on this folder using this utility.
 Create Quota
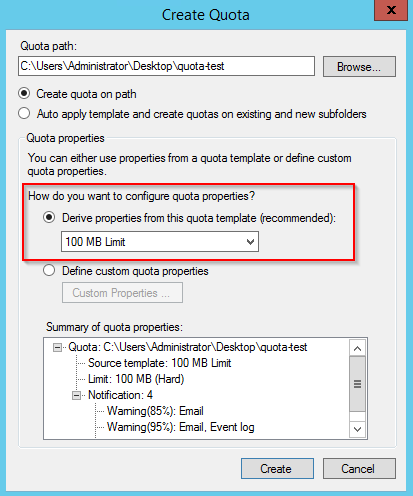
Next Select “100MB Limit” Under “How do you want to configure Quota Properties” and select “Create”
 Create Quota: Properties
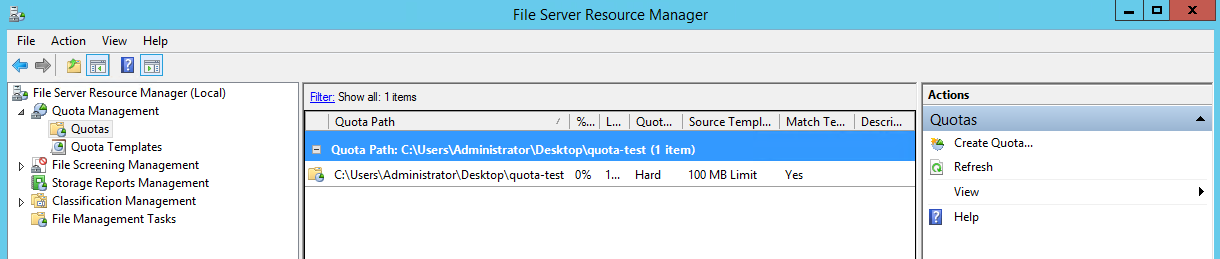
That’s it! You’ve now restricted the size of the folder to a maximum of 100MB. As you can see from above, you are not limited to the templates available within the drop down list for your quotas. You may create your own custom quotas as you please and even set up alert notifications. This functionality, however, goes beyond the scope of this article.
 Sample Quota
Atlantic.Net
Since 1995, Atlantic.Net has been providing internet services to customers, including managed, virtual private server hosting and dedicated hosting. In 20+ years of service, our solutions have been focused on providing the very best in web solutions to our valued customers!
Get a $250 Credit and Access to Our Free Tier!
Free Tier includes:
G3.2GB Cloud VPS a Free to Use for One Year
50 GB of Block Storage Free to Use for One Year
50 GB of Snapshots Free to Use for One Year