How to Install Joomla on CentOS 7 with Apache
December 16, 2015 by Editorial Team ( 450 ) under HIPAA Compliant WordPress Hosting
0 Comments
Verified and Tested 12/16/15
Introduction
In this How-To, we will walk you through the install and configuration of Joomla on CentOS 7 with Apache. Joomla, one of the most popular content management systems nowadays, is used by many web developers for new websites. It is a powerful but yet simple system that requires little technical experience to work with.
Prerequisites
– You need a CentOS 7 server that is configured with a static IP address.
– You will also need to have a LAMP (Linux, Apache, MySQL, PHP) stack platform if you don’t already have it.
Installing Joomla on CentOS 7 with Apache
To get started, log into your CentOS 7 server via SSH or Console. If you are using the Atlantic.Net cloud service, note that they are setup with minimal installations to avoid having unnecessary packages from being installed and never used. If some software packages that you’re used to using aren’t installed by default, feel free to install them as needed.
Let’s download tar to decompress the installation file and some dependencies that we will need to simplify this tutorial.
sudo yum install wget unzip
Make sure that your server is fully up-to-date so we can complete the preparation.
sudo yum update
Creating a Database and User for Joomla on CentOS 7
For Joomla to function correctly, we must create a database. This tutorial uses MariaDB, so let’s access MariaDB with the following command:
mysql -u root -p
Now, we must first begin creating the database that Joomla will use. This can be accomplished with the following command replacing yourdbname with your database name:
CREATE DATABASE yourdbname;
With the database created we must now create a user so it can access the database. This can be accomplished with the following command replacing yourjoomlauser with your desired username and replace yourjoomlapassword with your desired password.
CREATE USER yourjoomlauser@localhost IDENTIFIED BY 'yourjoomlapassword';
Next, we grant database access to your recently created user with the following command:
GRANT ALL PRIVILEGES ON yourdbname.* TO yourjoomlauser@localhost;
Finally, we must refresh MariaDB so the system can flush the newly added privileges and for the changes to take effect, then exit your session. This can be accomplished with the following commands:
FLUSH PRIVILEGES;
exit
Installing Joomla on CentOS 7
Download the most recent stable Joomla release. For this tutorial, that’s version 3.4.5. You can check here to find the most recent release.
wget https://github.com/joomla/joomla-cms/releases/download/3.4.5/Joomla_3.4.5-Stable-Full_Package.zip
After we have downloaded the package, we must move the zip file to the html directory. This can be accomplished with the following command:
mv Joomla_3.4.5-Stable-Full_Package.zip /var/www/html
Now, change to that directory and unzip the to get ready for the installation:
cd /var/www/html
Finally, we can continue with the Joomla installation by unzipping the installation file with the following command:
unzip Joomla_3.4.5-Stable-Full_Package.zip
Furthermore, with the following command, we can apply the appropriate permissions for the Joomla directory that was just created.
chown -R apache:apache /var/www/html
chmod -R 755 /var/www/html
Joomla’s Web Configuration on CentOS 7
Your server is now configured correctly to run the web-based installation by going to the following:
http://server_domain_or_IP
or
http://your.server.IP.address/joomla
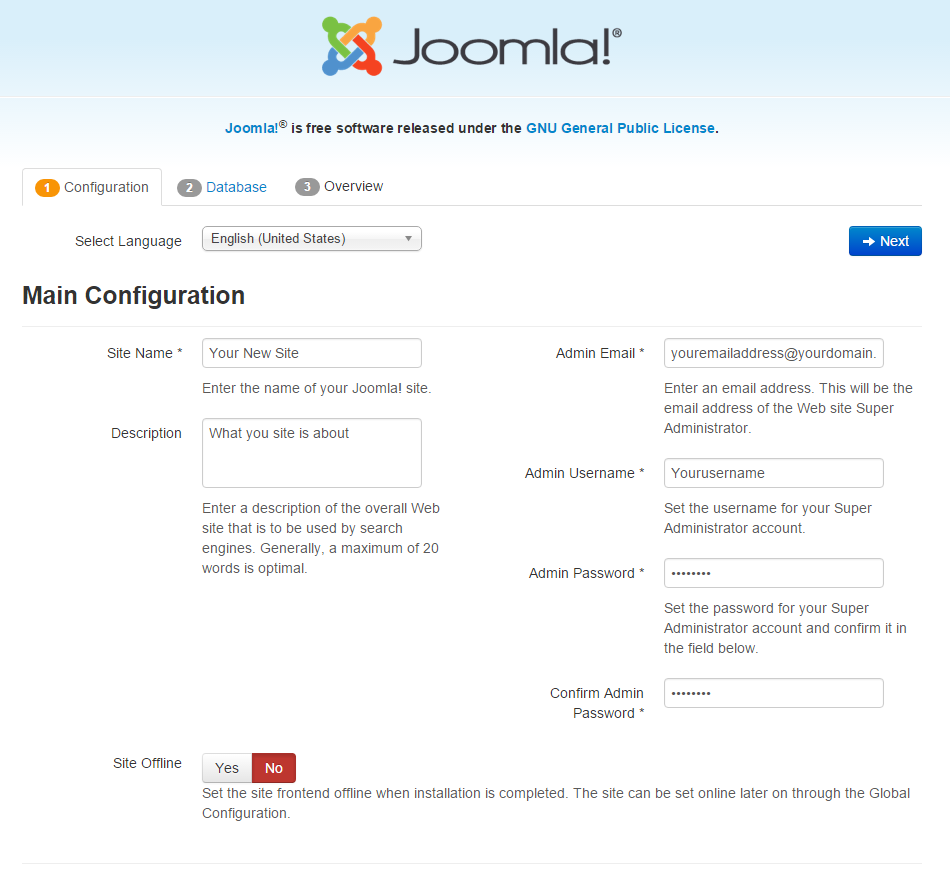
You will see the initial Joomla installation page, similar to the one below. Insert your site details and then click “Next.”
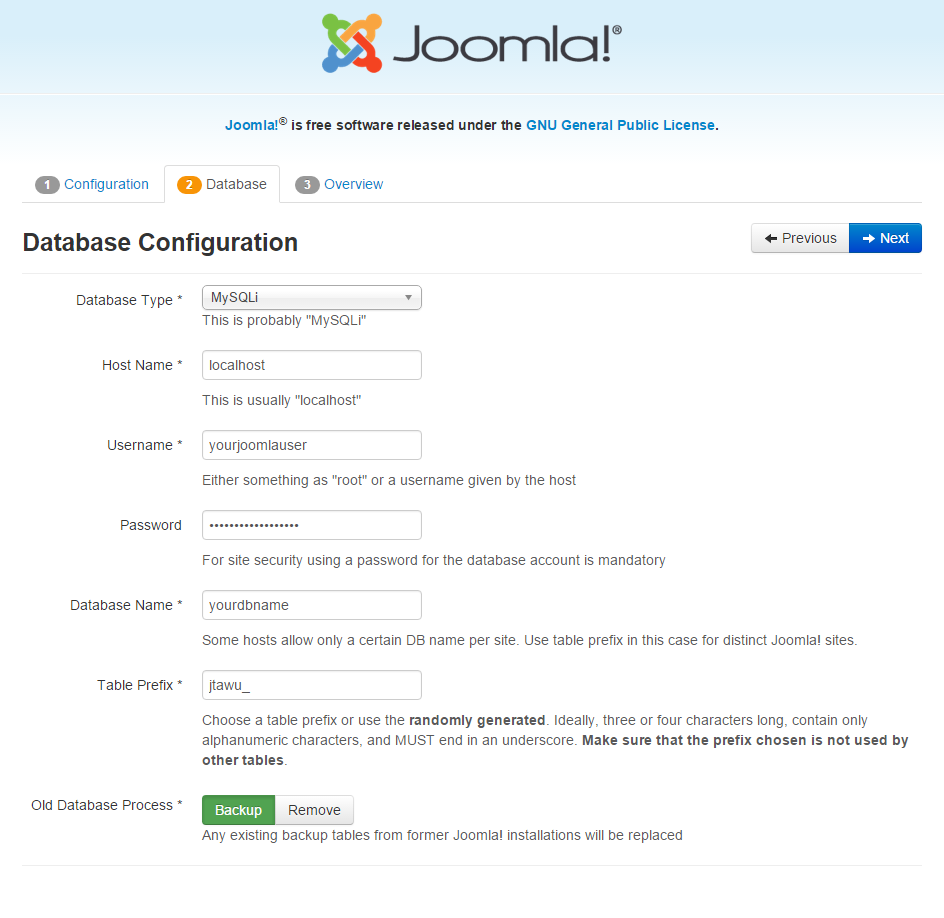
Now we need to insert your MariaDB database information within the forms. It should look similar to the image below. Once done click “Next.”
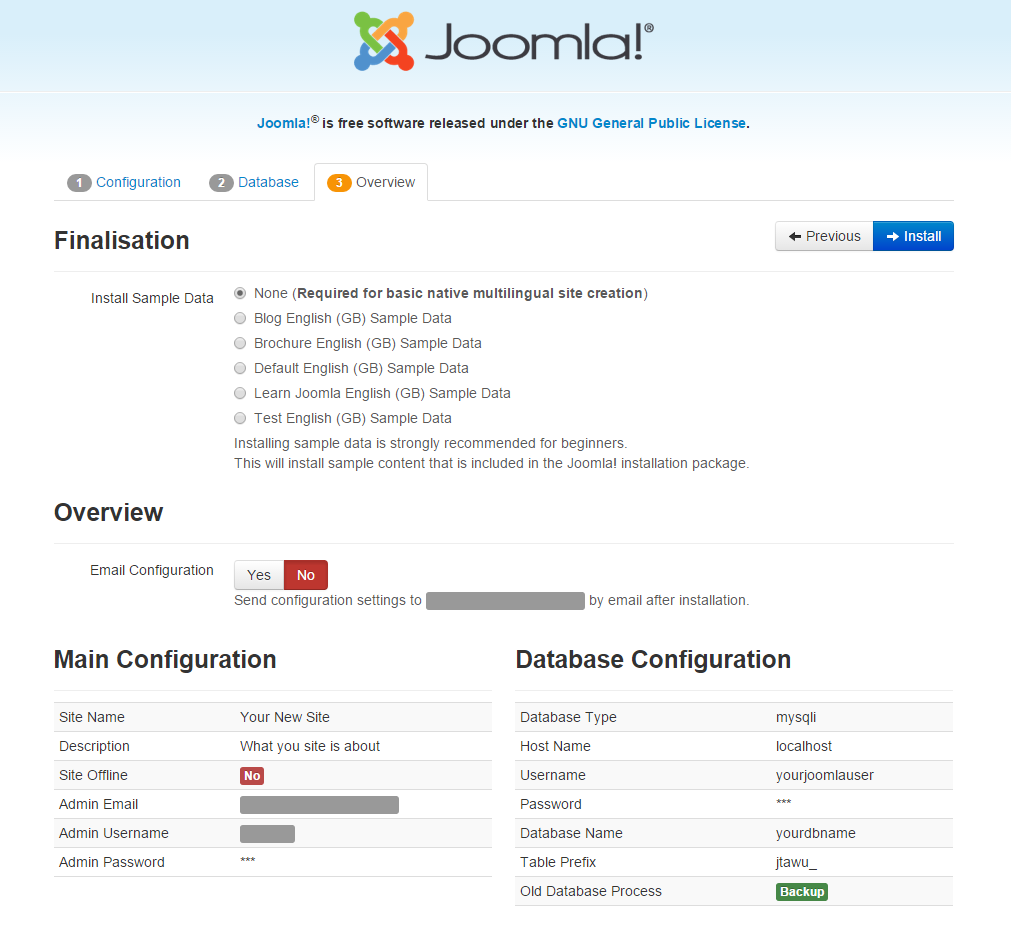
Take a look at the overview and make sure your information is correct. Once satisfied click “Install.”
What’s Next?
Congratulations! You have just installed and configured Joomla with Apache on your CentOS 7 cloud server. Thank you for following along in this How-To and check back with us for any new updates, or learn how you can set up HIPAA-compliant WordPress hosting with Atlantic.Net.
Get a $250 Credit and Access to Our Free Tier!
Free Tier includes:
G3.2GB Cloud VPS a Free to Use for One Year
50 GB of Block Storage Free to Use for One Year
50 GB of Snapshots Free to Use for One Year