In this How-To, we will be installing PHP7 on a Debian 8.2 LAMP stack. PHP7’s expected release date is sometime in November 2015. If you plan on upgrading to the new version of PHP, you can use this guide to install PHP7 so that you can test your code. This guide will be show you how to install the PHP7 Beta or Nightly Build from repo.
After adding the PHP7 early access repo, we should now update the system with the following command:
apt-get update
Installing Apache
The next thing we need is to install Apache; you can do so with the following command:
apt-get install apache2
During the install, hit enter when it asks “Do you want to continue?”
Now that Apache is installed, we can check to see if it running with the following command:
service apache2 status
Another way to check to see if Apache is working is by opening your web browser and then go to http://youripaddress
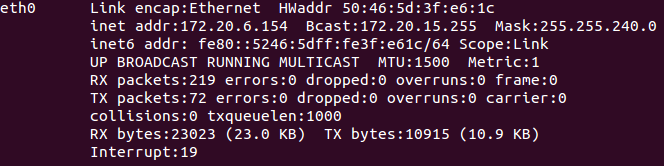
To get your IP address you can run the following command:
ifconfig
An example of ifconfig showing the IP address of 172.20.6.154
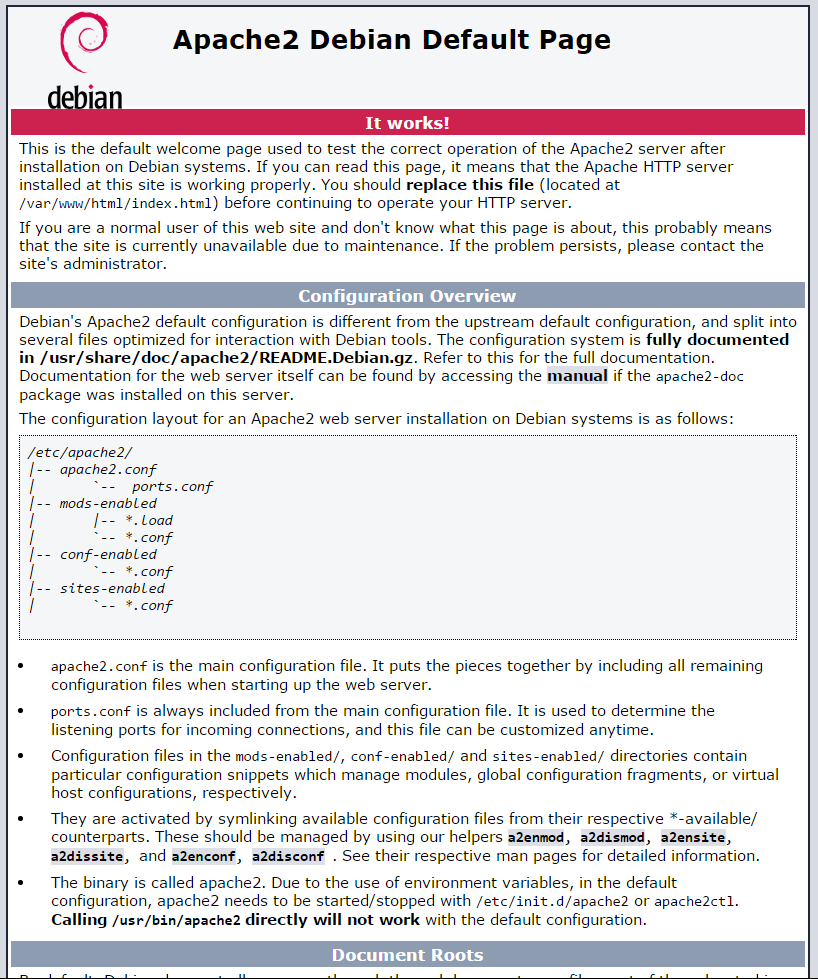
Using the above example we would put http://172.20.6.154 in the address bar of our browser:
The default page for Apache on Debian 8.2
Installing MariaDB
We are now going to add a database management system, however, if your code does not require a database, you can skip this section. Install MariaDB with the following command:
apt-get install mariadb-server
During the install, hit enter when it asks “Do you want to continue?”
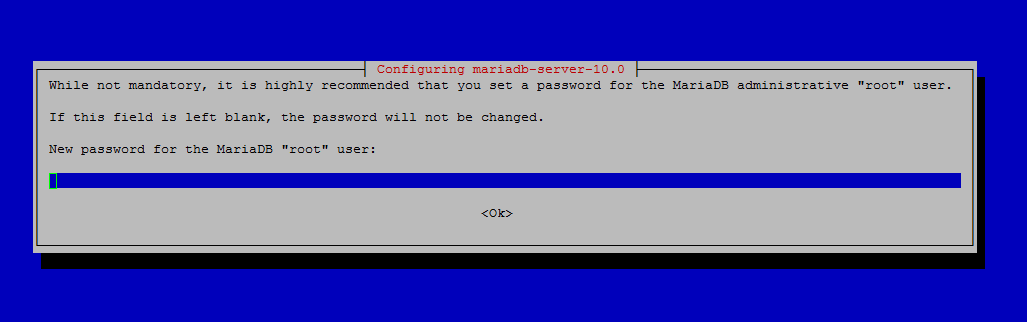
It will also prompt you to enter a MariaDB root password. Set a strong password of your choosing. After entering your password, hit enter to continue.
Enter a strong password of your choice
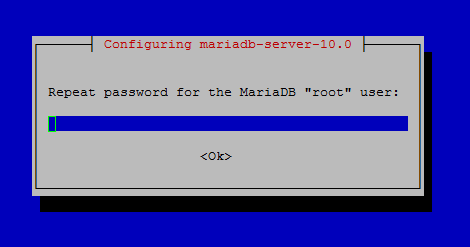
After hitting enter, it will prompt you to reenter the password, do so and then hit enter to continue.
Re-enter the password you set before
After the install completes, we need to run the MariaDB Security installation with the following command:
mysql_secure_installation
Note: During the MariaDB Security installation, you will be prompted with a series of questions. For standard setups, type N for the change root password question (since you just set it) and Y for yes on all of the rest, see the screen shot below:
An example of what mysql_secure_installation looks like using MariaDB
You can check that MariaDB is running with the following command:
service mysql status
Installing PHP7
We can now install PHP7. Below you can find the two choices of the Nightly or the Beta builds. As the nightly build is more up to date, it has more fixed bugs than the Beta version, so I would suggest the nightly.
PHP7 Nightly Build Install:
apt-get install php7-nightly
PHP7 Beta 1 Install:
apt-get install php7-beta1
During the install, hit enter when it asks “Do you want to continue?”
After hitting enter, you will also get a warning similar to below.
WARNING: The following packages cannot be authenticated!
  php7-nightly
Install these packages without verification? [y/N]
Type Y and then hit Enter to continue.
Getting PHP7 to work with Apache
We need to move the libraries and modules of PHP7 to the Apache directories with the following commands:
Restart Apache so that the changes we made take effect:
service apache2 restart
Testing PHP 7
To test out PHP7, we are going to create a PHP file a called info.php in /var/www/html/ by using your favorite editor and inserting the following lines of code.
<?php
phpinfo();
?>
Now we can go back to your browser and update the following hyperlink with your IP address.
http://youripaddress/info.php
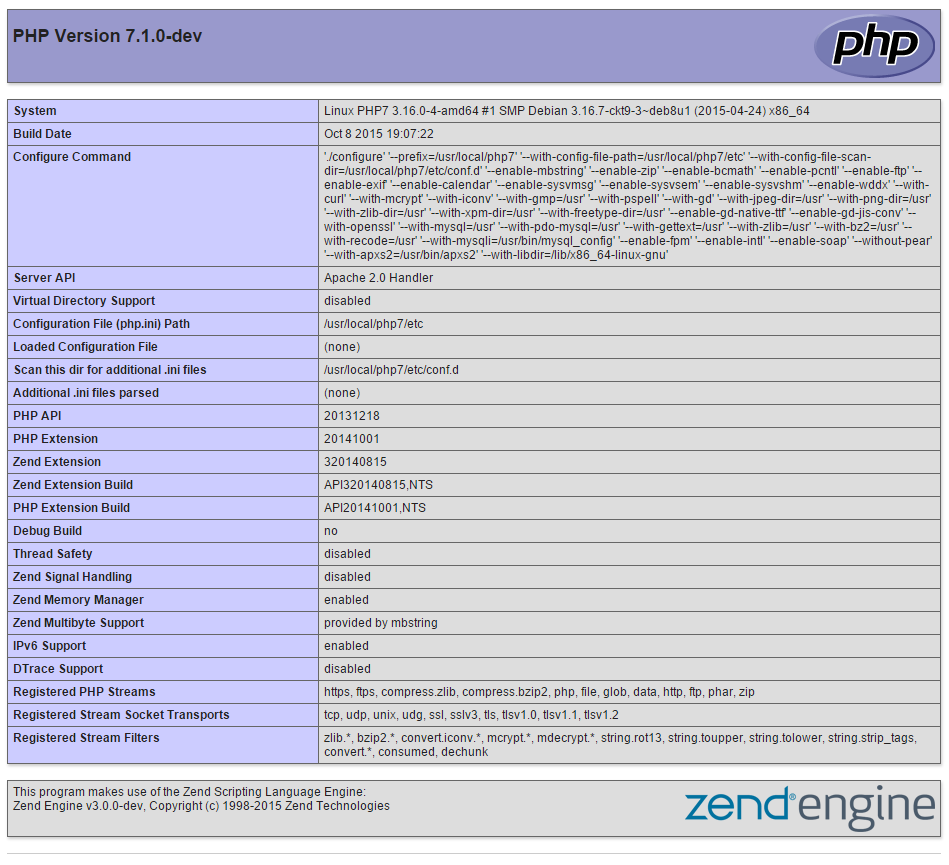
The result of the php.info file you made, using PHP7
At the top of the page, check that the PHP version is 7.0 or higher.
Now that we verified that it is working, we should remove your info.php as hackers could use this information to set up attacks directed at the specific version of PHP you are running. Remove it with the following command:
rm /var/www/html/info.php
Congratulations on installing PHP7 with LAMP on your Debian 8.2 Server! Thank you for following this How-To, and please check back for more updates and to learn more about our reliable dedicated server hosting solutions.
Get a $250 Credit and Access to Our Free Tier!
$250 Credit Good for 60 Days Free Tier Includes:
G3.2GB Cloud VPS a Free to Use for One Year
50 GB of Block Storage Free to Use for One Year
50 GB of Snapshots Free to Use for One Year
Free Tier includes:
G3.2GB Cloud VPS a Free to Use for One Year
50 GB of Block Storage Free to Use for One Year
50 GB of Snapshots Free to Use for One Year
We use cookies for advertising, social media and analytics purposes. Read about how we use cookies in our updated Privacy Policy.
If you continue to use this site, you consent to our use of cookies and our Privacy Policy.
Strictly Necessary Cookies
Strictly Necessary Cookie should be enabled at all times so that we can save your preferences for cookie settings.
If you disable this cookie, we will not be able to save your preferences. This means that every time you visit this website you will need to enable or disable cookies again.
3rd Party Cookies
This website uses analytics software to collect anonymous information such as the number of visitors to the site and the most popular pages.
Keeping this cookie enabled helps us to improve our website.
Please enable Strictly Necessary Cookies first so that we can save your preferences!
 PHP7 Elephant created by