How to Install Active Directory in Windows Server 2012
April 21, 2015 by Jose Velazquez ( 38 ) under VPS Hosting
0 Comments
Verified and Tested 03/12/2015
Introduction
This How-To will walk you through Installing Active Directory in Windows Server 2012. Active Directory, also known as AD, is a service that comes with many Windows Server Operating Systems. It is used to manage Domain Networks distinguishing an administrator user and regular users. This is done by verifying the specified security boundaries and policies for each user to maintain the Network secure and restricted.
Prerequisites
– A Server with Windows Server 2012. If you do not have a server already, you can visit our VPS Hosting page and spin a new server up in under 30 seconds.
Installing Active Directory on Windows Server 2012
Open the Server Manager from the taskbar.
From Server Manager Dashboard, select Add roles and features. This will launch the Roles and Features Wizard, allowing modifications to be performed on the Windows Server 2012 instance.
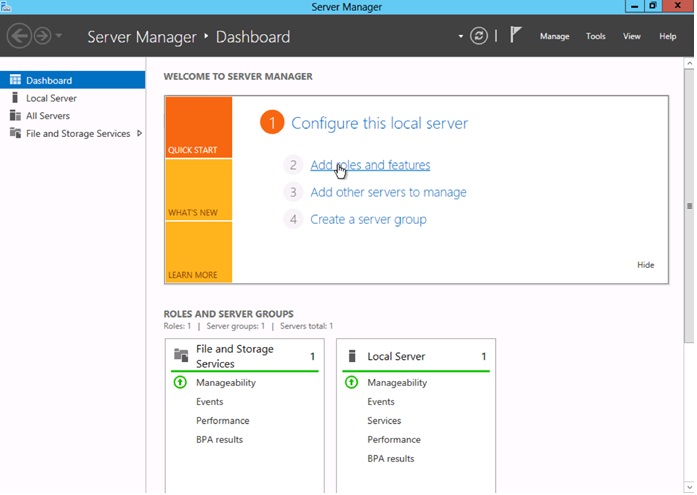
Server Manager
Select Role-based or feature-based installation from the Installation Type screen and click Next.
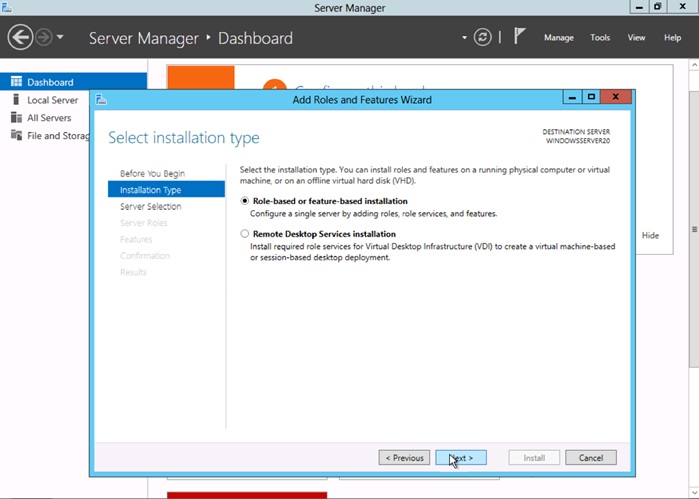
Installation Type
By default, the current server is selected. Click Next to proceed to the Server Roles tab.
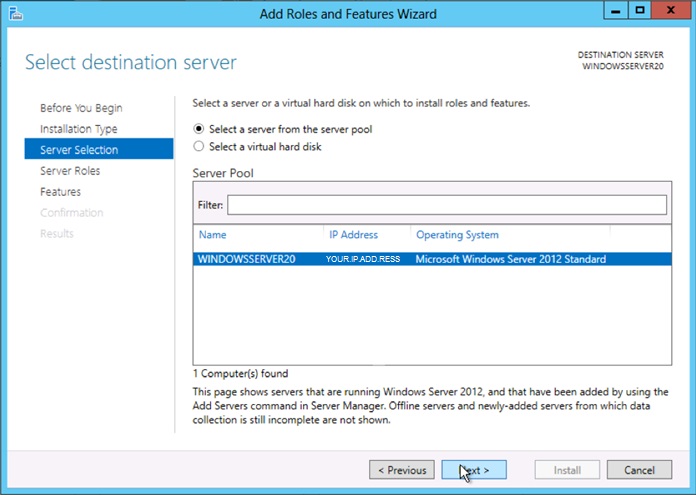
Server Selection
From the Server Roles page, place a checkmark in the box next to Active Directory Domain Services. A notice will appear explaining that additional role services or features are also required to install domain services; click Add Features.
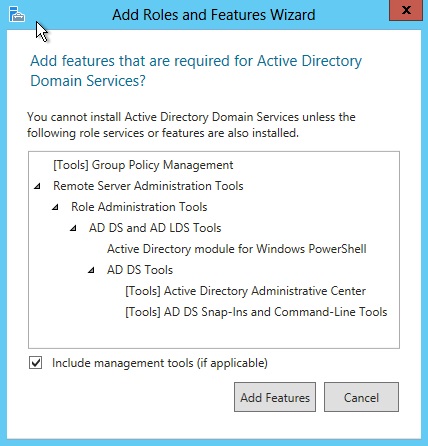
Add roles and features wizard.
Review and select optional features to install during the AD DS installation by placing a check in the box next to any desired features; Once done, click Next.
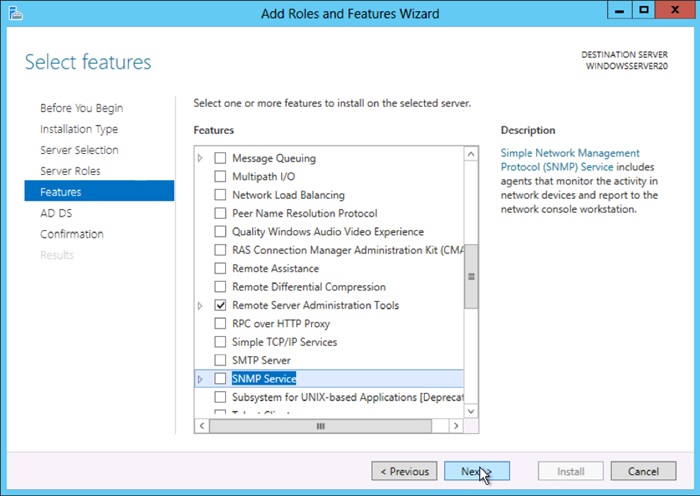
Features
Review the information on the AD DS tab and click Next.
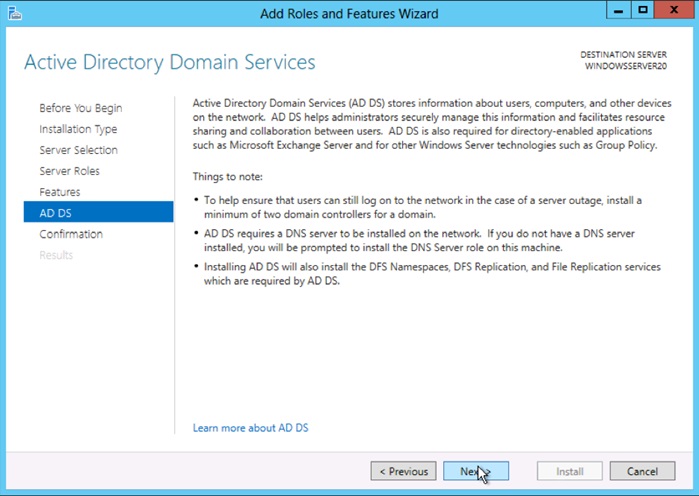
AD DS
Once you click next, the following window will quickly come up. Review the installation and click Install.
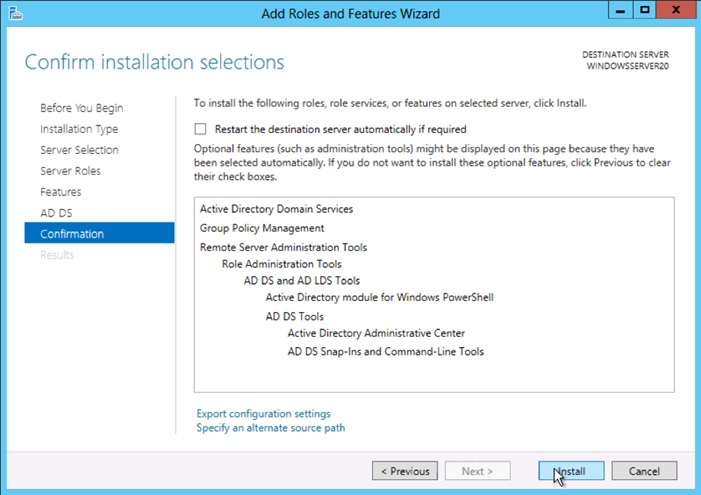
Confirm
Congratulations! You have just Installed Active Directory in Windows Server 2012. If you would like to configure Active Directory, please Check our “Configuring Active Directory in Windows Server 2012” article. Thank you for following along in this How-To, and check back with us for any new updates.
Learn more about our VPS hosting services and VPS hosting price.
Get a $250 Credit and Access to Our Free Tier!
Free Tier includes:
G3.2GB Cloud VPS a Free to Use for One Year
50 GB of Block Storage Free to Use for One Year
50 GB of Snapshots Free to Use for One Year