How to Install hMailServer MTA on Windows
September 18, 2015 by Editorial Team ( 450 ) under Dedicated Server Hosting
0 Comments
Verified and Tested 09/18/15
Introduction
HMailserver is a free software that will allow you handle e-mail delivery. MTA, mail transfer agent, is just another name for this process. Since Windows Server 2003, there have not been roles or feature included with the Windows Server operating system to host an MTA, so if you’re looking to run a mail server on a Windows host you need to look at third-party applications, and hMailServer is one of the more popular choices. There are paid versions available, but licensing for them can be very expensive when you can use a free software that can manage multiple domains.
In This Article
Prerequisite
We will be using a Windows 2008 R2 SP1 Datacenter 64-bit. This will also work on Windows 2012 R2 Datacenter 64-bit. Be sure to download the installation files by having the Internet Explorer security changed for the account you are logged in with. You can see a guide on that depending on your OS.
or
Install hMailServer MTA on Windows
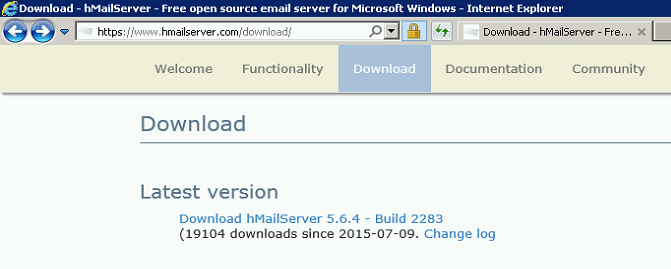
Let’s get started. Visit the download page, https://www.hmailserver.com/download/ and get the Latest Version. Previous versions of the software are also available and can be downloaded here.
In this example, we’re using the Latest Version, 5.6.4 – Build 2283, and we are using the default installation options.
Once you have chosen and downloaded the version, click run if you would like the file to start downloading, and run as soon as the download is finished. You can also click save, to install the program later.

When the download has completed, and the install begins you are prompted with a Setup window. Click next to proceed.
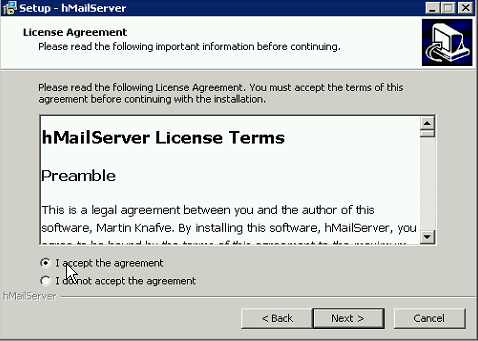
You are then prompted to accept the license agreement. Please be sure to read over the terms of the agreement, and if you accept, click the radio button that corresponds to your selection. Then click next.
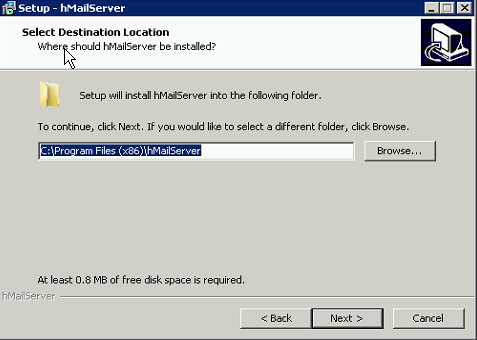
Next you are prompted for the location the program will install. The default is C:\Program Files (x86)\hMailServer. If you would like to change this, click on the browse button and choose the directory you want the program to be installed to. Once you have chosen a directory, click next.
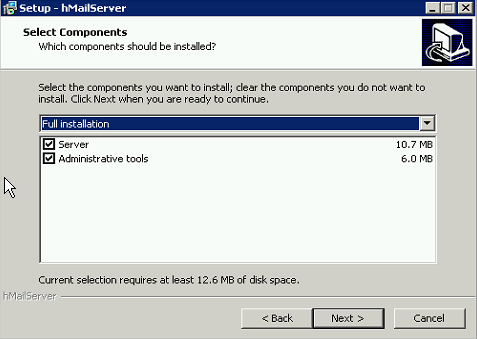
Now you can select your components. The default setting is Full installation, providing the Server and the Administrative tools. You can change this by using the drop down at the Full installation line, and choosing Custom installation and only keep the components you want selected. When you have your desired components selected, click next
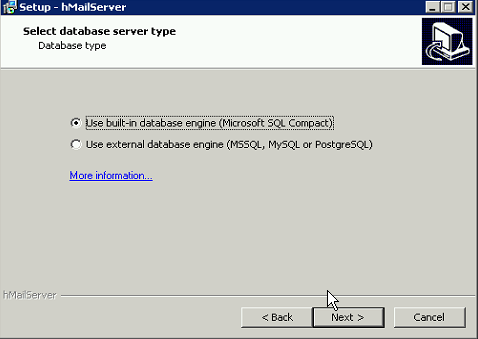
Going with a standalone model, we will be using the built-in database engine. If you have another host configured as a database server, you can select “Use external database engine”. Keep in mind you will need to provide the database information at a later time to start using the external database. Click next to continue.
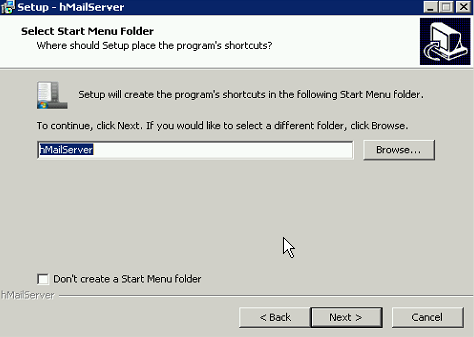
Choose whether or not you want a start menu folder. You can also change the name of the folder at this time. If you do not want a start menu folder click the check mark on the bottom left of the window. The folder name window will gray out if you do, this is expected. Click next.
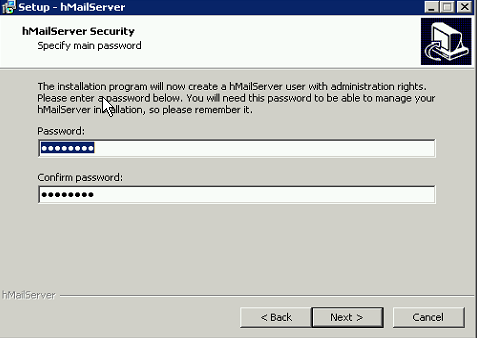
Now you get to choose a secure password for the hMailServer program. Be sure to enter the same password in both fields. Click next when the password has been entered.
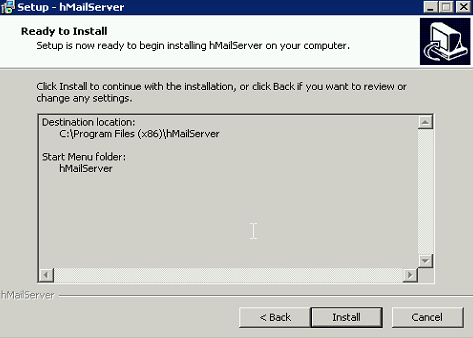
Finally, review all of your settings, and go back to fix any errors. If there are no errors, click install.
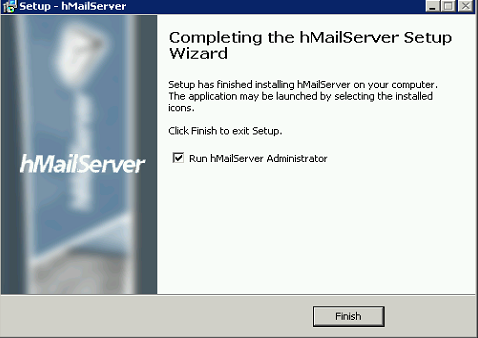
When the install has completed, you can choose to run hMailServer Administrator now, or starting it later. If you do not want to run it now, remove the checkmark. Click Finish to end the installation.
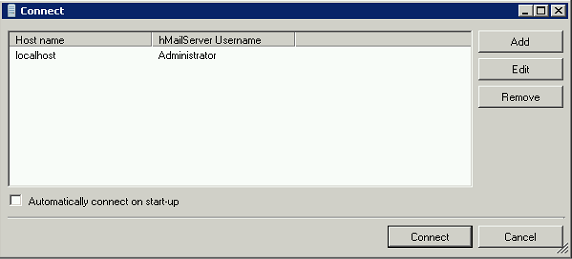
If you choose to run it now and see the following, your installation is successful and complete.
Get a $250 Credit and Access to Our Free Tier!
Free Tier includes:
G3.2GB Cloud VPS a Free to Use for One Year
50 GB of Block Storage Free to Use for One Year
50 GB of Snapshots Free to Use for One Year