Atlantic.Net Cloud – How to Add a Private IP on Fedora
September 30, 2015 by Editorial Team ( 450 ) under VPS Hosting
0 Comments
Verified and Tested 09/27/2015
Introduction
This guide will take you through how to add a private IP address to a Fedora server. This guide has been tested with Fedora 30, 31, and 32. One thing to note before we start is that our cloud hosting service automatically uses eth1 as the private interface.
Prerequisites
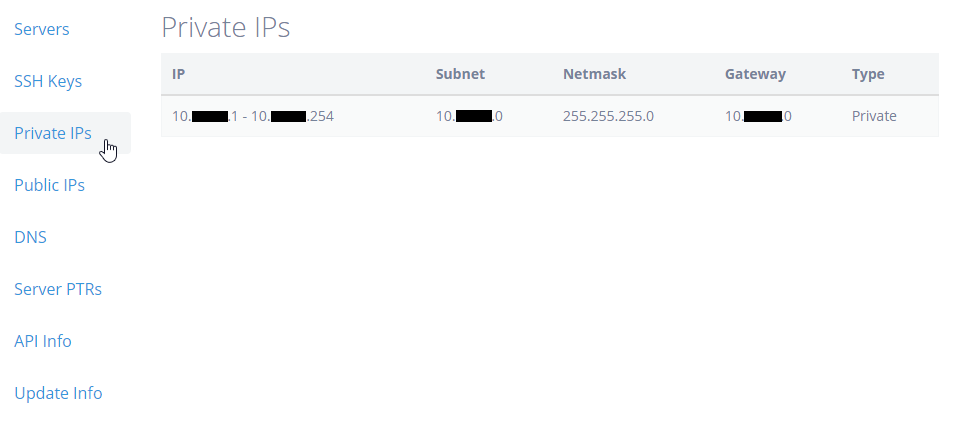
-A private IP to add to your server. If using an Atlantic.Net Cloud VM, this would be an IP from your assigned Private IP range.
-A server with Fedora installed on it.
Adding a Private IP on Fedora
Log in to your cloud control panel and click on “Private IP’s” to see what private range has been allocated to you.
Assigning the IP in Fedora
Assigning a Private IP on Fedora is pretty simple. You simply edit the configuration and restart networking. In our Cloud example below, the private interface is known as eth1. So we run:
nano /etc/sysconfig/network-scripts/ifcfg-eth1
If you do not have nano installed, you may do so by running:
yum install nano -y
Once opened, add the below configuration to the bottom of the file.
IPADDR=x.x.x.x
NETMASK=255.255.255.0
Where IPADDR= your private IP address and the NETMASK= is the range’s netmask for your IP. In our Cloud, this would be a /24 private IP range so the netmask is 255.255.255.0.
Once this is complete, simply restart networking with the below command and the IP will be active for use.
systemctl restart network
You can now verify your newly assigned IP address using the following command.
ifconfig eth1
You should get your newly assigned IP address in the following output:
eth1: flags=4163<UP,BROADCAST,RUNNING,MULTICAST>  mtu 1500
        inet x.x.x.x  netmask 255.255.255.0  broadcast x.x.x.x
        inet6 fe80::200:aff:fef5:2467  prefixlen 64  scopeid 0x20
        ether 00:00:0a:f5:24:67  txqueuelen 1000  (Ethernet)
        RX packets 1554  bytes 133751 (130.6 KiB)
        RX errors 0  dropped 0  overruns 0  frame 0
        TX packets 41  bytes 2862 (2.7 KiB)
        TX errors 0  dropped 0 overruns 0  carrier 0  collisions 0
And that’s it. Configure another server on the private IP range and you will be able to communicate between the two. Make sure you add an exception for the IP/range to any firewall that may be on the server.
Get a $250 Credit and Access to Our Free Tier!
Free Tier includes:
G3.2GB Cloud VPS a Free to Use for One Year
50 GB of Block Storage Free to Use for One Year
50 GB of Snapshots Free to Use for One Year