Atlantic.Net Cloud – How to Add a Private IP on Windows Server 2012 R2
September 30, 2015 by Editorial Team ( 450 ) under VPS Hosting
0 Comments
Verified and Tested 09/27/2015
Introduction
This guide will take you through how to add a private IP address to a Windows Server 2012 R2 server. One thing to note before we start is that our Cloud hosting service automatically uses the second interface as the private interface.
Prerequisites
-A private IP to add to your server. In our Cloud’s case, this would be an IP from your Private IP range.
-A server with Windows Server 2012 R2 installed on it.
Add a Private IP on Windows Server 2012 R2
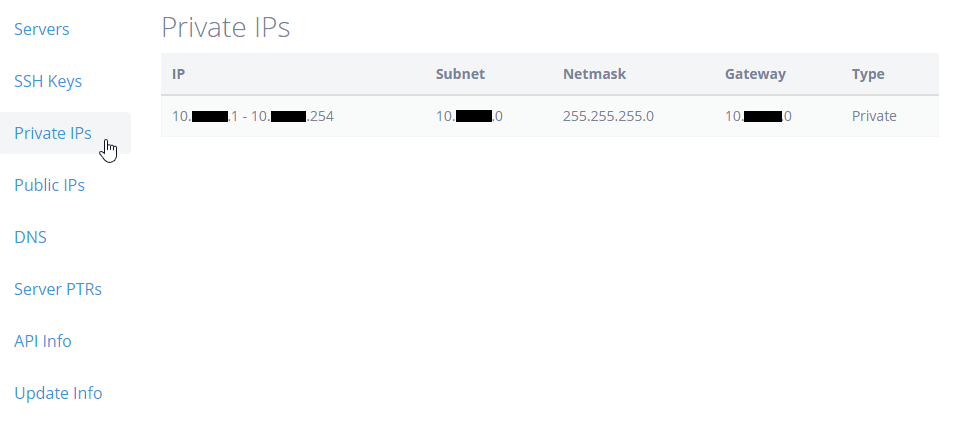
Login to your cloud control panel and click on “Private IP’s” to see what private range has been allocated to you.
Getting Started
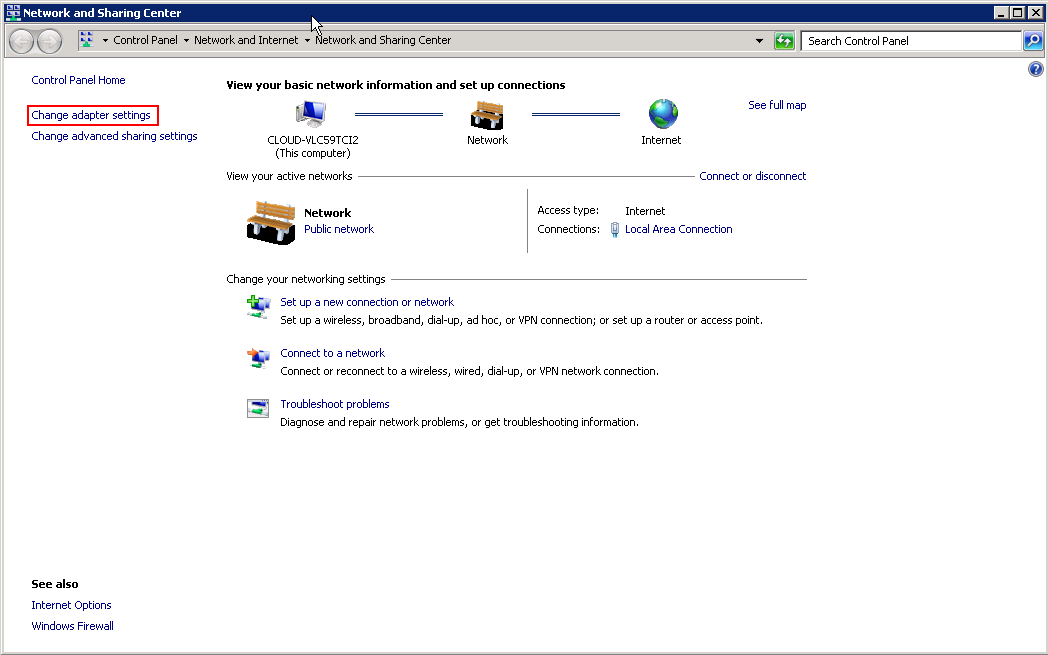
Assigning a Private IP on Windows Server 2012 R2 is pretty simple. Open up the Networking and Sharing Center so we can edit the Network Interface. For a guide on that, please visit here.
Click on “Change adapter settings”
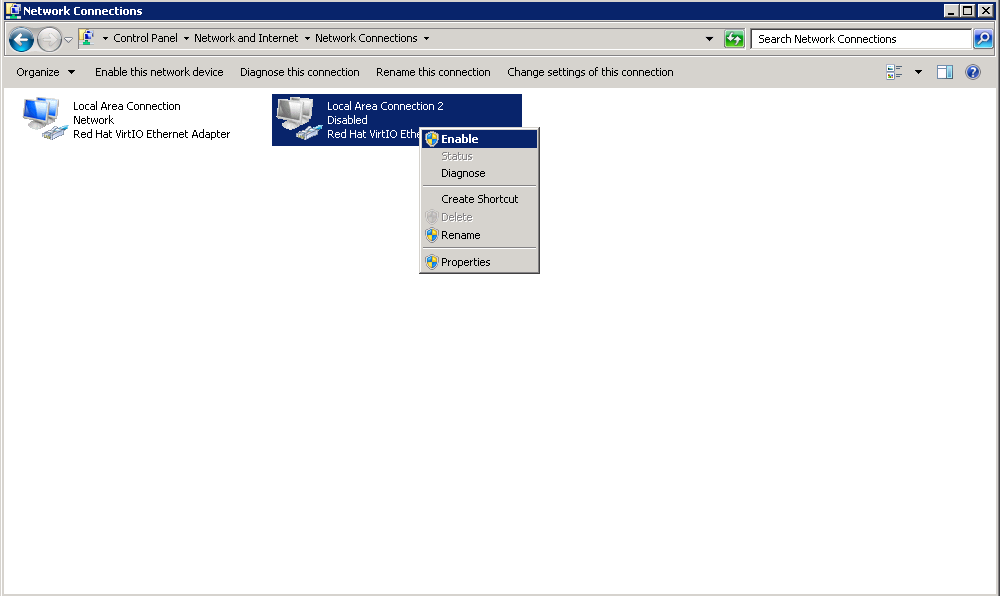
Right click on Local Area Connection 2 and enable it. You will then want to right click the interface again and go to Properties.
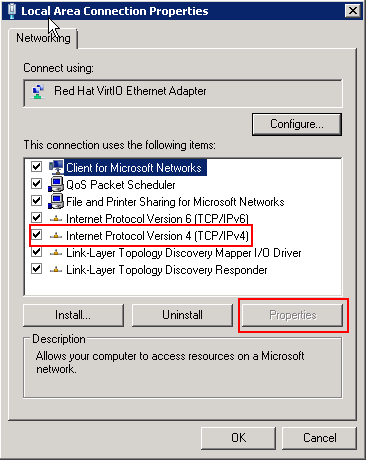
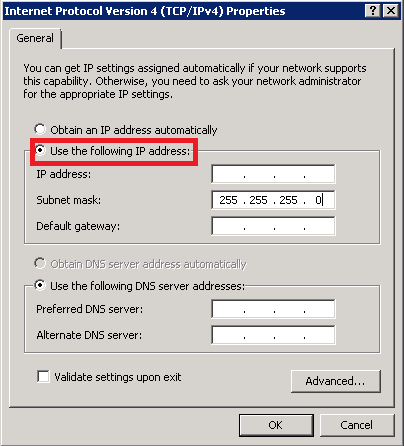
Now click on “Internet Protocol Version 4 (TCP/IPv4)” and click “Properties”.
Once in the Properties, select “Use the following IP address.” We are going to add the IP address that we have selected in the field for IP address. We will then add it’s associated Netmask to the Subnet mask field. Once done, click on Ok and you can close the other windows out because we are now done.
IPv4 for Private
And that’s it. Configure another server on the private IP range and you will be able to communicate between the two. Make sure you add an exception for the IP/range to any firewall that may be on the server. As always, Atlantic.Net offers the best Windows Cloud hosting solutions to you.
Get a $250 Credit and Access to Our Free Tier!
Free Tier includes:
G3.2GB Cloud VPS a Free to Use for One Year
50 GB of Block Storage Free to Use for One Year
50 GB of Snapshots Free to Use for One Year