Atlantic.Net Cloud – How To Reprovision A Cloud Server
August 3, 2015 by Editorial Team ( 450 ) under VPS Hosting
0 Comments
Introduction
In this article, we will be reviewing how to reprovision a cloud server. Reprovisioning a cloud server will allow you to keep the current IP address assigned to your server, but choose a new plan or operating system. This walkthrough will show you how to complete this process.
What Do You Need?
In order to complete this process, you will first need an active Atlantic.Net cloud server. Please see “Getting Started With Atlantic.Net Cloud Services” for more information.
Procedure
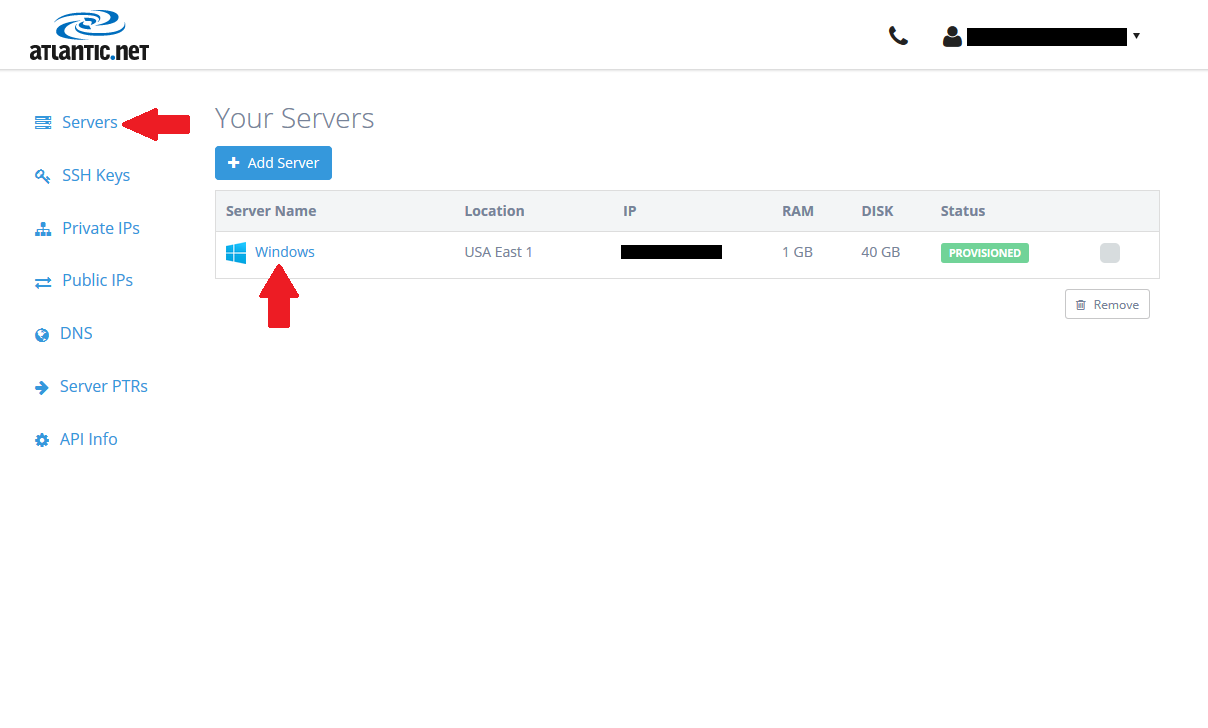
Start by logging in to your account at cloud.atlantic.net. Once logged in, click on “Servers” located on the upper left-hand side. This will display all active servers on your account. Click on the server you wish to reprovision from the list, as shown below.
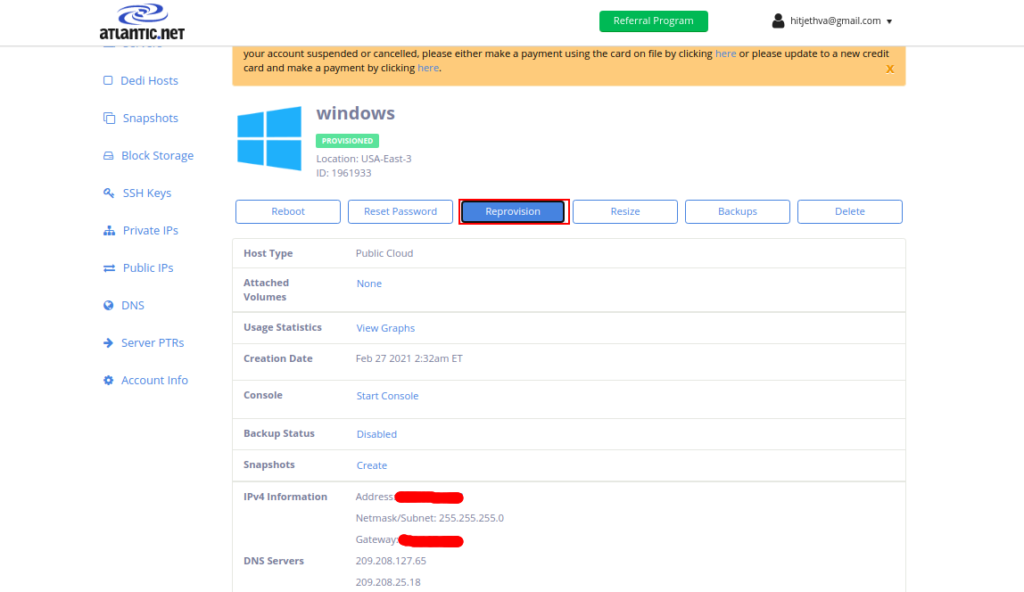
When you click on the server you wish to reprovision, another window will appear, like the one pictured below. This window displays all the network information for your server. Click on the “Reprovision” button that appears in this window.
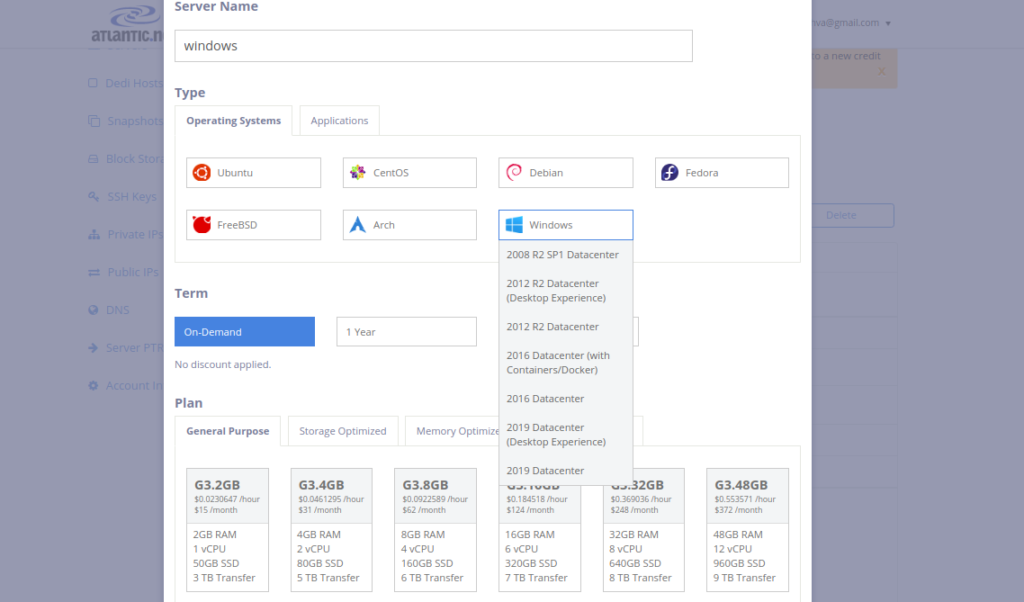
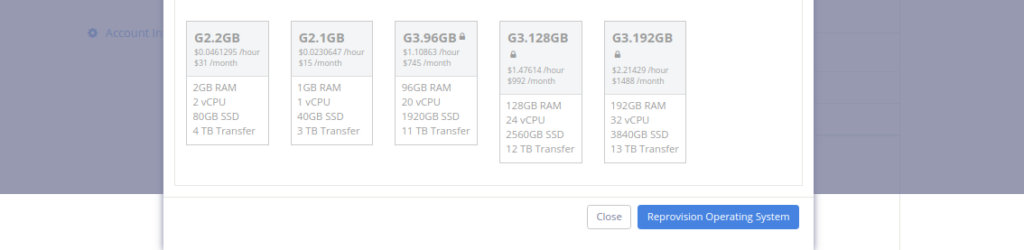
Next, the “Reprovision Your Server” window will pop up. This window will allow you to choose a different operating system for your server as well as a new hosting package. Once you have selected your new OS and plan, click on the “Reprovision Operating System” button located on the bottom right. This will reprovision the server with the new information. When the process is completed, the server will be accessible once again.
Conclusion
By following these simple steps, you can reprovision an existing cloud server within minutes. The best aspect about this feature is you can reprovision at any time with no additional cost to our customers.
Get a $250 Credit and Access to Our Free Tier!
Free Tier includes:
G3.2GB Cloud VPS a Free to Use for One Year
50 GB of Block Storage Free to Use for One Year
50 GB of Snapshots Free to Use for One Year