How to Add an Additional IP to Your Ubuntu or Debian Cloud Server
May 13, 2015 by Alexander Wise ( 29 ) under VPS Hosting
0 Comments
Verified and Tested 02/27/2021
Introduction
This how-to will walk you through the process of adding an additional IP to your Ubuntu or Debian server. In order for an additional IP to work properly, it must be added to both the cloud interface and your server.
In This Article
Prerequisites
– Root privileges
– A reserved additional IP. You can find out how to reserve an additional IP here.
Adding your Additional Public IP in the Cloud Control Panel
We’ll start by logging in to the Atlantic.Net Cloud Control Panel.

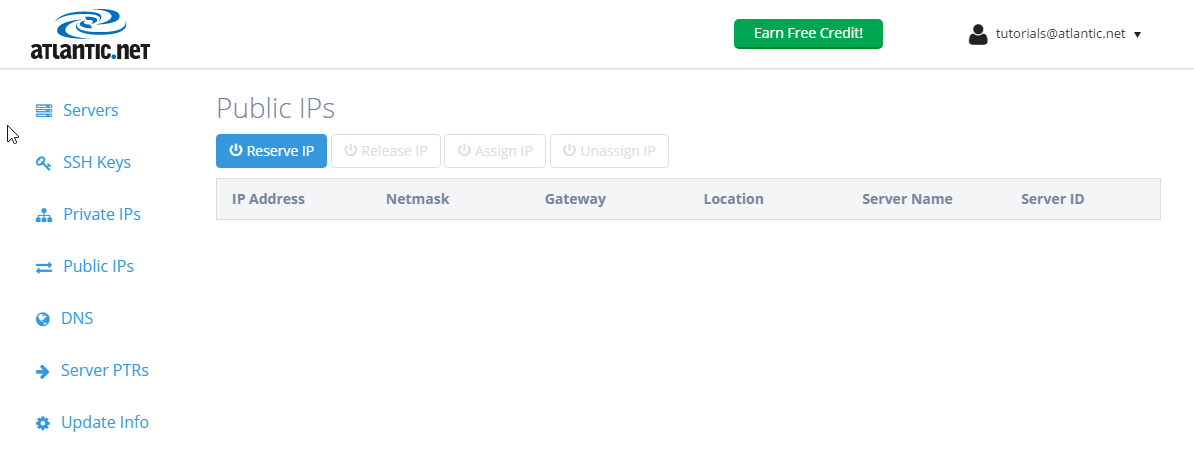
Navigate to your ‘Public IPs‘ section.
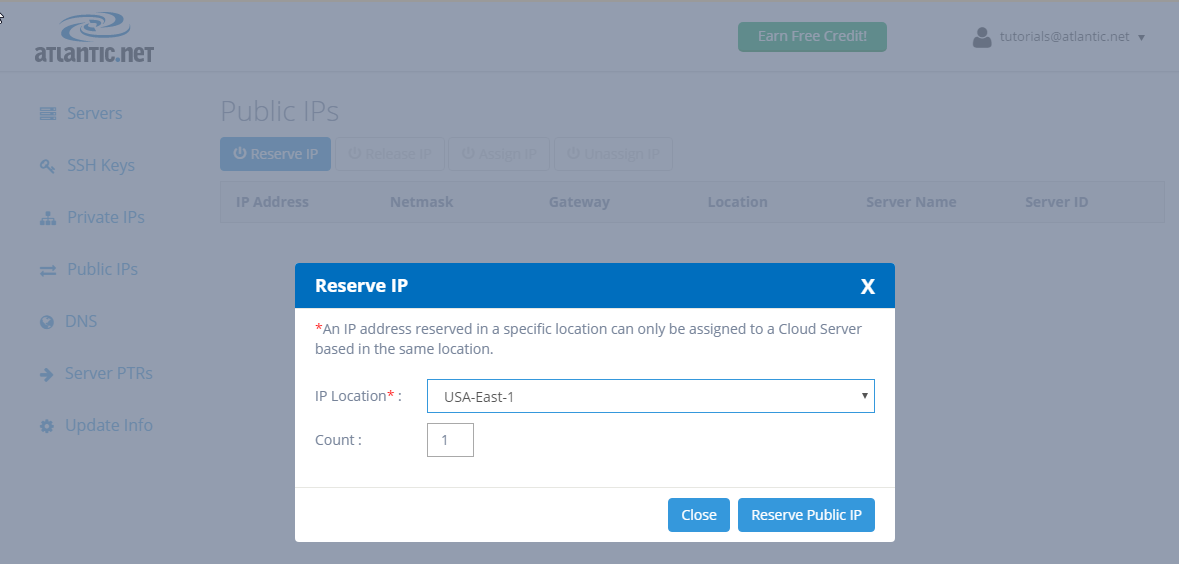
We begin by clicking on “Reserve IP“. A popup box will appear asking for the IP Location and Count of public IPs to add. For IP Location, select the same location as your Atlantic.Net CentOS server. We only want to add one IP address, so we will enter “1” for Count. Now click “Reserve Public IP.”
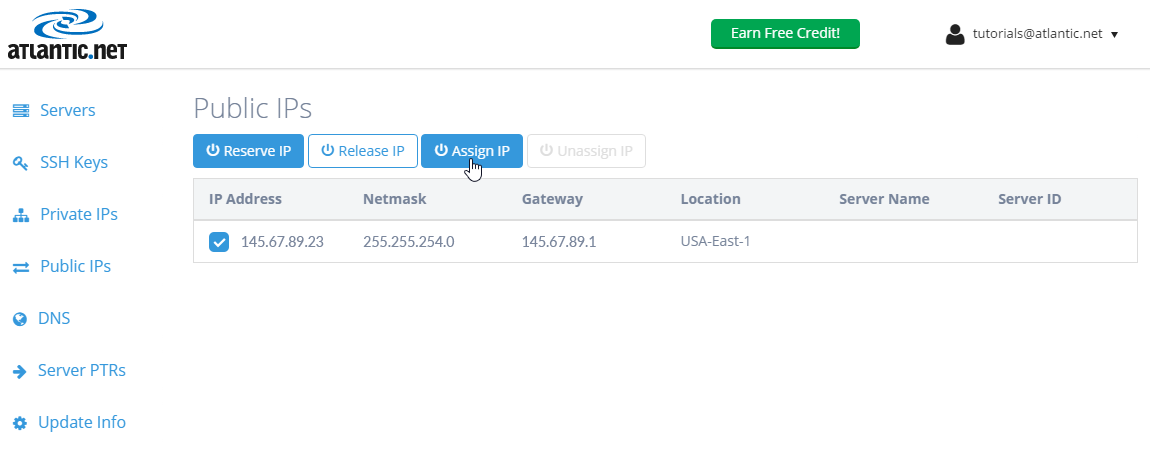
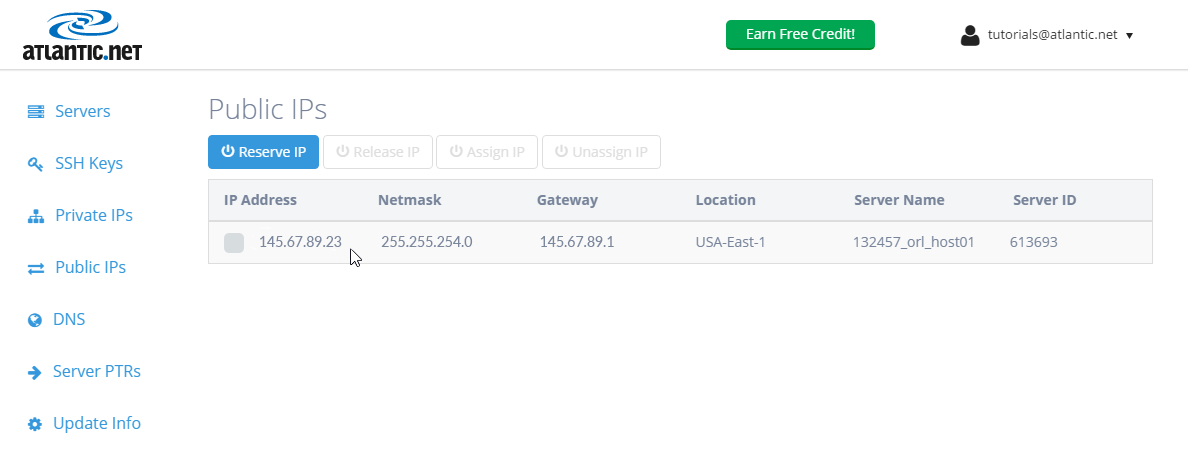
We can now see a new IP address displayed under “Public IPs.”

Click on the checkbox next to the newly reserved public IP address, and choose to “Assign IP.” (Note: You can assign the IP to any of the servers in the same location that IP was reserved. For this tutorial, we will assume you want to assign this IP to a CentOS server.)
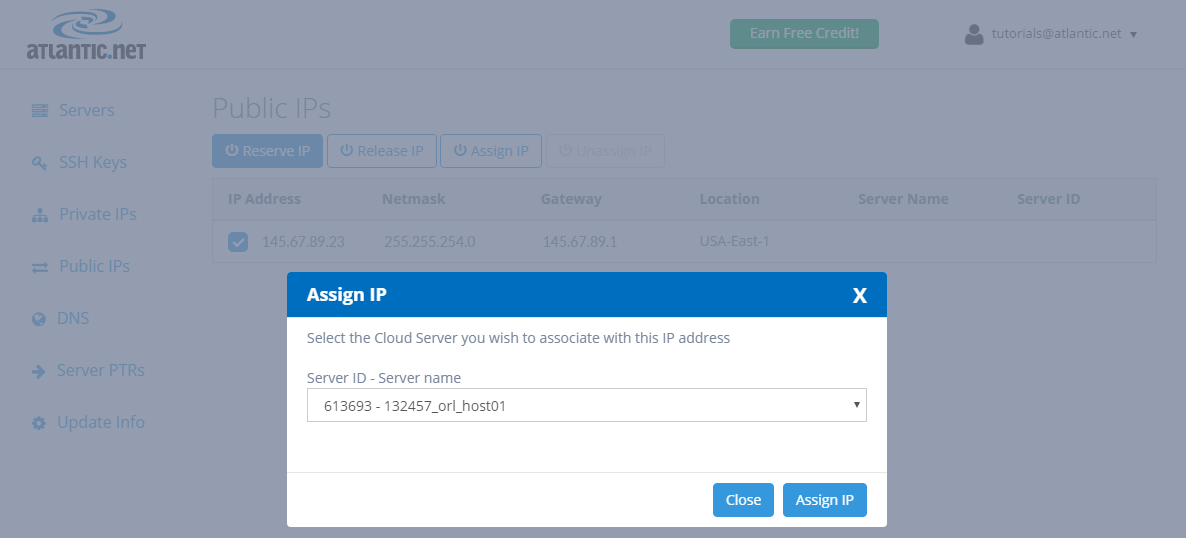
Once the IP is assigned, it should look something like this:
Now we can move on to adding the IP to the actual server’s network interface.
Add an Additional IP to Your Ubuntu Server
To add this IP to your server’s network interface, you will need to edit your /etc/netplan/01-netcfg.yaml file, but first we should back it up in case of any mistakes. To do this, make sure you are on the root account on your server and use the following command:
cp /etc/netplan/01-netcfg.yaml /etc/netplan/01-netcfg.yaml.backup
Once copied, we can view and edit the file with nano:
nano /etc/netplan/01-netcfg.yaml
Once there, you should see something like this:
network:
  version: 2
  renderer: networkd
  ethernets:
    eth0:
      addresses:
        - 208.117.86.35/24
      gateway4: 208.117.86.1
      nameservers:
        addresses:
          - 209.208.127.65
          - 209.208.25.18
We want to add our IP below the eth0 and name it eth1. It should look something like this:
network:
  version: 2
  renderer: networkd
  ethernets:
    eth0:
      addresses:
        - 208.117.86.35/24
      gateway4: 208.117.86.1
    eth1:
      addresses:
        - 208.117.87.9/24
      gateway4: 208.117.87.1

      nameservers:
        addresses:
          - 209.208.127.65
          - 209.208.25.18
Save and close the file then run the following command to apply the changes:
netplan apply
You can now verify the newly assigned IP address with the following command:
ip addr
You should get the following output:
1: lo: <LOOPBACK,UP,LOWER_UP> mtu 65536 qdisc noqueue state UNKNOWN group default qlen 1000
    link/loopback 00:00:00:00:00:00 brd 00:00:00:00:00:00
    inet 127.0.0.1/8 scope host lo
       valid_lft forever preferred_lft forever
    inet6 ::1/128 scope host
       valid_lft forever preferred_lft forever
2: eth0: <BROADCAST,MULTICAST,UP,LOWER_UP> mtu 1500 qdisc fq_codel state UP group default qlen 1000
    link/ether 00:00:d0:75:56:23 brd ff:ff:ff:ff:ff:ff
    inet 208.117.86.35/24 brd 208.117.86.255 scope global eth0
       valid_lft forever preferred_lft forever
    inet6 fe80::200:d0ff:fe75:5623/64 scope link
       valid_lft forever preferred_lft forever
3: eth1: <BROADCAST,MULTICAST,UP,LOWER_UP> mtu 1500 qdisc fq_codel state UP group default qlen 1000
    link/ether 00:00:0a:75:56:23 brd ff:ff:ff:ff:ff:ff
    inet 208.117.87.9/24 brd 208.117.87.255 scope global eth1
       valid_lft forever preferred_lft forever
    inet6 fe80::200:aff:fe75:5623/64 scope link
       valid_lft forever preferred_lft forever
Add an Additional IP to Your Debian Server
To add this IP to your server’s network interface, you will need to edit your /root/etc/network/interfaces file, but first, we should back it up in case of any mistakes. To do this, make sure you are on the root account on your server and use the following command:
cp /etc/network/interfaces /etc/network/interfaces.backup
Once copied, we can view and edit the file with nano:
nano /etc/network/interfaces
Once there, you should see something like this:
auto lo
iface lo inet loopback
auto eth0
iface eth0 inet static
hwaddress ether 00:00:45:1c:5e:d6
address 192.168.0.1
netmask 255.255.252.0
gateway 192.168.0.1
dns-nameservers 209.208.127.65 209.208.25.18
We want to add our IP below the eth0 and name it eth1. It should look something like this:
auto eth0
iface eth0 inet static
hwaddress ether 00:00:45:1c:5e:d6
address 192.168.0.25
netmask 255.255.252.0
gateway 192.168.0.1
auto eth1
iface eth1 inet static
address 192.168.0.26
netmask 255.255.252.0
Once you have this set, save and restart the network service to apply the changes:
systemctl restart networking
Once the service is restarted, your new IP will be set!
Get a $250 Credit and Access to Our Free Tier!
Free Tier includes:
G3.2GB Cloud VPS a Free to Use for One Year
50 GB of Block Storage Free to Use for One Year
50 GB of Snapshots Free to Use for One Year