# Auto-Capture Selfie by Detecting Smile Using OpenCV on Ubuntu 24.04 Server

> URL: https://www.atlantic.net/gpu-server-hosting/auto-capture-selfie-by-detecting-smile-using-opencv-on-ubuntu-24-04-server/ | Published: 2025-06-16 | Updated: 2025-06-18 | Author: Hitesh Jethva

In this digital age, automated photo capture systems are becoming increasingly popular for creating seamless user experiences. This article will guide you through setting up a browser-based smile detection system that automatically captures selfies when it detects your smile.

## Prerequisites

- An Ubuntu 24.04 server with an [NVIDIA GPU](https://www.atlantic.net/gpu-server-hosting/).
- A non-root user with sudo privileges.
- NVIDIA drivers installed.

## Step 1: Set up a Python Environment

First, we need to install essential system-level packages to support Python development and OpenCV.

```bash
apt install -y python3-pip python3-dev python3-venv libopencv-dev cmake
```

Now let’s isolate our Python project using a virtual environment.

```bash
python3 -m venv smile_env
source smile_env/bin/activate
```

Install the necessary Python libraries for image processing, mathematical operations, and web application.

```bash
pip install opencv-python opencv-contrib-python numpy flask
```

## Step 2: Create Project Structure

Now, create directories to organize templates and selfie images.

```bash
mkdir templates static/selfies
```

## Step 3: Create a Self-Signed SSL Certificate

Flask will run with HTTPS, which browsers require for webcam access. Let’s create a self-signed certificate.

```bash
openssl req -x509 -newkey rsa:4096 -nodes -out cert.pem -keyout key.pem -days 365
```

This creates two files: cert.pem (certificate) and key.pem (private key), valid for one year. Browsers may show a warning, but you can safely proceed for local testing.

## Step 4: Build the Flask Backend

Let’s create the heart of the app, the Python backend that receives webcam frames and saves selfies.

```bash
nano app.py
```

Add the following code.

```bash
from flask import Flask, request, Response, jsonify, render_template
import cv2
import numpy as np
import os
import time
import base64

app = Flask(__name__)

# Create directory for saved selfies
os.makedirs('static/selfies', exist_ok=True)

# Load pre-trained classifiers
face_cascade = cv2.CascadeClassifier(cv2.data.haarcascades + 'haarcascade_frontalface_default.xml')
smile_cascade = cv2.CascadeClassifier(cv2.data.haarcascades + 'haarcascade_smile.xml')

selfie_count = 0
last_capture_time = 0
CAPTURE_COOLDOWN = 2  # seconds between captures

@app.route('/')
def index():
    selfies = sorted([f for f in os.listdir('static/selfies') if f.endswith('.jpg')], reverse=True)
    return render_template('index.html', selfies=selfies)

@app.route('/process_frame', methods=['POST'])
def process_frame():
    global selfie_count, last_capture_time
    
    # Get image data from POST request
    image_data = request.json['image'].split(',')[1]  # Remove data URL prefix
    nparr = np.frombuffer(base64.b64decode(image_data), np.uint8)
    frame = cv2.imdecode(nparr, cv2.IMREAD_COLOR)
    
    # Convert to grayscale
    gray = cv2.cvtColor(frame, cv2.COLOR_BGR2GRAY)
    
    # Detect faces
    faces = face_cascade.detectMultiScale(gray, 1.3, 5)
    
    result = {'faces': [], 'captured': False}
    
    for (x, y, w, h) in faces:
        # Add face to result
        result['faces'].append({'x': int(x), 'y': int(y), 'w': int(w), 'h': int(h)})
        
        # Detect smiles within the face region
        roi_gray = gray[y:y+h, x:x+w]
        smiles = smile_cascade.detectMultiScale(
            roi_gray,
            scaleFactor=1.7,
            minNeighbors=20,
            minSize=(25, 25)
        )
        
        # If smile detected and cooldown has passed
        current_time = time.time()
        if len(smiles) > 0 and (current_time - last_capture_time) > CAPTURE_COOLDOWN:
            # Save the selfie
            timestamp = time.strftime("%Y%m%d-%H%M%S")
            filename = f"static/selfies/selfie_{timestamp}_{selfie_count}.jpg"
            cv2.imwrite(filename, frame)
            selfie_count += 1
            last_capture_time = current_time
            result['captured'] = True
            result['selfie_url'] = filename
    
    return jsonify(result)


if __name__ == '__main__':
    app.run(host='0.0.0.0', port=5000, ssl_context=('cert.pem', 'key.pem'))
```

The above code:

- Loads pre-trained Haar cascade classifiers for face and smile detection.
- Processes video frames sent from the browser.
- Captures and saves selfies when a smile is detected (with a 2-second cooldown).

## Step 5: Build the Web Interface

Create a front-end that interacts with the user’s webcam and displays the results.

```bash
nano templates/index.html
```

Add the following code.

```bash
<!DOCTYPE html>
<html>
<head>
    <title>Browser-Based Smile Detection Selfie</title>
    <style>
        body { font-family: Arial, sans-serif; max-width: 800px; margin: 0 auto; padding: 20px; }
        #video { background: #000; width: 100%; }
        #canvas { display: none; }
        .container { display: flex; flex-direction: column; gap: 20px; }
        .face-box { position: absolute; border: 2px solid blue; }
        .smile-box { position: absolute; border: 2px solid green; }
        .selfie-grid { display: grid; grid-template-columns: repeat(auto-fill, minmax(200px, 1fr)); gap: 10px; margin-top: 20px; }
        .selfie { width: 100%; border: 1px solid #ddd; }
        .controls { margin: 10px 0; }
        button { padding: 8px 16px; background: #4CAF50; color: white; border: none; cursor: pointer; }
        button:hover { background: #45a049; }
        .camera-feed { position: relative; }
        #status { margin: 10px 0; padding: 10px; background: #f8f8f8; }
    </style>
</head>
<body>
    <h1>Smile Detection Selfie Capture</h1>
    <p>Allow camera access when prompted. The system will automatically capture selfies when you smile!</p>
    
    <div class="container">
        <div class="camera-feed">
            <video id="video" autoplay playsinline></video>
            <canvas id="canvas"></canvas>
            <div id="face-boxes"></div>
        </div>
        
        <div class="controls">
            <button id="startButton">Start Camera</button>
            <div id="status">Camera is off</div>
        </div>
        
        <h2>Your Selfies</h2>
        <div class="selfie-grid" id="selfieGrid">
            {% for selfie in selfies %}
                <img src="{{ url_for('static', filename='selfies/' + selfie) }}" class="selfie">
            {% endfor %}
        </div>
    </div>

    <script>
        const video = document.getElementById('video');
        const canvas = document.getElementById('canvas');
        const ctx = canvas.getContext('2d');
        const faceBoxes = document.getElementById('face-boxes');
        const startButton = document.getElementById('startButton');
        const statusDiv = document.getElementById('status');
        const selfieGrid = document.getElementById('selfieGrid');
        
        let stream = null;
        let processing = false;
        let animationId = null;
        
        // Set canvas size to match video when it's known
        function setCanvasSize() {
            canvas.width = video.videoWidth;
            canvas.height = video.videoHeight;
        }
        
        // Process frame and send to server
        async function processFrame() {
            if (!processing) return;
            
            // Draw video frame to canvas
            ctx.drawImage(video, 0, 0, canvas.width, canvas.height);
            
            // Get image data
            const imageData = canvas.toDataURL('image/jpeg');
            
            try {
                // Send to server for processing
                const response = await fetch('/process_frame', {
                    method: 'POST',
                    headers: { 'Content-Type': 'application/json' },
                    body: JSON.stringify({ image: imageData })
                });
                
                const result = await response.json();
                
                // Clear previous boxes
                faceBoxes.innerHTML = '';
                
                // Draw face boxes
                result.faces.forEach(face => {
                    const box = document.createElement('div');
                    box.className = 'face-box';
                    box.style.left = `${face.x}px`;
                    box.style.top = `${face.y}px`;
                    box.style.width = `${face.w}px`;
                    box.style.height = `${face.h}px`;
                    faceBoxes.appendChild(box);
                });
                
                // If selfie was captured, add to grid
                if (result.captured) {
                    const img = document.createElement('img');
                    img.className = 'selfie';
                    img.src = result.selfie_url;
                    selfieGrid.prepend(img);
                    statusDiv.textContent = 'Selfie captured! Keep smiling!';
                    setTimeout(() => {
                        statusDiv.textContent = 'Looking for smiles...';
                    }, 2000);
                }
            } catch (error) {
                console.error('Error:', error);
            }
            
            // Continue processing
            animationId = requestAnimationFrame(processFrame);
        }
        
        // Start camera
        startButton.addEventListener('click', async () => {
            try {
                if (stream) {
                    // Stop existing stream
                    stream.getTracks().forEach(track => track.stop());
                    cancelAnimationFrame(animationId);
                    processing = false;
                    startButton.textContent = 'Start Camera';
                    statusDiv.textContent = 'Camera is off';
                    return;
                }
                
                statusDiv.textContent = 'Accessing camera...';
                stream = await navigator.mediaDevices.getUserMedia({ 
                    video: { 
                        width: { ideal: 640 }, 
                        height: { ideal: 480 },
                        facingMode: 'user' 
                    }, 
                    audio: false 
                });
                video.srcObject = stream;
                
                video.onloadedmetadata = () => {
                    setCanvasSize();
                    startButton.textContent = 'Stop Camera';
                    statusDiv.textContent = 'Looking for smiles...';
                    processing = true;
                    processFrame();
                };
            } catch (err) {
                statusDiv.textContent = `Error: ${err.message}`;
                console.error('Camera error:', err);
            }
        });
        
        // Clean up on page exit
        window.addEventListener('beforeunload', () => {
            if (stream) {
                stream.getTracks().forEach(track => track.stop());
            }
            cancelAnimationFrame(animationId);
        });
    </script>
</body>
</html>
```

This page:

- Lets users start or stop their webcam.
- Sends each frame to the Flask server via /process_frame.
- Draws bounding boxes around detected faces.
- Displays the captured selfies in a grid layout.

## Step 6: Run the Flask App

Launch your Flask web server with HTTPS enabled.

```bash
python3 app.py
```

Your app will now listen on **https://0.0.0.0:5000** with the SSL certificates. This makes it compatible with browsers requiring a secure context for webcam access.

## Step 7: Access the Web Interface

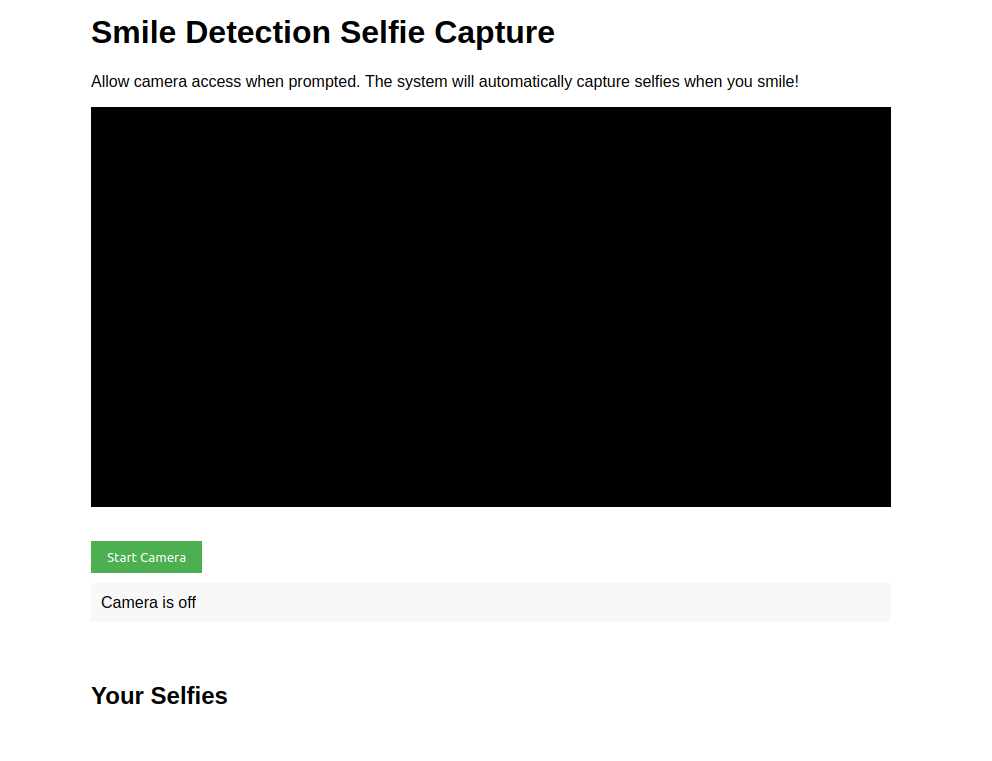
Open your web browser and open the URL https://server-ip:5000.
![](https://www.atlantic.net/wp-content/uploads/2025/05/p1-1.png)

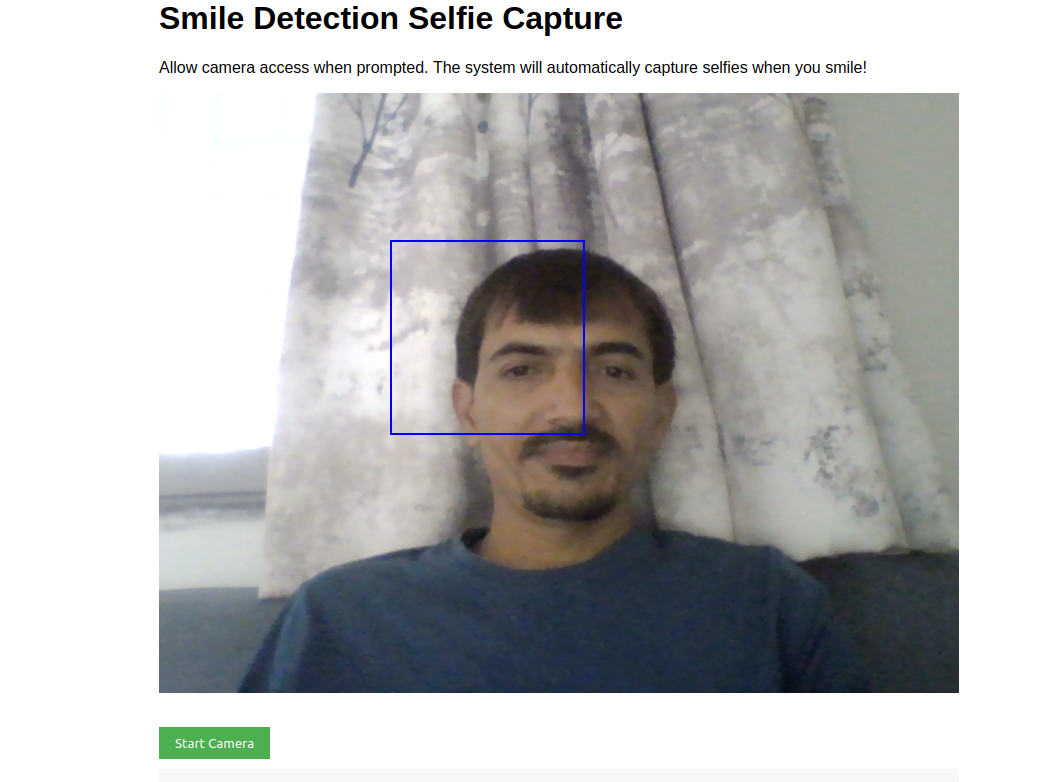
Once the site loads, click on the **“Start Camera”** button. Allow camera access when prompted.
![](https://www.atlantic.net/wp-content/uploads/2025/05/p2-1.png)

The system will now:

- Show your camera feed.
- Continuously scan for faces.
- Capture and save selfies when it detects a smile.

Every time you smile, the system detects it and captures a selfie, saving it to the **static/selfies** folder.

## Conclusion

You’ve just built a complete smile-activated selfie system using OpenCV and Flask on an Ubuntu 24.04 server. This project is an excellent example of combining computer vision with web development to create real-time, interactive applications.
