# How to Build a Real-Time Speech to Text App with Whisper and Flask
> URL: https://www.atlantic.net/gpu-server-hosting/how-to-build-a-real-time-speech-to-text-app-with-whisper-and-flask/ | Published: 2025-07-02 | Updated: 2025-07-10 | Author: Hitesh Jethva
Real-time speech-to-text transcription is a powerful application of AI. With the rise of open-source models like OpenAI’s Whisper and lightweight web frameworks like Flask, building such tools has become much easier.
In this tutorial, we’ll walk you through building a speech-to-text web app that:
- Captures audio from your browser,
- Sends it to a Flask server using WebSockets,
- Transcribes the audio in real time using Whisper,
- Displays the transcribed text in the browser.
We’ll also show how to expose the app with HTTPS using Nginx and Certbot for a secure experience.
## Prerequisites
Before you begin, ensure the following are in place:
- An Atlantic.Net [cloud GPU server](https://www.atlantic.net/gpu-server-hosting/gpu-cloud-hosting/) running Ubuntu 24.04 with root access.
- A domain name (e.g., app.code2devops.com) pointing to your server IP.
- NVIDIA drivers are installed on your server.
## Step 1: Install System Dependencies
First, install all the essential system packages required for audio processing and Python development.
```bash
apt install espeak ffmpeg libespeak1 python3 python3-dev python3-venv -y
```
These packages are required for text-to-speech (optional), audio conversion, and Python environment setup.
## Step 2: Create a Python Virtual Environment
Create a virtual environment for your project dependencies are isolated and won’t interfere with other Python projects.
Let’s create a virtual environment for your project.
```bash
python3 -m venv venv
```
Activate the virtual environment.
```bash
source venv/bin/activate
```
Upgrade pip to the latest version.
```bash
pip install --upgrade pip
```
## Step 3: Install Python Packages
Next, install Flask, Whisper, Socket.IO, and supporting libraries for real-time audio streaming and transcription.
```bash
pip install flask flask-socketio eventlet whisper torch pyttsx3
```
**Explanation:**
- **Whisper** and **Torch** are for speech recognition.
- **Flask** and **flask-socketio** serve and manage the web app.
- **Eventlet** enables real-time WebSocket communication.
- **pyttsx3** is optional, used for speech synthesis if needed.
## Step 4: Create the Flask App
Now, build the backend logic using Flask and WebSockets.
Create an app.py file.
```bash
nano app.py
```
Add the following code.
```bash
from flask import Flask, render_template
from flask_socketio import SocketIO
from core import transcribe_audio
app = Flask(__name__)
socketio = SocketIO(app, cors_allowed_origins="*")
@app.route("/")
def home():
return render_template("index.html")
@socketio.on("audio")
def handle_audio(data):
with open("temp.webm", "wb") as f:
f.write(data)
text = transcribe_audio("temp.webm")
print("🗣️ Transcribed:", text)
socketio.emit("transcript", {"text": text})
if __name__ == "__main__":
socketio.run(app, host="0.0.0.0", port=5000, debug=True)
```
This file sets up the Flask web server, handles audio input, and emits transcribed output.
## Step 5: Add Whisper Transcription Logic
Create a separate file to manage Whisper transcription logic.
```bash
nano core.py
```
Add the following code.
```bash
import whisper
model = whisper.load_model("base")
def transcribe_audio(audio_file):
result = model.transcribe(audio_file)
return result['text'].strip()
```
This script loads the Whisper model and uses it to transcribe audio.
## Step 6: Create the Web Interface
Now let’s build the frontend interface for browser-based audio capture and display.
```bash
mkdir templates
nano templates/index.html
```
Add the following HTML code.
```bash
Speech to Text
🎤 Speech to Text Demo
Transcription:
```
This simple UI allows users to start and stop audio recording and view the transcription in real time.
## Step 7: Run the Flask App
Start your Flask application in the background.
```bash
python3 app.py &
```
The app will now be accessible on port 5000.
## Step 8: Configure Nginx as a Reverse Proxy
Web browsers do not allow microphone access on insecure (HTTP) websites. This is a built-in security measure to protect user privacy. Since our app relies on real-time voice input, serving it over HTTPS is not optional, it’s required for the microphone to work. Additionally, HTTPS ensures all audio data is transmitted securely and cannot be intercepted.
To achieve this, we’ll use Nginx to forward requests to our Flask app and later secure the app with Let’s Encrypt SSL certificates using Certbot.
First, install Nginx and other packages.
```bash
apt install nginx certbot python3-certbot-nginx -y
```
Next, create an Nginx configuration file.
```bash
nano /etc/nginx/conf.d/app.conf
```
Add the following configuration.
```bash
server {
listen 80;
server_name app.code2devops.com;
location / {
proxy_pass http://127.0.0.1:5000;
proxy_http_version 1.1;
proxy_set_header Upgrade $http_upgrade;
proxy_set_header Connection "upgrade";
proxy_set_header Host $host;
proxy_set_header X-Real-IP $remote_addr;
}
}
```
**Note:** Replace the domain **app.code2devops.com** with your own domain name.
Verify the Nginx configuration.
```bash
nginx -t
```
Restart Nginx to apply the changes.
```bash
systemctl restart nginx
```
Now, use certbot to issue a free SSL certificate and enable HTTPS for your domain.
```bash
certbot --nginx -d app.code2devops.com
```
## Step 9: Access and Test Your Application
Visit **https://app.code2devops.com** in your browser.
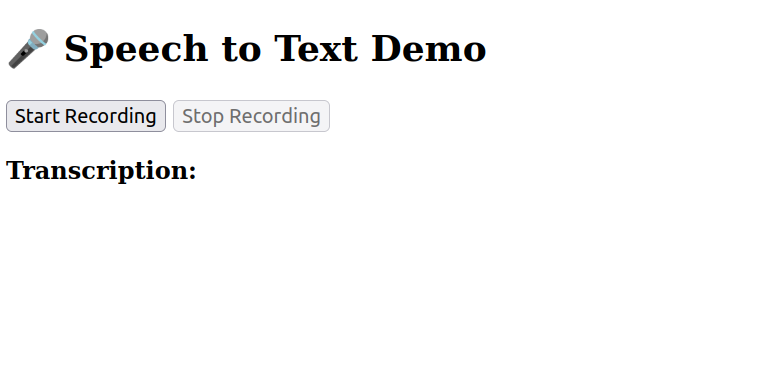
Click **Start Recording.** Allow microphone access when prompted.
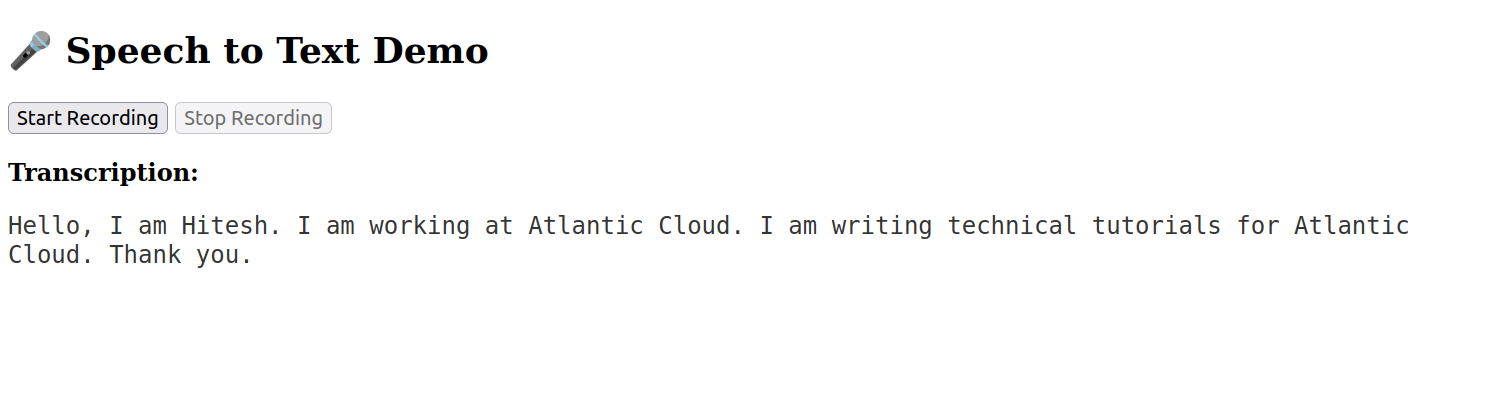
Click **Stop Recording** to stop and see your transcribed text.
## Conclusion
You’ve successfully built a real-time speech-to-text web application using Whisper and Flask. The app captures audio through a browser, transcribes it on the server using Whisper, and displays the text in real time. With the help of Nginx and Certbot, you also secured your app using HTTPS and made it publicly accessible via a custom domain.