How to Install WordPress on CentOS 7.1 with Apache
December 22, 2015 by Editorial Team ( 450 ) under VPS Hosting
0 Comments

Shoot for the Moon Illustration by Walker Cahall
Verified and Tested 12/22/15
Introduction
In this How-To, we will walk you through the installation and configuration of WordPress on CentOS 7.1 with Apache. It began a blogging system that then evolved into one of the greatest and easiest content management systems today. It offers simplicity, free templates, plugins and many other features that have the potential to make a relevant, responsive website.
In This Article
Prerequisites
– A CentOS 7.1 server configured with a static IP address. Don’t have a server?
– A CentOS 7.1 server running LAMP is required. Please see our how-to for LAMP.
Installing WordPress
To get started, login to your CentOS 7.1 server via SSH or Console.
First, make sure your system is up to date with the following command:
sudo yum update
If using a minimal or custom installation of CentOS, we’ll need to install wget to simplify this tutorial.
sudo yum install wget
Creating a Database and User
We will first start off by setting up the database by running the following command:
mysql -u root -p
When prompted, you will need to enter your MySQL password that you created during your LAMP setup.
In MySQL, enter the following commands:
create database wordpress character set utf8 collate utf8_bin;
Set a secure password where it says [insert-password-here]
grant all privileges on wordpress.* to wordpressuser@localhost identified by '[insert-password-here]';
flush privileges;
exit
Installing WordPress
Now that the database is created, we can download the latest version of WordPress with the following command:
wget http://wordpress.org/latest.tar.gz
We now need to decompress the lastest.tar.gz file with the following command:
tar -xzvf latest.tar.gz
After untaring, the next step is to copy wp-config-sample.php to wp-config.php, which is where WordPress gets its base configuration. To do that run:
cp wordpress/wp-config-sample.php wordpress/wp-config.php
Using your favorite text editor, edit wordpress/wp-config.php
For a basic setup, we need to have the following.
define(‘DB_NAME’, ‘wordpress’);
define(‘DB_USER’, ‘wordpressuser’);
define(‘DB_PASSWORD’, ‘[insert-password-here]’);
It should look like this when completed:
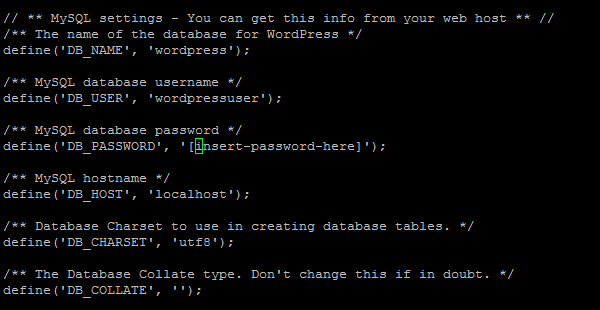
An example of the wp-config.php
Once wp-config.php is set up, you can move the contents of your WordPress folder to your web directory with the following command:
sudo cp -r ~/wordpress/* /var/www/html
WordPress Web Configuration
Now that the contents are moved to your web directory, you can now visit your site via a web browser by going to http://yourhostname-or-ipaddress
If you are unsure what you IP address is run the following:
Note: If you do not know your IP address, run the following command:
ip addr show eth0
An example of ip addr showing the IP address of 192.168.100.10In our example we would put
http://192.168.100.10into our browser’s address bar.

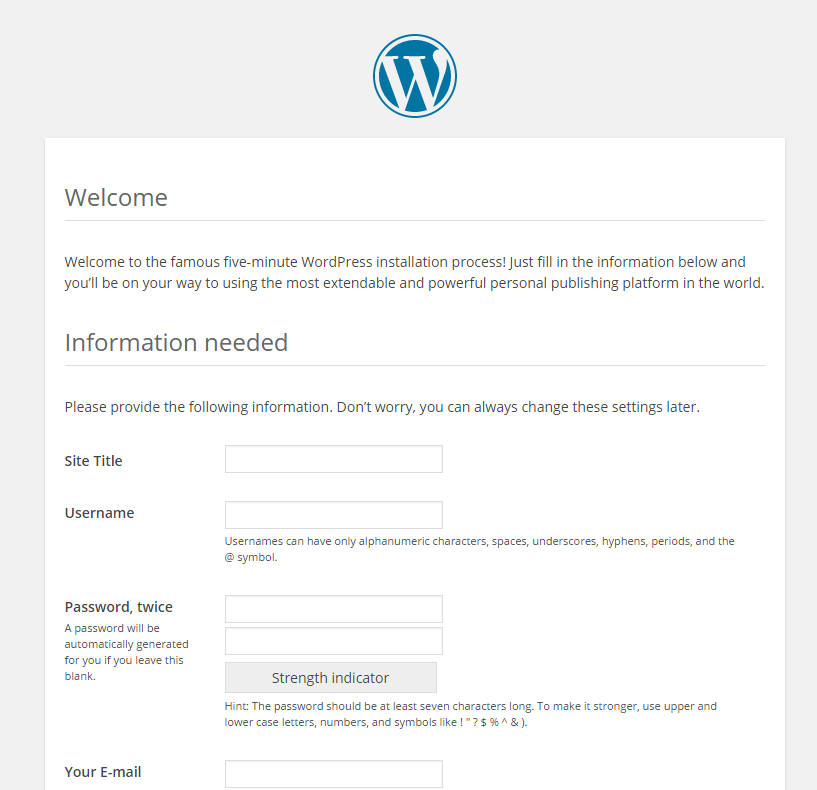
An example of the WordPress Welcome Page
Please enter the information required by the web installation. For more information on WordPress, you may want to check out the WordPress Codex.
What’s Next?
Congratulations! You have just installed and configured WordPress with Apache on your CentOS 7.1 Server. Thank you for following along in this How-To, and check back with us again for new updates.
Atlantic.Net
Atlantic.Net offers VPS hosting and managed server hosting services which include a layer of business-essential managed services to your hosting packages. Contact us today for more information.
Get a $250 Credit and Access to Our Free Tier!
Free Tier includes:
G3.2GB Cloud VPS a Free to Use for One Year
50 GB of Block Storage Free to Use for One Year
50 GB of Snapshots Free to Use for One Year