How to Install Gitea Code Hosting Service on Oracle Linux 8
May 19, 2022 by Hitesh Jethva ( 680 ) under VPS Hosting
0 Comments
Gitea is an open-source, self-hosted code hosting platform written in Go. It is very similar to other version control software solutions like GitHub and GitLab with features including issue tracking, pull requests, user management, notifications, and more. It can be installed on all major operating systems including Linux, macOS, Windows, and ARM. With Gitea, you can create a central repository where developers merge and track their code changes in the repository.
If you are looking for an open-source, lightweight, and self-hosted code hosting platform, then Gitea is the best choice for you.
In this post, we will show you how to install Gitea on Oracle Linux 8.
In This Article
Step 1 – Install and Configure MariaDB Database
Gitea uses a MariaDB, MySQL, or PostgreSQL database to store its data. In this tutorial, we will use a MariaDB server as a database backend.
Note: You don’t need to install and configure the MariaDB database if you are using database hosting from Atlantic.Net.
First, install all the required dependencies using the following command:
dnf install git unzip gnupg2 nano wget -y
Once all the dependencies are installed, run the following command to install the MariaDB server:
dnf install mariadb-server -y
Next, start and enable the MariaDB service using the following command:
systemctl start mariadb
systemctl enable mariadb
You can check the MariaDB version using the following command:
mysql --version
Sample output:
mysql Ver 15.1 Distrib 10.3.32-MariaDB, for Linux (x86_64) using readline 5.1
Next, log in to the MariaDB shell with the following command:
mysql
Once you are logged in, create a database and user for Gitea using the following command:
CREATE DATABASE gitea CHARACTER SET 'utf8mb4' COLLATE 'utf8mb4_unicode_ci';
GRANT ALL ON gitea.* TO 'gitea'@'localhost' IDENTIFIED BY 'password';
Next, flush the privileges and exit from the MariaDB shell with the following command:
FLUSH PRIVILEGES;
EXIT;
Next, edit the MariaDB configuration file and tweak some settings:
nano /etc/my.cnf.d/mariadb-server.cnf
Add the following lines below the line [mysqld]:
innodb_file_format = Barracuda
innodb_large_prefix = 1
innodb_default_row_format = dynamic
Save and close, the file then restart the MariaDB service to apply the changes:
systemctl restart mariadb
Step 2 – Install and Configure Gitea
It is a good idea to create a dedicated user to run Gitea. You can create it using the following command:
useradd --system --shell /bin/bash --comment 'Git Version Control' --create-home --home /home/git git
Next, download the latest version of the Gitea binary using the wget command:
wget https://dl.gitea.io/gitea/1.16.6/gitea-1.16.6-linux-amd64
Next, move the downloaded binary to the system path and set proper permissions on it:
mv gitea-1.16.6-linux-amd64 /usr/bin/gitea
chmod 755 /usr/bin/gitea
Next, run the following command to verify the Gitea version:
gitea --version
You should get the following output:
Gitea version 1.16.6 built with GNU Make 4.1, go1.18.1 : bindata, sqlite, sqlite_unlock_notify
Next, you will need to create a directory structure to store Gitea configuration, data, and log files.
You can create it with the following commands:
mkdir -p /var/lib/gitea/{custom,data,indexers,public,log}
chown git: /var/lib/gitea/{data,indexers,log}
chmod 750 /var/lib/gitea/{data,indexers,log}
mkdir /etc/gitea
chown root:git /etc/gitea
chmod 770 /etc/gitea
Step 3 – Create a Systemd Service File for Gitea
Next, you will need to create a service file to manage the Gitea service via systemd. You can create it with the following command:
nano /etc/systemd/system/gitea.service
Add the following lines:
[Unit]
 Description=Gitea
 After=syslog.target
 After=network.target
 After=mysql.service

 [Service]
 RestartSec=2s
 Type=simple
 User=git
 Group=git
 WorkingDirectory=/var/lib/gitea/
 ExecStart=/usr/bin/gitea web -c /etc/gitea/app.ini
 Restart=always
 Environment=USER=git HOME=/home/git GITEA_WORK_DIR=/var/lib/gitea

 [Install]
 WantedBy=multi-user.target
Save and close the file, then reload the systemd daemon with the following command:
systemctl daemon-reload
Next, start the Gitea service and enable it to start at system reboot:
systemctl start gitea
systemctl enable gitea
You can now check the status of Gitea using the following command:
systemctl status gitea
You should see the following output:
● gitea.service - Gitea
   Loaded: loaded (/etc/systemd/system/gitea.service; disabled; vendor preset: disabled)
   Active: active (running) since Sat 2022-04-30 08:45:45 EDT; 9s ago
 Main PID: 12643 (gitea)
    Tasks: 8 (limit: 23694)
   Memory: 125.4M
   CGroup: /system.slice/gitea.service
           └─12643 /usr/bin/gitea web -c /etc/gitea/app.ini

Apr 30 08:45:45 oraclelinux gitea[12643]: 2022/04/30 08:45:45 ...s/install/setting.go:21:PreloadSettings() [I] AppPath: /usr/bin/gitea
Apr 30 08:45:45 oraclelinux gitea[12643]: 2022/04/30 08:45:45 ...s/install/setting.go:22:PreloadSettings() [I] AppWorkPath: /var/lib/gitea
Apr 30 08:45:45 oraclelinux gitea[12643]: 2022/04/30 08:45:45 ...s/install/setting.go:23:PreloadSettings() [I] Custom path: /var/lib/gitea/cu>
Apr 30 08:45:45 oraclelinux gitea[12643]: 2022/04/30 08:45:45 ...s/install/setting.go:24:PreloadSettings() [I] Log path: /var/lib/gitea/log
Apr 30 08:45:45 oraclelinux gitea[12643]: 2022/04/30 08:45:45 ...s/install/setting.go:25:PreloadSettings() [I] Configuration file: /etc/gitea>
Apr 30 08:45:45 oraclelinux gitea[12643]: 2022/04/30 08:45:45 ...s/install/setting.go:26:PreloadSettings() [I] Prepare to run install page
Apr 30 08:45:46 oraclelinux gitea[12643]: 2022/04/30 08:45:46 ...s/install/setting.go:29:PreloadSettings() [I] SQLite3 is supported
Apr 30 08:45:46 oraclelinux gitea[12643]: 2022/04/30 08:45:46 cmd/web.go:208:listen() [I] Listen: http://0.0.0.0:3000
Apr 30 08:45:46 oraclelinux gitea[12643]: 2022/04/30 08:45:46 cmd/web.go:212:listen() [I] AppURL(ROOT_URL): http://localhost:3000/
Apr 30 08:45:46 oraclelinux gitea[12643]: 2022/04/30 08:45:46 ...s/graceful/server.go:61:NewServer() [I] Starting new Web server: tcp:0.0.0.0>
By default, Gitea listens on port 3000. You can verify it using the following command:
ss -antpl | grep 3000
You should get the following output:
LISTEN 0 128 *:3000 *:* users:(("gitea",pid=12643,fd=6))
Step 4 – Access Gitea Web Interface
You can now open your web browser and type the URL http://your-server-ip:3000 to access the Gitea web interface. You should get the following screen:
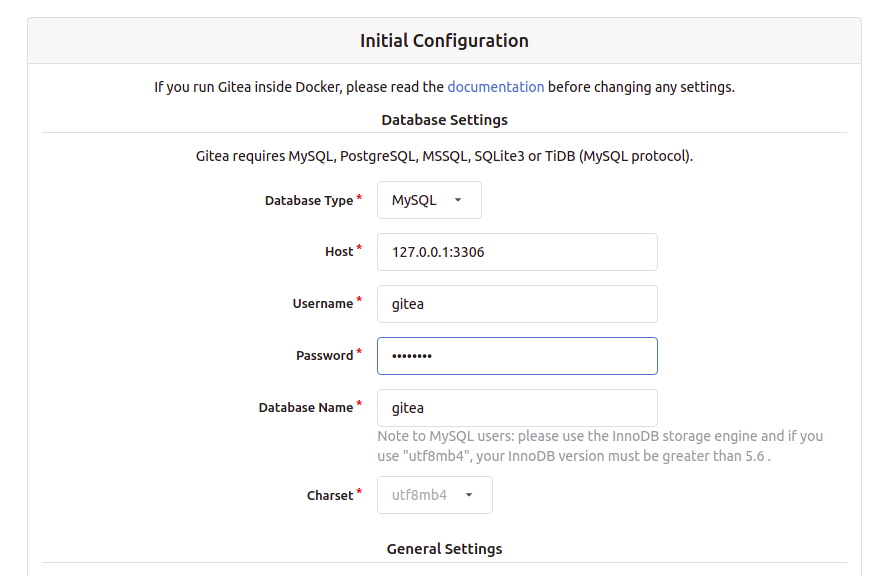
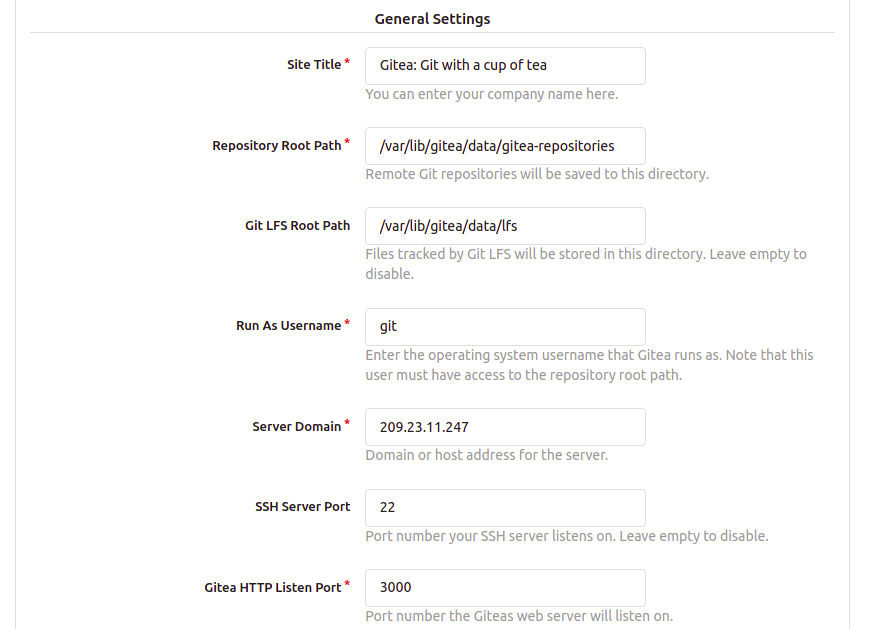
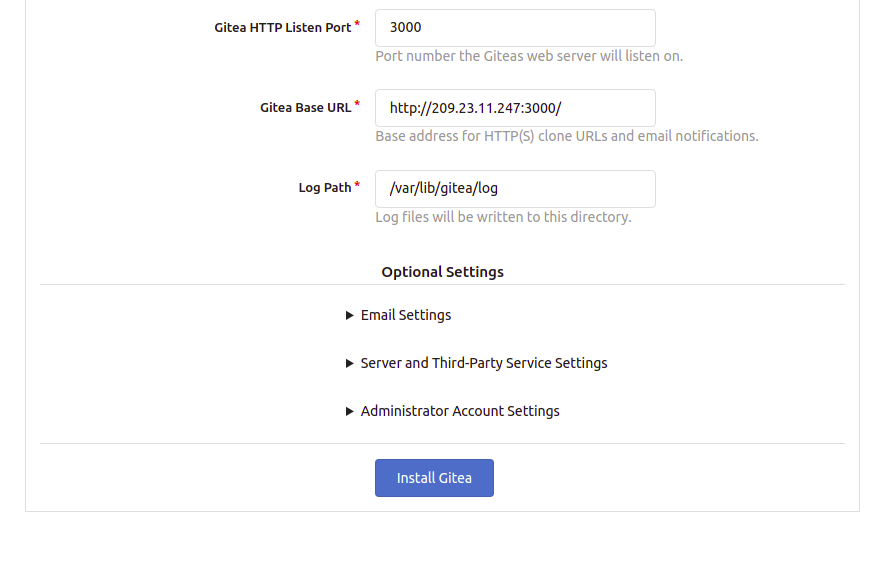
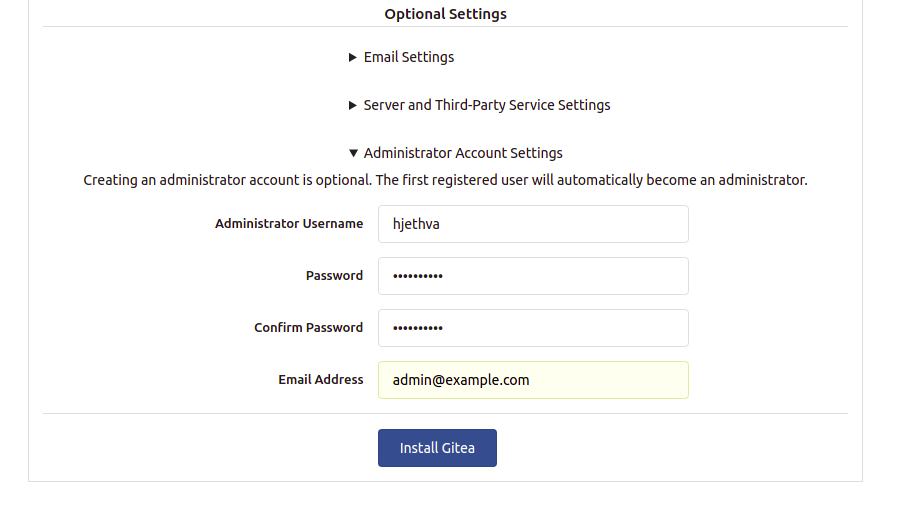
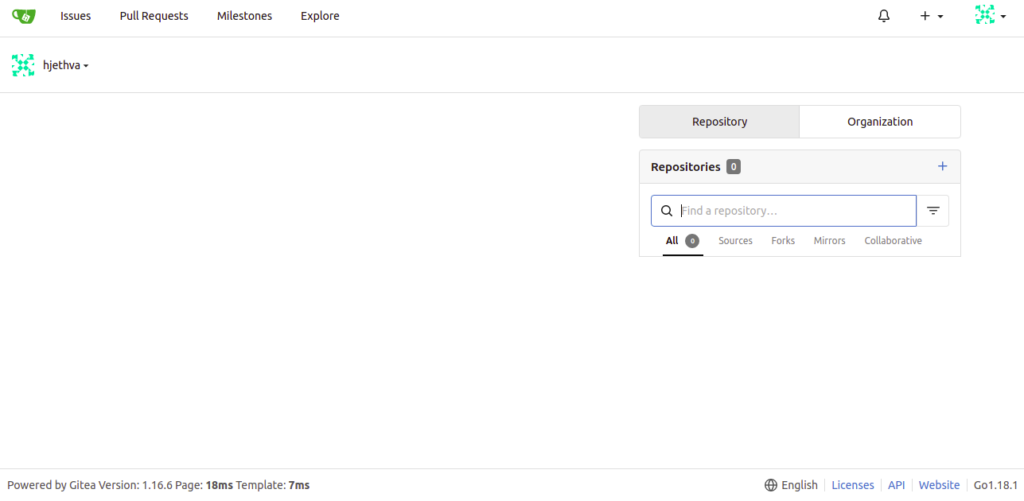
Provide your Gitea repository name, run as username, listen port, base URL, admin username, and password and click on the Install Gitea button. Once the installation has been completed, you will be redirected to the Gitea dashboard:
Conclusion
In this guide, we explained how to install the Gitea code hosting platform on Oracle Linux 8. You can now start implementing Gitea in your development environment to manage and track your code from a central location. Give it a try on your dedicated server from Atlantic.Net!
Get a $250 Credit and Access to Our Free Tier!
Free Tier includes:
G3.2GB Cloud VPS a Free to Use for One Year
50 GB of Block Storage Free to Use for One Year
50 GB of Snapshots Free to Use for One Year