How to Install Zeek Network Security Monitoring Tool in Ubuntu
September 18, 2021 by Hitesh Jethva ( 680 ) under Dedicated Server Hosting
0 Comments
Zeek, formerly known as Bro, is a network security monitoring tool for Linux. It is a free, open-source, and flexible tool that sits on a “sensor,” or cloud platform, and observes network traffic. Zeek monitors and records connections, the volume of packets sent and received, attributes about TCP sessions, and other metadata that is useful for analyzing network behavior. It helps you trace complex events across multiple flows and protocols with ease.
In this post, we will show you how to install the Zeek network security monitoring tool on Ubuntu 20.04.
In This Article
Step 1 – Install Zeek
By default, Zeek is not included in the Ubuntu default repository, so you will first add the Zeek repository to your system. Install all required dependencies with the following command:
apt-get update -y
apt-get install curl gnupg2 wget -y
Next, download and add the Zeek GPG key using the following command:
curl -fsSL https://download.opensuse.org/repositories/security:zeek/xUbuntu_20.04/Release.key | gpg --dearmor | tee /etc/apt/trusted.gpg.d/security_zeek.gpg
Next, add the Zeek repository to APT with the following command:
echo 'deb http://download.opensuse.org/repositories/security:/zeek/xUbuntu_20.04/ /' | tee /etc/apt/sources.list.d/security:zeek.list
Finally, update the repository cache and install the Zeek with the following command:
apt-get update -y
apt-get install zeek -y
During the installation, you will be asked to provide some postfix settings as shown below:
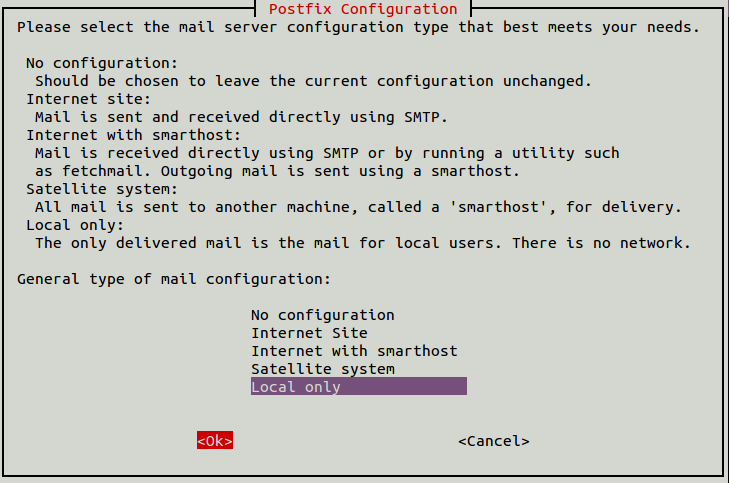
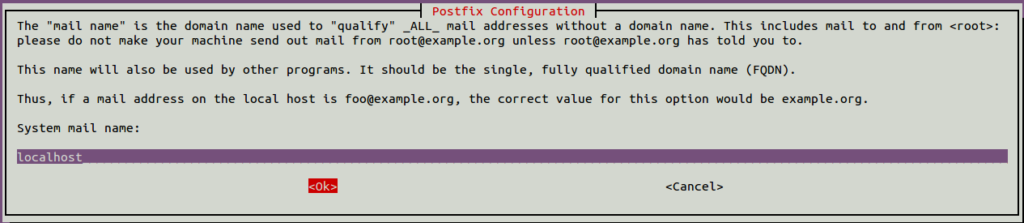
After installing Zeek, you will need to add Zeek to the system path. You can do it with the following command:
echo "export PATH=$PATH:/opt/zeek/bin" >> ~/.bashrc
Next, activate ~/.bashrc with the following command:
source ~/.bashrc
Now, verify the Zeek version with the following command:
zeek --version
You should get the following output:
zeek version 4.0.3
Step 2 – Define Your Network
Next, you will need to define the network that you want to monitor. You can define it by editing /opt/zeek/etc/networks.cfg file.
nano /opt/zeek/etc/networks.cfg
Here are the default values. You can add your own networks at the end of the file:
10.0.0.0/8          Private IP space
172.16.0.0/12       Private IP space
192.168.0.0/16      Private IP space
Save and close the file when you are finished.
Step 3 – Configure Zeek Cluster
By default, Zeek is configured to run in standalone mode. In this section, we will configure Zeek in cluster mode.
First, edit the Zeek main configuration file:
nano /opt/zeek/etc/node.cfg
Comment out the following lines:
#[zeek]
#type=standalone
#host=localhost
#interface=eth0
Add the following lines at the end of the file.
[zeek-logger]
type=logger
host=your-server-ip
#
[zeek-manager]
type=manager
host=your-server-ip
#
[zeek-proxy]
type=proxy
host=your-server-ip
#
[zeek-worker]
type=worker
host=your-server-ip
interface=eth0
#
[zeek-worker-lo]
type=worker
host=localhost
interface=lo
Save and close the file when you are finished, then check the configuration file for any errors with the following command:
zeekctl check
If everything is fine, you should get the following output:
zeek-logger scripts are ok.
zeek-manager scripts are ok.
zeek-proxy scripts are ok.
zeek-worker scripts are ok.
zeek-worker-lo scripts are ok.
Next, deploy the Zeek configuration with the following command:
zeekctl deploy
You should get the following output:
starting logger ...
starting manager ...
starting proxy ...
starting workers ...
Step 4 – Verify Status of Zeek
You can now check the status of the Zeek instance using the following command:
zeekctl status
You should get the following output:
Name         Type    Host             Status    Pid    Started
zeek-logger  logger  your-server-ip     running   10479  25 Jul 06:34:08
zeek-manager manager your-server-ip     running   10529  25 Jul 06:34:10
zeek-proxy   proxy   your-server-ip     running   10579  25 Jul 06:34:12
zeek-worker  worker  your-server-ip     running   10648  25 Jul 06:34:14
zeek-worker-lo worker  localhost        running   10650  25 Jul 06:34:14
At this point, Zeek will start to analyze traffic as per the configuration file and write logs to the /opt/zeek/logs/current directory.
You can check all generated log files with the following command:
ls -l /opt/zeek/logs/current/
You should see the following output:
-rw-r--r-- 1 root zeek  1780 Jul 25 06:36 broker.log
-rw-r--r-- 1 root zeek  2346 Jul 25 06:36 cluster.log
-rw-r--r-- 1 root zeek   578 Jul 25 06:36 conn.log
-rw-r--r-- 1 root zeek 28733 Jul 25 06:36 loaded_scripts.log
-rw-r--r-- 1 root zeek   596 Jul 25 06:36 ntp.log
-rw-r--r-- 1 root zeek   187 Jul 25 06:36 packet_filter.log
-rw-r--r-- 1 root zeek   601 Jul 25 06:36 stats.log
-rw-r--r-- 1 root zeek     0 Jul 25 06:36 stderr.log
-rw-r--r-- 1 root zeek   188 Jul 25 06:36 stdout.log
-rw-r--r-- 1 root zeek   482 Jul 25 06:36 weird.log
Run the following command to check the connection logs.
tail /opt/zeek/logs/current/conn.log
Sample output:
1627194994.735281	Cu51ph1SpnaI5e8VGe	184.188.36.2	56921	your-server-ip	445	tcp	-	0.000036	0	0	REJ	F	F	0	Sr	1	52	1	40	-
1627194997.416217	CEMJC91xoEHySwvNdg	your-server-ip	47762	your-server-ip	47466	tcp	-	-	-	-	OTH	FF	0	CcCc	0	0	0	0	-
1627194998.422707	C9lEWO2Cka3rN7kafa	your-server-ip	46316	your-server-ip	47761	tcp	-	-	-	-	OTH	FF	0	CcCc	0	0	0	0	-
1627195000.441681	Cw8Uy5wH7AyZlUxg	your-server-ip	46310	your-server-ip	47761	tcp	-	-	-	-	OTH	FF	0	CcCc	0	0	0	0	-
Run the following command to check the cluster logs:
tail /opt/zeek/logs/current/cluster.log
Sample output:
1627194993.480149	zeek-proxy	got hello from zeek-worker (37A494EB63B75E2A52F1EA47CA05933C608362F3#13744)
1627194993.506139	zeek-proxy	got hello from zeek-worker-lo (78A849E99E95C3EB4A0E457797D42C13BAFF3E14#13742)
1627194993.506938	zeek-manager	got hello from zeek-worker (37A494EB63B75E2A52F1EA47CA05933C608362F3#13744)
Step 5 – Check Zeek Node Processes
You can also check the processes running on each node.
To check the running processes of the zeek-manager node, run the following command:
zeekctl ps.zeek zeek-manager
You should get the following output:
        USER         PID    PPID %CPU %MEM    VSZ   RSS TT       S  STARTED     TIME COMMAND
>>> your-server-ip
   (-) root       13574   13568  1.7  2.1 1263568 87912 ?       S 06:36:26 00:00:01 zeek
   (+) root       13624   13618  1.5  2.2 642620 88836 ?        S 06:36:27 00:00:01 zeek
   (-) root       13673   13667  1.3  2.1 640932 87224 ?        S 06:36:29 00:00:01 zeek
   (-) root       13742   13732  2.1  5.4 771956 218288 ?       S 06:36:31 00:00:01 zeek
   (-) root       13744   13731  2.2  5.4 772548 219764 ?       S 06:36:31 00:00:02 zeek
Conclusion
In this post, you learned how to install and configure the Zeek network security monitoring tool on Ubuntu 20.04. For more information on Zeek configuration, visit the Zeek documentation. Get started with Zeek today on dedicated server hosting from Atlantic.Net!
Get a $250 Credit and Access to Our Free Tier!
Free Tier includes:
G3.2GB Cloud VPS a Free to Use for One Year
50 GB of Block Storage Free to Use for One Year
50 GB of Snapshots Free to Use for One Year