How to Install and Configure Apache Webserver on Oracle Linux
June 20, 2022 by Hitesh Jethva ( 680 ) under VPS Hosting
0 Comments
Free, open-source Apache is one of the most popular web servers on the internet. It was developed and maintained by the Apache Software Foundation. Apache is reliable, secure, and fast and can be customized using extensions and modules. Due to its stability, efficiency, and popularity, it is used by many web hosting companies worldwide. It supports all major operating systems, including Linux, Windows, macOS, Solaris, etc.
In this post, we will explain how to install an Apache web server on Oracle Linux 8.
In This Article
- Install Apache on Oracle Linux 8
- Manage Apache Service
- Configure Firewall
- Access Apache Default Web Page
- Host a Simple Website with Apache
Step 1 – Install Apache on Oracle Linux 8
By default, the latest version of Apache is available in the Oracle Linux default repository. You can install it by running the following commands:
dnf update -y
dnf install httpd -y
Once the Apache package is installed, verify the package information using the following command:
apachectl -V
You will get the following output:
Server version: Apache/2.4.37 (Oracle Linux)
Server built:   May 11 2022 05:39:03
Server's Module Magic Number: 20120211:83
Server loaded:  APR 1.6.3, APR-UTIL 1.6.1
Compiled using: APR 1.6.3, APR-UTIL 1.6.1
Architecture:   64-bit
Server MPM:     event
  threaded:     yes (fixed thread count)
    forked:     yes (variable process count)
Server compiled with....
 -D APR_HAS_SENDFILE
 -D APR_HAS_MMAP
 -D APR_HAVE_IPV6 (IPv4-mapped addresses enabled)
 -D APR_USE_SYSVSEM_SERIALIZE
 -D APR_USE_PTHREAD_SERIALIZE
 -D SINGLE_LISTEN_UNSERIALIZED_ACCEPT
 -D APR_HAS_OTHER_CHILD
 -D AP_HAVE_RELIABLE_PIPED_LOGS
 -D DYNAMIC_MODULE_LIMIT=256
 -D HTTPD_ROOT="/etc/httpd"
 -D SUEXEC_BIN="/usr/sbin/suexec"
 -D DEFAULT_PIDLOG="run/httpd.pid"
 -D DEFAULT_SCOREBOARD="logs/apache_runtime_status"
 -D DEFAULT_ERRORLOG="logs/error_log"
 -D AP_TYPES_CONFIG_FILE="conf/mime.types"
 -D SERVER_CONFIG_FILE="conf/httpd.conf"
Also Read
Host Multiple Websites on a Single Server Using Apache Web Server
Step 2 – Manage Apache Service
By default, the Apache webserver service is managed by systemd. You can control it easily using the systemctl command-line utility.
To start the Apache service, run the following command:
systemctl start httpd
To restart the Apache service, run the following command:
systemctl restart httpd
To enable the Apache service, run the following command:
systemctl enable httpd
To check the status of the Apache service, run the following command:
systemctl status httpd
You will get the following output:
● httpd.service - The Apache HTTP Server
   Loaded: loaded (/usr/lib/systemd/system/httpd.service; disabled; vendor preset: disabled)
   Active: active (running) since Wed 2022-06-08 11:41:51 EDT; 25min ago
     Docs: man:httpd.service(8)
 Main PID: 3745 (httpd)
   Status: "Running, listening on: port 80"
    Tasks: 213 (limit: 23694)
   Memory: 25.2M
   CGroup: /system.slice/httpd.service
           ├─3745 /usr/sbin/httpd -DFOREGROUND
           ├─3760 /usr/sbin/httpd -DFOREGROUND
           ├─3765 /usr/sbin/httpd -DFOREGROUND
           ├─3766 /usr/sbin/httpd -DFOREGROUND
           └─3767 /usr/sbin/httpd -DFOREGROUND

Jun 08 11:41:51 oraclelinux8 systemd[1]: Starting The Apache HTTP Server...
Step 3 – Configure Firewall
By default, Apache listens on ports 80 and 443. If a firewall is installed and configured to your server, then you will need to allow both ports via firewalld. You can allow them with the following command:
firewall-cmd --permanent --zone=public --add-service=http
firewall-cmd --permanent --zone=public --add-service=https
Next, reload the firewalld to apply the changes:
firewall-cmd --reload
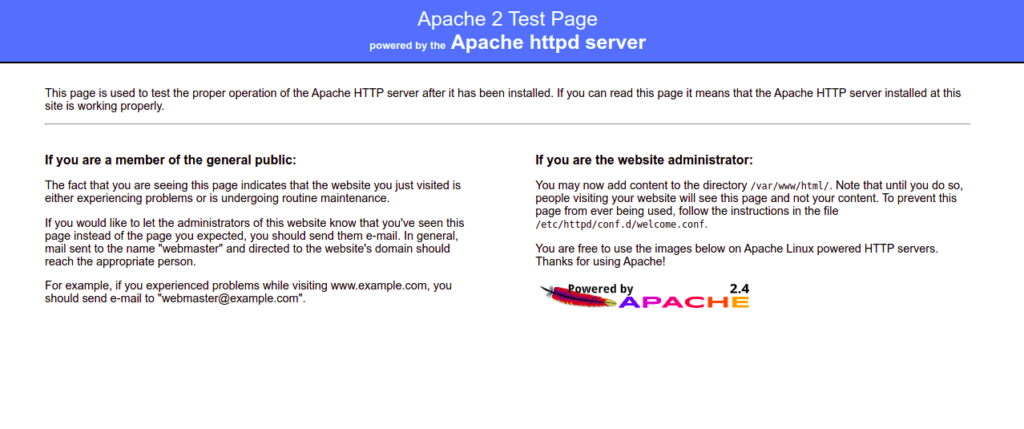
Step 4 – Access Apache Default Web Page
At this point, the Apache web server is installed and listens on port 80. You can now open your web browser and access the Apache test page using the URL http://your-server-ip. You should see the Apache default page on the following screen:
Step 5 – Host a Simple Website with Apache
First, create a directory to hold the website data with the following command:
mkdir /var/www/html/web.example.com
Next, create a simple HTML file inside the website directory:
nano /var/www/html/web.example.com/index.html
Add the following HTML code:
<html>
<h1>Welcome to the Apache Webserver!</h1>
</html>
Save and close the file, then change the ownership and permissions of the website directory:
chown -R apache:apache /var/www/html/web.example.com/
chmod -R 775 /var/www/html/web.example.com/
Next, create an Apache virtual host configuration file to define your website directory:
nano /etc/httpd/conf/example.conf
Add the following configuration:
<VirtualHost *:80>
    ServerAdmin web.example.com
    DocumentRoot /var/www/html/web.example.com
    DirectoryIndex index.html
    ErrorLog /var/log/httpd/error.log
    CustomLog /var/log/httpd/access.log combined
</VirtualHost>
Save and close the file, then restart the Apache service to apply the configuration changes:
systemctl restart httpd
Now, open your web browser and verify your website using the URL http://web.example.com. You should see your website page on the following screen:

Also Read
How to Set Up Apache Virtual Hosting
Conclusion
In the above post, we explained how to install an Apache web server on Oracle Linux 8. We also explained how to create a new website and host it using the Apache virtual host. Try it on VPS hosting from Atlantic.Net!
Get a $250 Credit and Access to Our Free Tier!
Free Tier includes:
G3.2GB Cloud VPS a Free to Use for One Year
50 GB of Block Storage Free to Use for One Year
50 GB of Snapshots Free to Use for One Year