# How to Install and Secure phpMyAdmin on CentOS 8
> URL: https://www.atlantic.net/vps-hosting/how-to-install-and-secure-phpmyadmin-on-centos-8/ | Published: 2020-04-05 | Updated: 2024-07-02 | Author: Hitesh Jethva
phpMyAdmin is an open-source software tool used for managing MySQL/MariaDB databases. It provides an easy way to interact with MySQL through a web browser. phpMyAdmin is very useful for users who are not comfortable administering their data from the command line, so it is essential for any system administrator to secure phpMyAdmin from different kinds of attacks.
In this tutorial, we will show you how to install and secure phpMyAdmin on CentOS 8.
## Step 1 – Install Apache, MariaDB and PHP
Before starting, install Apache, MariaDB, PHP and other required PHP extensions with the following command:
```
dnf update -y
dnf install httpd mariadb-server php php-cli php-json php-mbstring php-pdo php-pecl-zip php-mysqlnd -y
```
After installing all the packages, you can proceed to the next step.
## Step 2 – Set MariaDB Root Password
First, start the MariaDB service and enable it to start on boot time with the following command:
```
systemctl start mariadb
systemctl enable mariadb
```
Next, set the MySQL root password using the following script:
```
mysql_secure_installation
```
This script will set the MySQL root password, remove anonymous users, disallow root login remotely and remove the test database and access to it, as shown below:
Enter current password for root (enter for none):
```
Set root password? [Y/n] Y
New password:
Remove anonymous users? [Y/n] Y
Disallow root login remotely? [Y/n] Y
Remove test database and access to it? [Y/n] Y
Reload privilege tables now? [Y/n] Y
```
## Step 3 – Install phpMyAdmin
First, download the latest version of phpMyAdmin to the Apache web root directory using the following command:
```
cd /var/www/html
wget https://files.phpmyadmin.net/phpMyAdmin/4.9.4/phpMyAdmin-4.9.4-all-languages.zip
```
Once downloaded, unzip the downloaded file with the following command:
```
unzip phpMyAdmin-4.9.4-all-languages.zip
```
Next, rename the extracted directory to phpmyadmin as shown below:
```
mv phpMyAdmin-4.9.4-all-languages phpmyadmin
```
Next, change the ownership of the phpmyadmin directory to the apache user:
```
chown -R apache:apache /var/www/html/phpmyadmin
```
Next, rename the config.sample.inc.php file:
```
cd /var/www/html/phpmyadmin
mv config.sample.inc.php config.inc.php
```
Next, edit the file and define your secure password:
```
nano config.inc.php
```
Find the line below and update with your secure password, as shown below:
```
$cfg['blowfish_secret'] = 'your-secure-password';
```
Save and close the file. Then, import the tables for phpMyAdmin with the following command:
```
mysql < sql/create_tables.sql -u root -p
```
Once you are done, you can proceed to the next step.
## Step 4 – Configure Apache for phpMyAdmin
Next, create an Apache virtual host configuration file for phpMyAdmin:
```
nano /etc/httpd/conf.d/phpmyadmin.conf
```
Add the following lines:
```
Alias /phpmyadmin /var/www/html/phpmyadmin
AddDefaultCharset UTF-8
# Apache 2.4
Require all granted
# Apache 2.2
Order Deny,Allow
Deny from All
Allow from 127.0.0.1
Allow from ::1
# Apache 2.4
Require all granted
# Apache 2.2
Order Deny,Allow
Deny from All
Allow from 127.0.0.1
Allow from ::1
```
Save and close the file. Then, start the Apache service and enable it to start after system reboot with the following command:
```
systemctl start httpd
systemctl enable httpd
```
Now, open your web browser and visit the URL your-server-ip/phpmyadmin. You should see the phpMyAdmin web interface in the following screen:
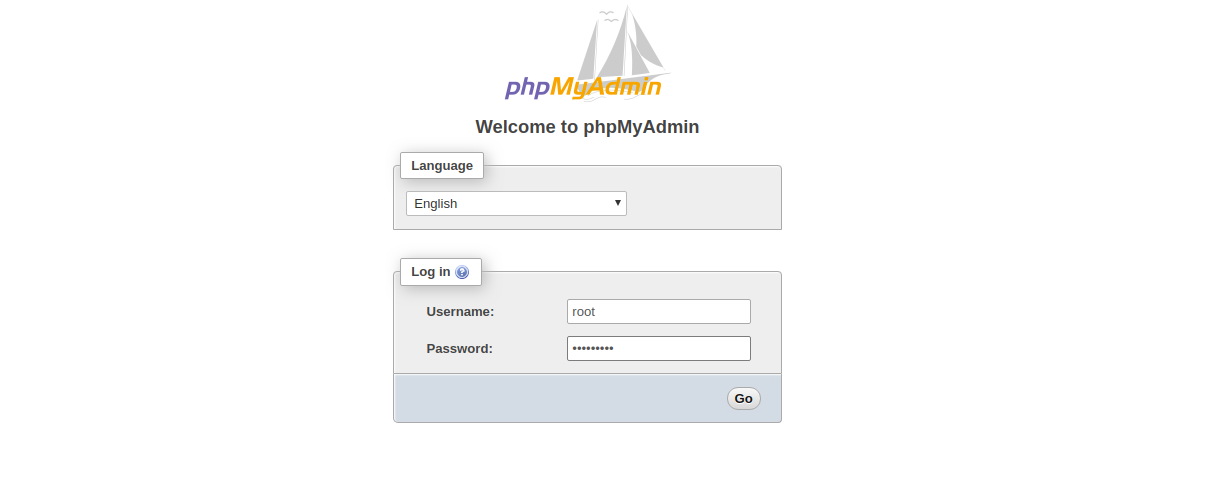
Log in with your MySQL credentials created earlier.
## Step 5 – Secure phpMyAdmin
In this section, we will show different ways to secure your phpMyAdmin web interface.
### Change phpMyAdmin Access Location
It is a good idea to change the access URL of your phpMyAdmin interface. You can change it by editing the phpmyadmin.conf file:
```
nano /etc/httpd/conf.d/phpmyadmin.conf
```
Find the following line:
```
Alias /phpmyadmin /var/www/html/phpmyadmin
```
Replace it with the following line:
```
Alias /securelocation /var/www/html/phpmyadmin
```
Save and close the file, then restart the Apache service to implement the changes:
```
systemctl restart httpd
```
You can now access the phpMyAdmin interface using the URL: your-server-ip/securelocation.
### Allow phpMyAdmin from Specific IP
It is always a good idea to allow phpMyAdmin only to be accessible from a specific IP address.
To do so, open the phpmyadmin.conf file:
```
nano /etc/httpd/conf.d/phpmyadmin.conf
```
Find the following lines:
```
Require all granted
```
Replace it with the following:
```
Require ip your-client-ip-address
Require ip ::1
```
Save and close the file, then restart the Apache service to implement the changes:
```
systemctl restart httpd
```
Your phpMyAdmin interface is now only accessible from a specified IP address.
### Password Protect phpMyAdmin Interface
You can also add an extra layer of password protection on phpMyAdmin by setting up basic authentication.
First, create an authentication file using the following command:
```
htpasswd -c /etc/httpd/.htpasswd phpadmin
```
Provide a secure password as shown below:
```
New password:
Re-type new password:
Adding password for user phpadmin
```
Next, create the .htaccess file within the phpmyadmin directory:
```
nano /var/www/html/phpmyadmin/.htaccess
```
Add the following lines:
```
AuthType basic
AuthName "Authentication Required"
AuthUserFile /etc/httpd/.htpasswd
Require valid-user
```
Save and close the file when you are finished.
Next, edit the phpmyadmin.conf file and configure Apache to use the .htpasswd file.
```
nano /etc/httpd/conf.d/phpmyadmin.conf
```
Add the following lines below the line “AddDefaultCharset UTF-8”:
```
AllowOverride All
```
Save the file, then restart the Apache service to implement the changes:
```
systemctl restart httpd
```
## Step 6 – Test phpMyAdmin
At this point, the phpMyAdmin interface is secured with an extra layer of password protection. To test it, open your web browser and type the URL http://your-server-ip/securelocation. You will be asked to provide the login credentials that we created earlier:
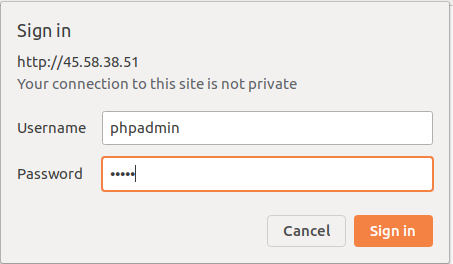
Type your username and password and click on the **OK** button. You will be redirected to the phpMyAdmin login page:

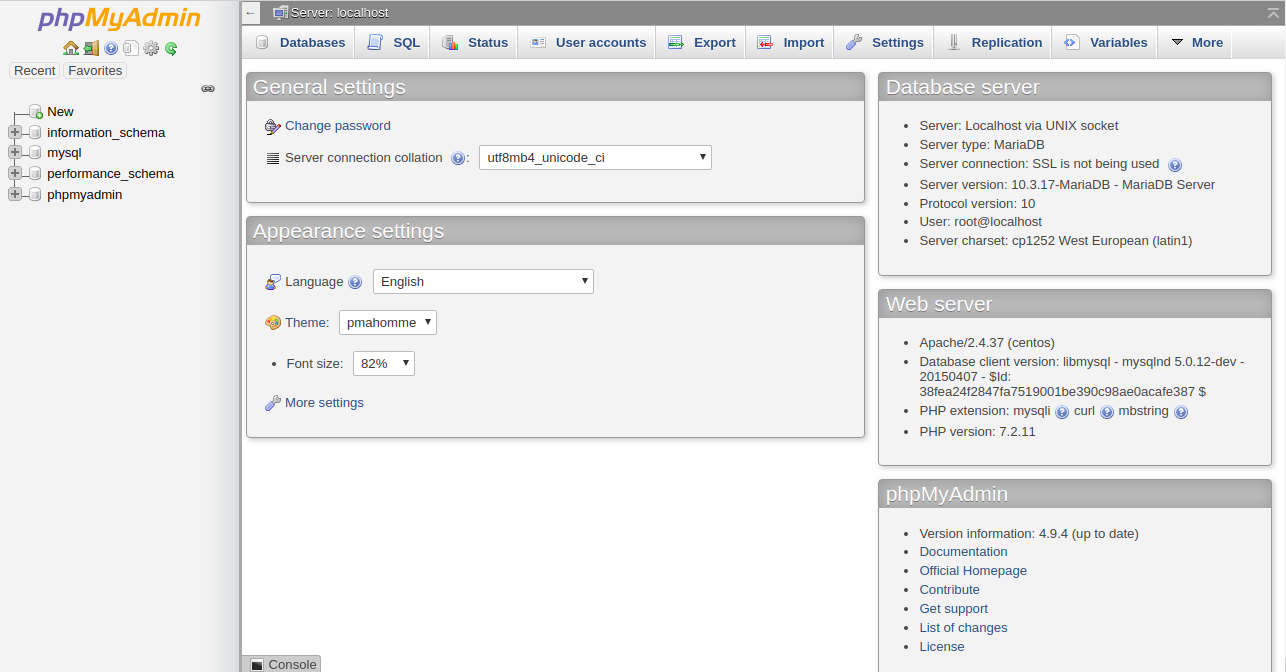
Provide your MySQL username and password, then click on the **Go** button. You should see your phpMyAdmin web interface in the following screen:

## Conclusion
In the above guide, we learned how to install and secure phpMyAdmin on CentOS 8. Your phpMyAdmin interface is now secured with additional password protection. You can use this method to secure a server under an Atlantic.Net VPS Hosting Plan.
Learn more about our [VPS hosting](https://www.atlantic.net/vps-hosting/) services and [Virtual private servers.](https://www.atlantic.net/vps-hosting/)