Table of Contents
Verified and Tested 10/31/15
Introduction
Atlantic.Net is actively working towards providing an exceptional customer experience for everyone, whether you are Tech savvy or not, we want to simplify our services so you can be up and running in no time. This is where the One-Click application installation comes into place. Atlantic.Net is working to ensure that all of the most popular applications are available to you at the click of a button.
 NGINX Car by Walker Cahall
Prerequisites
The only requirement that you need to accomplish this task is a valid or active Atlantic.Net cloud account. If you do not have one, please sign up here.
Installing LEMP via Atlantic.Net’s One-Click Install
First we need to log into the Cloud Portal here: cloud.atlantic.net and select Add Server.
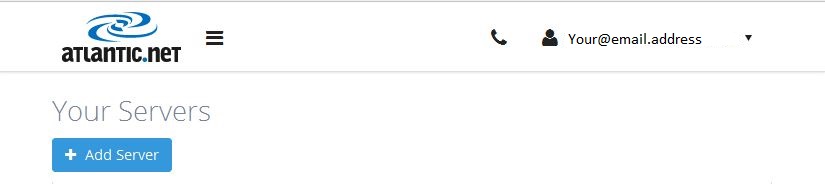
Click on Add Server
You will now be prompted to type a server name (in this case our server will be named “One Click LEMP”), and then you will select the location where you want your server created. If you don’t know which location to use, we recommend selecting the one that is closest to your geographical area to ensure the best performance.
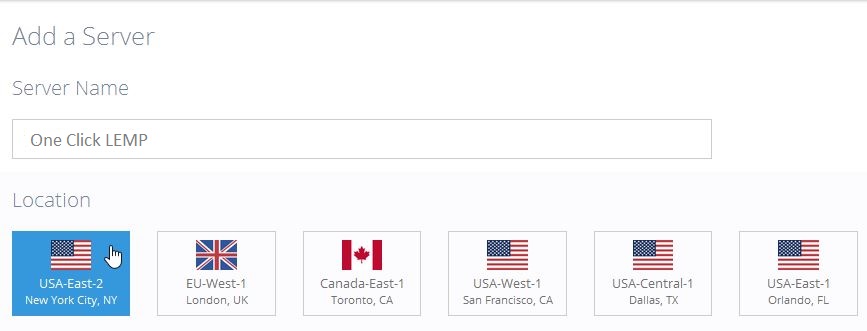
Server name and server location
Then, you will need to click on Applications and then select LEMP. You should see that it will change the icon to LEMP on Ubuntu 14.04.
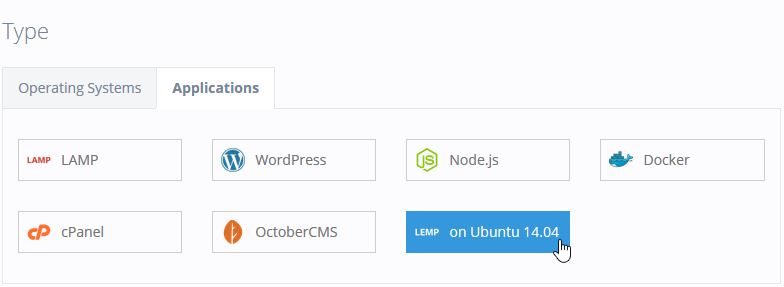
LEMP application selected
Once done, you will need to select the size that you want to create. For this tutorial, an XS server was selected.
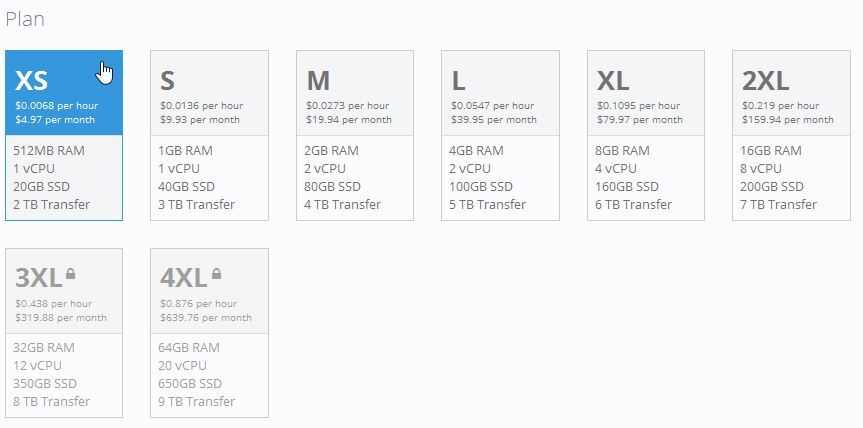
Server size selected
Finally, you before you create the server there are two optional add-ons to choose from: SSH Key and Enable Backups.Atlantic.Net highly recommends using both of these features to help improve security and to ensure that all of your server data is backed up.
Once you’ve decided to go with the add-ons or not, you may proceed with the clicking Create Server.
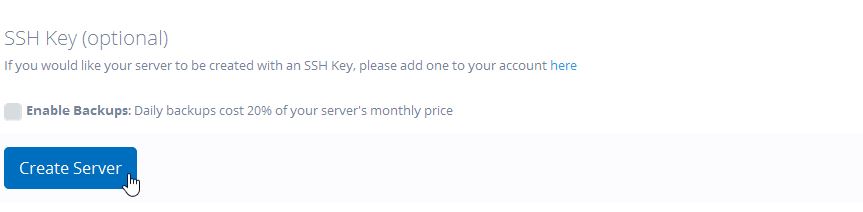
Create Server selected
You will then see your servers information like the following image. You should receive a copy of this information in your email. Make sure to store your server connection details in a safe place!
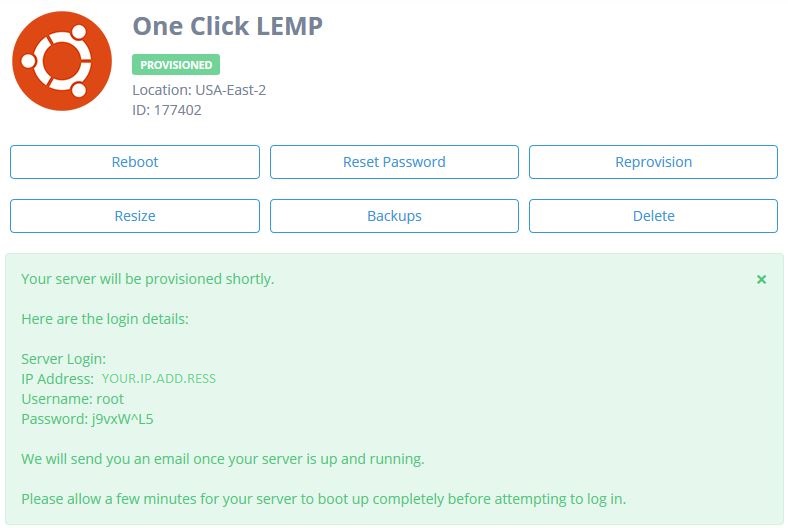
Server created and server credentials
Once you’ve received an email stating your server is available you can use an SSH client to access the server, or you can use our Atlantic.Net VNC Console from within your Cloud Panel. For this tutorial, we are using PUTTY – a free open source SSH client that can be downloadedhere. Once your in, you will see the following Welcome message on your terminal session.
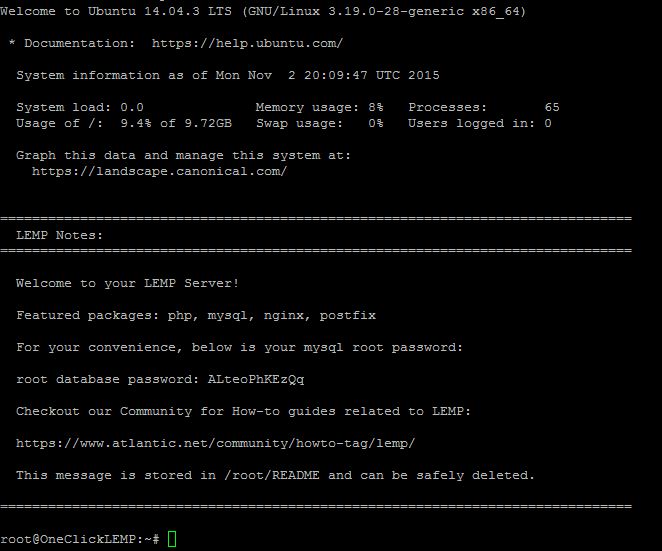
Your servers Welcome message with MySQL Credentials
Now, that the installation is complete we can begin testing out our LEMP components. Since we’re already in the command line, Let us test MYSQL with the following command which will confirm that it is running.
mysql status

MySQL status
Then, we will test Nginx by going to your web browser and typing http://YOUR.IP.ADD.RESS you should see the following screen.
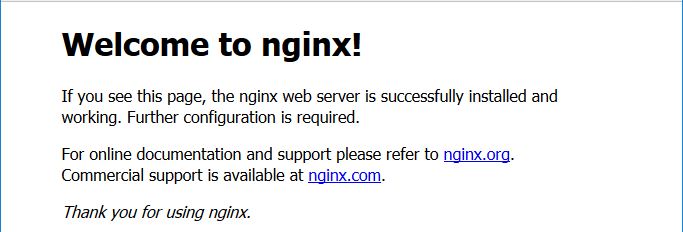
Nginx verification page online
Finally, we can test PHP by completing the following steps. We must create a test PHP file which can be accomplished with the following command:
nano /usr/share/nginx/html/test.php
You will then paste the following PHP script in the empty document and then save your file.
<?php
phpinfo();
?>
OK! Finally, test PHP by going to your web browser and typing http://YOUR.IP.ADD.RESS/test.php you should see the following screen.
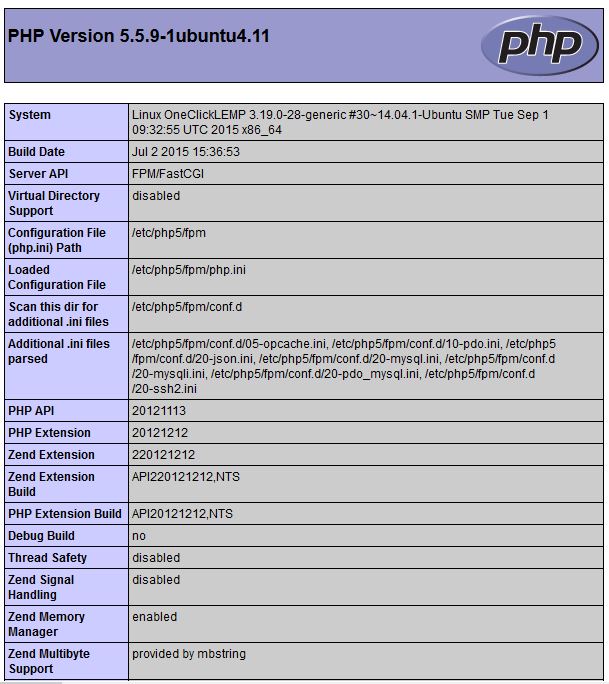
PHP verification page online
Remove the test.php file with the following command:
Note: It is always a good idea to remove your phpinfo file as a hacker could use it to attack you.
rm /usr/share/nginx/html/test.php
What Next?
Congratulations! You have just installed LEMP using Atlantic.Net’s One-Click Install. Thank you for following along in this How-To and feel free to check back with us for latest updates.