Table of Contents
Verified and Tested 02/31/14
Introduction
Installation procedure for installing a DHCP server onto Windows 2012R2 with Server Manager.
Prerequisites
Server must have access to the internet.
Installing DHCP on Windows Server 2012 R2
Open the Add Roles and Features wizard
Server Manager -> Manage -> Add Roles and Features
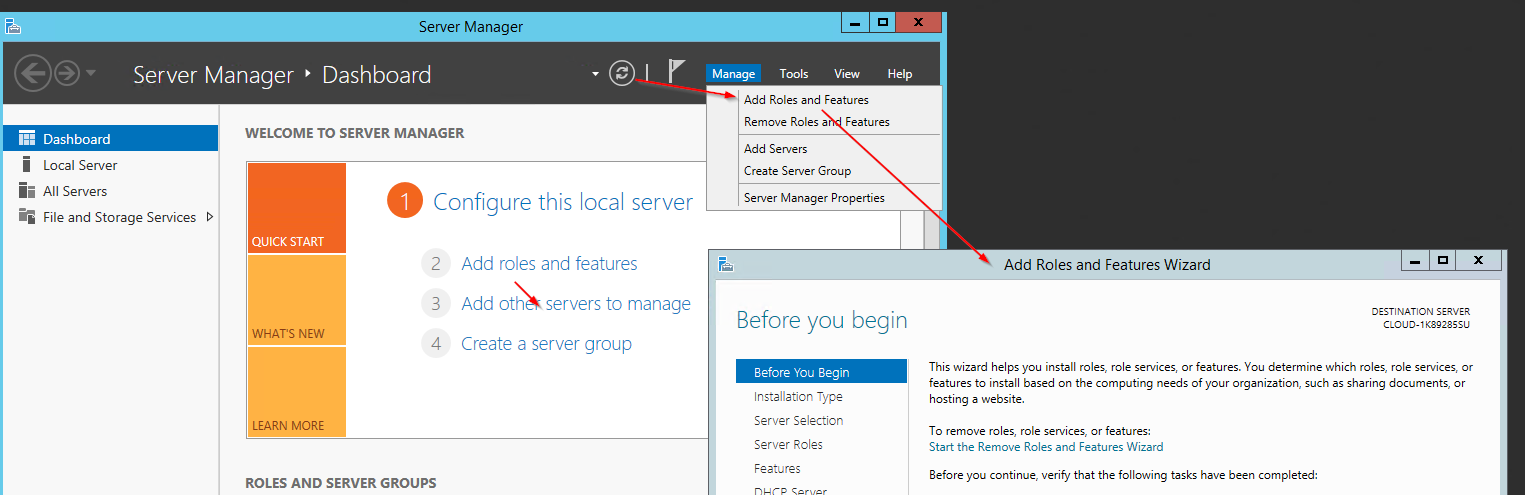
Server Manager: Add roles and features
Select the “Next” button until you reach “Server Roles” then proceed to select “DHCP server”
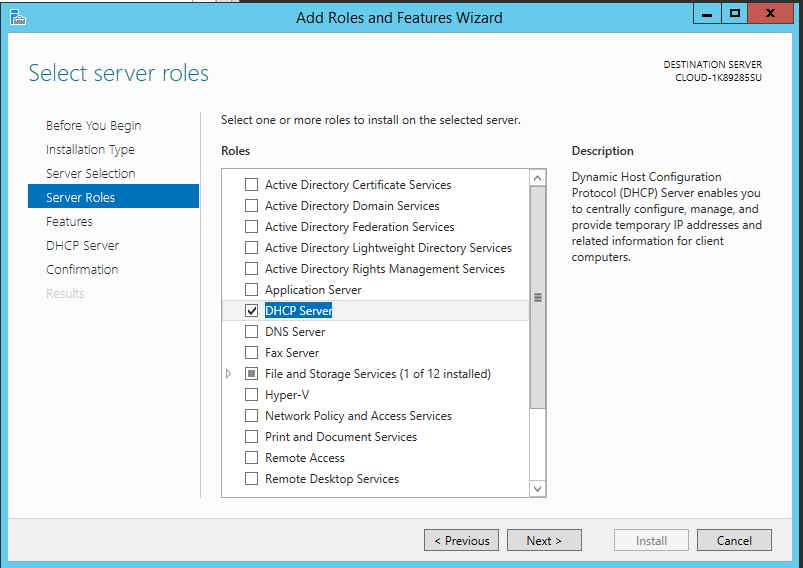
Server Roles: DHCP Server
Select the Next button. A popup box will appear, proceed to select “Add Features”. Make sure the “Include management tools” check box is selected.

Add features and select management tools
Proceed to select the “Next” button until you arrive at the “Confirmation” selection page below and select “Install”

Confirm and install
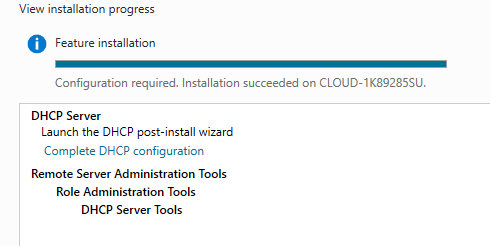
Select “Complete DHCP” configuration”
Once the installation is complete, you’ll be presented with a new screen. Select “Complete DHCP” configuration”
Select “Commit” as seen below. Then select “Complete DHCP” configuration”, and select “Commit”.
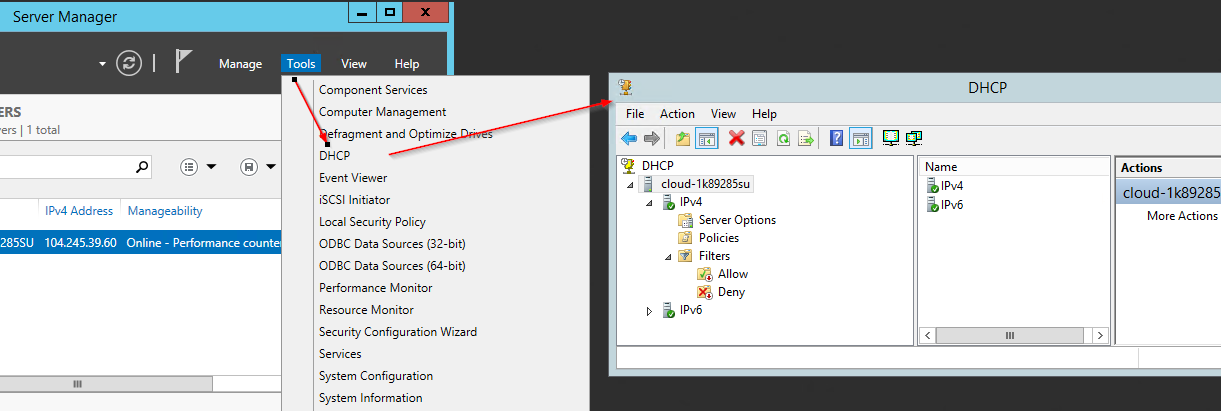
Your DHCP server is now installed and may be configured under Server Manager -> Tools -> DHCP