Table of Contents
- Prerequisites
- Step 1: Set Up Python Environment
- Step 2: Install Required Python Packages
- Step 3: Set Up Project Structure
- Step 4: Create the Machine Learning Model
- Step 5: Create the Color Detector Class
- Step 6: Create the Flask Web Application
- Step 7: Run the Application
- Step 8: Access the Application
- Conclusion
Color detection plays a crucial role in computer vision, from sorting items by color to assisting visually impaired users. By combining the power of Flask, OpenCV, and machine learning, you can build an advanced web app that accurately detects and classifies colors from uploaded images or user interactions.
In this tutorial, we will deploy a color detection web app on an Ubuntu 24.04 GPU server. The app utilizes a pre-trained machine learning model for enhanced accuracy and offers an intuitive interface for uploading images and selecting pixels to identify their colors. You also learn how to structure the Flask backend, handle file uploads, and serve color predictions in real-time.
Prerequisites
- An Ubuntu 24.04 server with an NVIDIA GPU.
- A non-root user with sudo privileges.
- NVIDIA drivers installed.
Step 1: Set Up Python Environment
First, we’ll install the necessary Python packages and create a virtual environment.
1. Install Python and pip.
apt install -y python3-pip python3-dev python3-venv2. Create a virtual environment.
python3 -m venv venv3. Activate the virtual environment.
source venv/bin/activateStep 2: Install Required Python Packages
Now we’ll install all the Python dependencies for our project.
pip install tqdm flask opencv-python pandas numpy scikit-learn pillowThese packages include:
- tqdm for progress bars
- flask for the web framework
- opencv-python for image processing
- pandas, numpy for data handling
- scikit-learn for machine learning
- pillow for image handling
Step 3: Set Up Project Structure
1. Create the necessary directories for our web application.
mkdir templates static2. Download the color database from Kaggle for color recognition.
3. Copy the downloaded dataset file from your local computer to the server.
scp archive.zip root@server-ip:/root/4. Unzip the downloaded dataset.
unzip archive.zipStep 4: Create the Machine Learning Model
Now we’ll create a script to train our color classification model.
1. Create a new file called model_trainer.py:
nano model_trainer.pyAdd the following code.
import os
import cv2
import numpy as np
from sklearn.svm import SVC
from sklearn.model_selection import train_test_split
from sklearn.metrics import accuracy_score
import joblib
from tqdm import tqdm

class ColorModelTrainer:
    def __init__(self, dataset_path="training_dataset"):
        self.dataset_path = dataset_path
        self.classes = sorted(os.listdir(dataset_path))
        self.model = SVC(kernel='linear', probability=True)

    def load_dataset(self):
        X = []
        y = []

        print("Loading dataset...")
        for class_idx, class_name in enumerate(tqdm(self.classes)):
            class_path = os.path.join(self.dataset_path, class_name)
            for img_file in os.listdir(class_path):
                img_path = os.path.join(class_path, img_file)
                img = cv2.imread(img_path)
                if img is not None:
                    img = cv2.resize(img, (50, 50))  # Standardize size
                    img = cv2.cvtColor(img, cv2.COLOR_BGR2RGB)
                    X.append(img.flatten())
                    y.append(class_idx)

        return np.array(X), np.array(y)

    def train(self):
        X, y = self.load_dataset()
        X_train, X_test, y_train, y_test = train_test_split(X, y, test_size=0.2)

        print("Training model...")
        self.model.fit(X_train, y_train)

        # Evaluate
        y_pred = self.model.predict(X_test)
        accuracy = accuracy_score(y_test, y_pred)
        print(f"Model accuracy: {accuracy:.2f}")

        # Save model
        os.makedirs("static/models", exist_ok=True)
        joblib.dump(self.model, "static/models/color_classifier.joblib")
        joblib.dump(self.classes, "static/models/classes.joblib")
        print("Model saved successfully")

if __name__ == "__main__":
    trainer = ColorModelTrainer()
    trainer.train()
2. Run the training script.
python3 model_trainer.pyThis script will:
- Load and preprocess the training images
- Train an SVM classifier
- Evaluate the model accuracy
- Save the trained model for later use
Step 5: Create the Color Detector Class
Now we’ll create the core functionality that detects colors using both traditional and ML methods.
1. Create a new file called color_detector.py:
nano color_detector.pyAdd the following code.
import cv2
import pandas as pd
import numpy as np
import joblib
import os

class AdvancedColorDetector:
    def __init__(self):
        # Traditional method
        self.csv_path = os.path.join('static', 'colors.csv')
        self.index = ["color", "color_name", "hex", "R", "G", "B"]
        self.df = pd.read_csv(self.csv_path, names=self.index, header=None)

        # ML method
        self.ml_model = joblib.load("static/models/color_classifier.joblib")
        self.classes = joblib.load("static/models/classes.joblib")

    def get_color_name_traditional(self, R, G, B):
        minimum = float('inf')
        color_name = "Unknown"
        for i in range(len(self.df)):
            d = abs(R - int(self.df.loc[i, "R"])) + abs(G - int(self.df.loc[i, "G"])) + abs(B - int(self.df.loc[i, "B"]))
            if d < minimum:
                minimum = d
                color_name = self.df.loc[i, "color_name"]
        return color_name

    def get_color_name_ml(self, img, x, y):
        # Extract 50x50 patch around the clicked point
        patch_size = 25
        patch = img[max(0,y-patch_size):min(img.shape[0],y+patch_size),
                   max(0,x-patch_size):min(img.shape[1],x+patch_size)]

        if patch.size == 0:
            return "Unknown"

        # Resize and predict
        patch = cv2.resize(patch, (50, 50))
        patch = cv2.cvtColor(patch, cv2.COLOR_BGR2RGB).flatten()
        proba = self.ml_model.predict_proba([patch])[0]
        confidence = max(proba)
        if confidence < 0.6:  # Confidence threshold
            return "Unknown (Low Confidence)"

        return self.classes[np.argmax(proba)]

    def process_image(self, image_path, x, y):
        img = cv2.imread(image_path)
        if img is None:
            return None, "Could not read image"

        b, g, r = img[y, x]

        # Get results from both methods
        traditional_name = self.get_color_name_traditional(r, g, b)
        ml_name = self.get_color_name_ml(img, x, y)

        return {
            'rgb': (r, g, b),
            'traditional': traditional_name,
            'ml': ml_name
        }
Step 6: Create the Flask Web Application
Now we’ll create the main Flask application that serves our web interface.
1. Create a new file called app.py:
nano app.pyAdd the following code.
from flask import Flask, render_template, request, jsonify
import os
from color_detector import AdvancedColorDetector

app = Flask(__name__)
app.config['UPLOAD_FOLDER'] = os.path.join('static', 'uploads')
os.makedirs(app.config['UPLOAD_FOLDER'], exist_ok=True)

detector = AdvancedColorDetector()

@app.route('/', methods=['GET', 'POST'])
def index():
    if request.method == 'POST':
        if 'file' not in request.files:
            return render_template('index.html', error="No file selected")

        file = request.files['file']
        if file.filename == '':
            return render_template('index.html', error="No file selected")

        if file:
            filename = os.path.join(app.config['UPLOAD_FOLDER'], file.filename)
            file.save(filename)
            return render_template('index.html',
                                image_url=filename,
                                filename=file.filename)

    return render_template('index.html')

@app.route('/detect', methods=['POST'])
def detect():
    data = request.json
    filename = os.path.join(app.config['UPLOAD_FOLDER'], data['filename'])
    x, y = int(data['x']), int(data['y'])

    result = detector.process_image(filename, x, y)

    return jsonify({
        'rgb': f"RGB({result['rgb'][0]}, {result['rgb'][1]}, {result['rgb'][2]})",
        'traditional': result['traditional'],
        'ml': result['ml']
    })

if __name__ == '__main__':
    app.run(host='0.0.0.0', port=5000, debug=True)
2. Create the web interface template in the templates directory.
nano templates/index.htmlAdd the following code.
<!DOCTYPE html>
<html>
<head>
    <title>Advanced Color Detection</title>
    <style>
        body { font-family: Arial, sans-serif; margin: 20px; }
        .container { max-width: 800px; margin: 0 auto; }
        .upload-box { border: 2px dashed #ccc; padding: 20px; text-align: center; margin-bottom: 20px; }
        #image-container { position: relative; margin-top: 20px; }
        #uploaded-image { max-width: 100%; cursor: crosshair; }
        #color-info { margin-top: 10px; padding: 15px; background: #f5f5f5; border-radius: 5px; }
        .result-box { margin: 10px 0; padding: 10px; background: white; border-left: 4px solid #4CAF50; }
        .error { color: red; }
        .method-label { font-weight: bold; color: #333; }
    </style>
</head>
<body>
    <div class="container">
        <h1>Advanced Color Detection</h1>
        <p>Upload an image and click anywhere to detect colors using both traditional and ML methods</p>

        <form method="post" enctype="multipart/form-data" class="upload-box">
            <input type="file" name="file" accept="image/*" required>
            <button type="submit">Upload Image</button>
            {% if error %}<p class="error">{{ error }}</p>{% endif %}
        </form>

        {% if image_url %}
        <div id="image-container">
            <img id="uploaded-image" src="{{ image_url }}" alt="Uploaded Image">
            <div id="color-info">
                <div class="result-box">
                    <span class="method-label">Traditional Method:</span> <span id="traditional-result">Click on the image</span>
                </div>
                <div class="result-box">
                    <span class="method-label">ML Method:</span> <span id="ml-result">Click on the image</span>
                </div>
                <div class="result-box">
                    <span class="method-label">RGB Values:</span> <span id="rgb-result">-</span>
                </div>
            </div>
        </div>
        {% endif %}
    </div>

    {% if image_url %}
    <script>
        document.getElementById('uploaded-image').addEventListener('click', function(e) {
            const rect = this.getBoundingClientRect();
            const x = e.clientX - rect.left;
            const y = e.clientY - rect.top;

            fetch('/detect', {
                method: 'POST',
                headers: { 'Content-Type': 'application/json' },
                body: JSON.stringify({
                    filename: '{{ filename }}',
                    x: x,
                    y: y
                })
            })
            .then(response => response.json())
            .then(data => {
                document.getElementById('traditional-result').textContent = data.traditional;
                document.getElementById('ml-result').textContent = data.ml;
                document.getElementById('rgb-result').textContent = data.rgb;
            });
        });
    </script>
    {% endif %}
</body>
</html>
Step 7: Run the Application
Start the Flask development server.
python3 app.pyYou will see the following output.
 * Running on all addresses (0.0.0.0)
 * Running on http://127.0.0.1:5000
 * Running on http://server-ip:5000
Step 8: Access the Application
1. Open a web browser and navigate to http://server-ip:5000.
2. Click the “Browse” button to upload an image from your local computer.
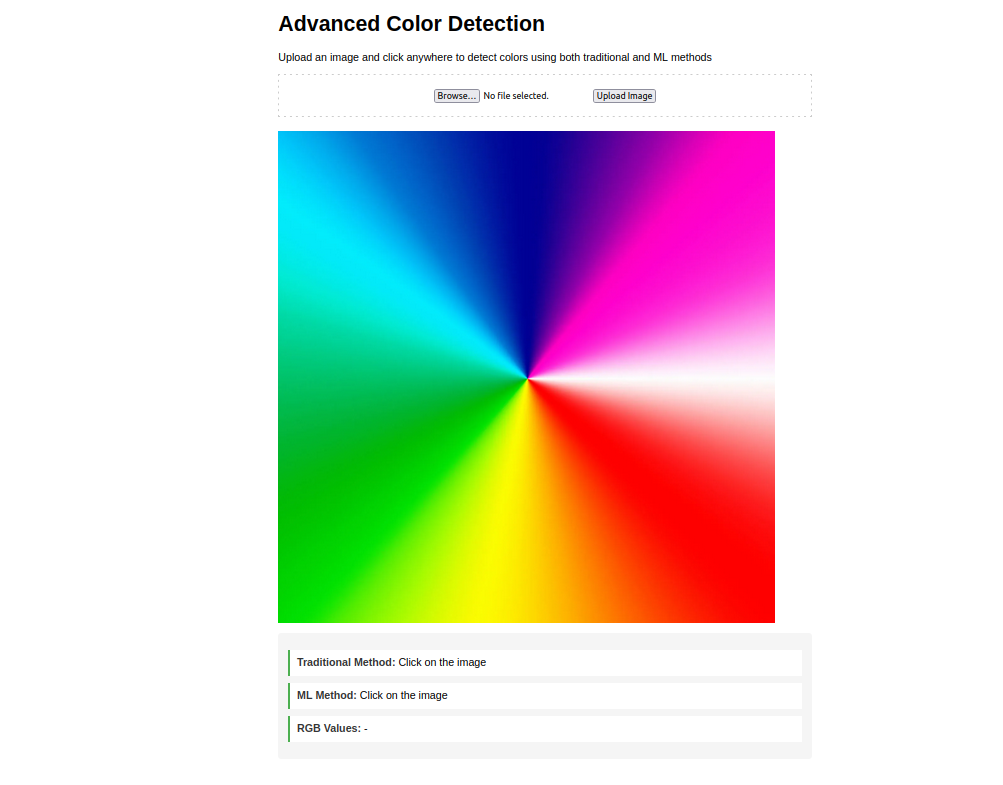
3. After uploading, click on any color in the image.
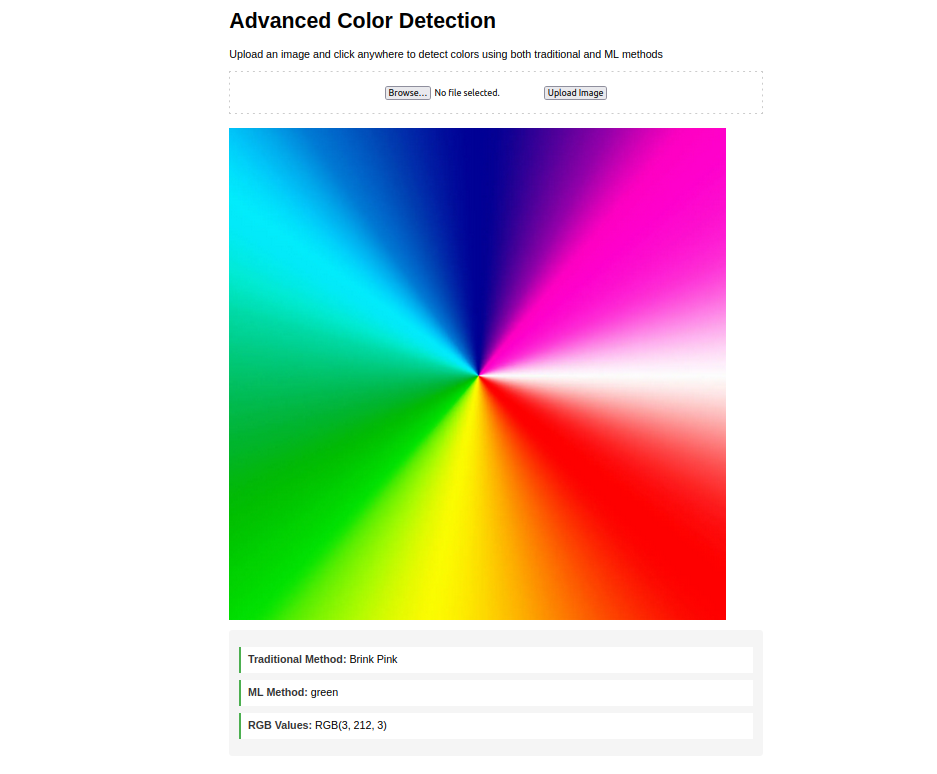
4. The app will display:
- The RGB values of the selected color
- The color name detected by the traditional method
- The color name detected by the machine learning method
Conclusion
In this tutorial, you have built a robust and interactive web app capable of detecting colors using machine learning on an Ubuntu 24.04 GPU server. You configured the environment, deployed a Flask application, and integrated a color classification model to enhance accuracy. This setup provides a strong foundation for more complex vision tasks such as object recognition or augmented reality.
* This post is for informational purposes only and does not constitute professional, legal, financial, or technical advice. Each situation is unique and may require guidance from a qualified professional.
Readers should conduct their own due diligence before making any decisions.