In this digital age, automated photo capture systems are becoming increasingly popular for creating seamless user experiences. This article will guide you through setting up a browser-based smile detection system that automatically captures selfies when it detects your smile.
Prerequisites
- An Ubuntu 24.04 server with an NVIDIA GPU.
- A non-root user with sudo privileges.
- NVIDIA drivers installed.
Step 1: Set up a Python Environment
First, we need to install essential system-level packages to support Python development and OpenCV.
apt install -y python3-pip python3-dev python3-venv libopencv-dev cmakeNow let’s isolate our Python project using a virtual environment.
python3 -m venv smile_env
source smile_env/bin/activate
Install the necessary Python libraries for image processing, mathematical operations, and web application.
pip install opencv-python opencv-contrib-python numpy flaskStep 2: Create Project Structure
Now, create directories to organize templates and selfie images.
mkdir templates static/selfiesStep 3: Create a Self-Signed SSL Certificate
Flask will run with HTTPS, which browsers require for webcam access. Let’s create a self-signed certificate.
openssl req -x509 -newkey rsa:4096 -nodes -out cert.pem -keyout key.pem -days 365This creates two files: cert.pem (certificate) and key.pem (private key), valid for one year. Browsers may show a warning, but you can safely proceed for local testing.
Step 4: Build the Flask Backend
Let’s create the heart of the app, the Python backend that receives webcam frames and saves selfies.
nano app.pyAdd the following code.
from flask import Flask, request, Response, jsonify, render_template
import cv2
import numpy as np
import os
import time
import base64

app = Flask(__name__)

# Create directory for saved selfies
os.makedirs('static/selfies', exist_ok=True)

# Load pre-trained classifiers
face_cascade = cv2.CascadeClassifier(cv2.data.haarcascades + 'haarcascade_frontalface_default.xml')
smile_cascade = cv2.CascadeClassifier(cv2.data.haarcascades + 'haarcascade_smile.xml')

selfie_count = 0
last_capture_time = 0
CAPTURE_COOLDOWN = 2  # seconds between captures

@app.route('/')
def index():
    selfies = sorted([f for f in os.listdir('static/selfies') if f.endswith('.jpg')], reverse=True)
    return render_template('index.html', selfies=selfies)

@app.route('/process_frame', methods=['POST'])
def process_frame():
    global selfie_count, last_capture_time

    # Get image data from POST request
    image_data = request.json['image'].split(',')[1]  # Remove data URL prefix
    nparr = np.frombuffer(base64.b64decode(image_data), np.uint8)
    frame = cv2.imdecode(nparr, cv2.IMREAD_COLOR)

    # Convert to grayscale
    gray = cv2.cvtColor(frame, cv2.COLOR_BGR2GRAY)

    # Detect faces
    faces = face_cascade.detectMultiScale(gray, 1.3, 5)

    result = {'faces': [], 'captured': False}

    for (x, y, w, h) in faces:
        # Add face to result
        result['faces'].append({'x': int(x), 'y': int(y), 'w': int(w), 'h': int(h)})

        # Detect smiles within the face region
        roi_gray = gray[y:y+h, x:x+w]
        smiles = smile_cascade.detectMultiScale(
            roi_gray,
            scaleFactor=1.7,
            minNeighbors=20,
            minSize=(25, 25)
        )

        # If smile detected and cooldown has passed
        current_time = time.time()
        if len(smiles) > 0 and (current_time - last_capture_time) > CAPTURE_COOLDOWN:
            # Save the selfie
            timestamp = time.strftime("%Y%m%d-%H%M%S")
            filename = f"static/selfies/selfie_{timestamp}_{selfie_count}.jpg"
            cv2.imwrite(filename, frame)
            selfie_count += 1
            last_capture_time = current_time
            result['captured'] = True
            result['selfie_url'] = filename

    return jsonify(result)


if __name__ == '__main__':
    app.run(host='0.0.0.0', port=5000, ssl_context=('cert.pem', 'key.pem'))
The above code:
- Loads pre-trained Haar cascade classifiers for face and smile detection.
- Processes video frames sent from the browser.
- Captures and saves selfies when a smile is detected (with a 2-second cooldown).
Step 5: Build the Web Interface
Create a front-end that interacts with the user’s webcam and displays the results.
nano templates/index.htmlAdd the following code.
<!DOCTYPE html>
<html>
<head>
<title>Browser-Based Smile Detection Selfie</title>
<style>
body { font-family: Arial, sans-serif; max-width: 800px; margin: 0 auto; padding: 20px; }
#video { background: #000; width: 100%; }
#canvas { display: none; }
.container { display: flex; flex-direction: column; gap: 20px; }
.face-box { position: absolute; border: 2px solid blue; }
.smile-box { position: absolute; border: 2px solid green; }
.selfie-grid { display: grid; grid-template-columns: repeat(auto-fill, minmax(200px, 1fr)); gap: 10px; margin-top: 20px; }
.selfie { width: 100%; border: 1px solid #ddd; }
.controls { margin: 10px 0; }
button { padding: 8px 16px; background: #4CAF50; color: white; border: none; cursor: pointer; }
button:hover { background: #45a049; }
.camera-feed { position: relative; }
#status { margin: 10px 0; padding: 10px; background: #f8f8f8; }
</style>
</head>
<body>
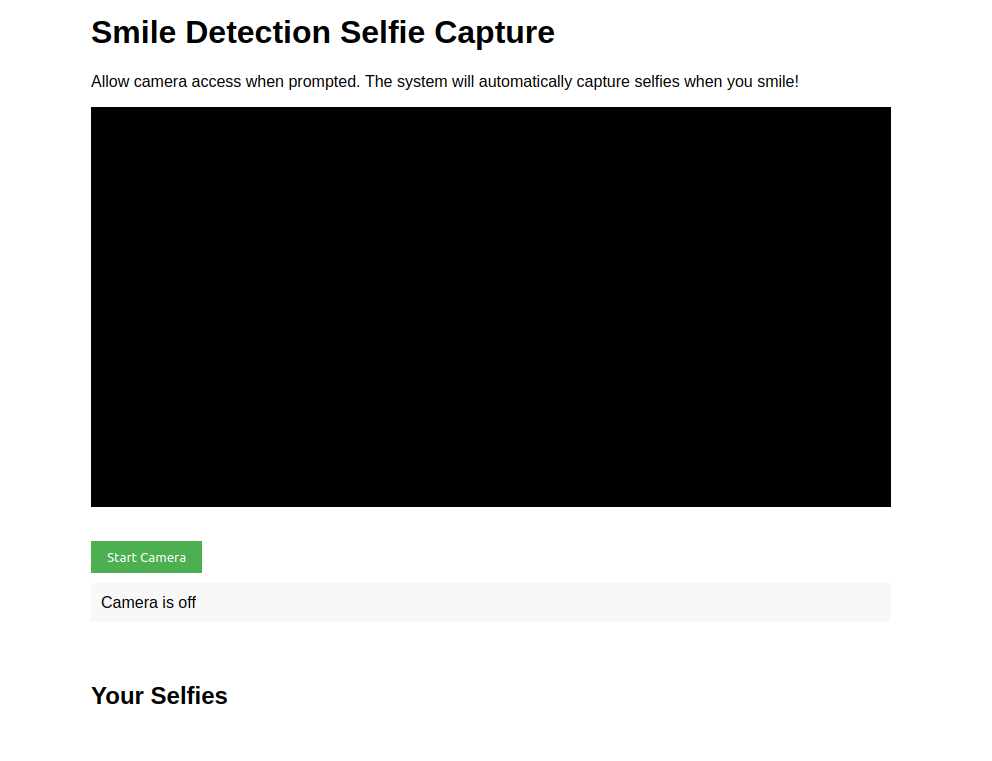
<h1>Smile Detection Selfie Capture</h1>
<p>Allow camera access when prompted. The system will automatically capture selfies when you smile!</p>
<div class="container">
<div class="camera-feed">
<video id="video" autoplay playsinline></video>
<canvas id="canvas"></canvas>
<div id="face-boxes"></div>
</div>
<div class="controls">
<button id="startButton">Start Camera</button>
<div id="status">Camera is off</div>
</div>
<h2>Your Selfies</h2>
<div class="selfie-grid" id="selfieGrid">
{% for selfie in selfies %}
<img src="{{ url_for('static', filename='selfies/' + selfie) }}" class="selfie">
{% endfor %}
</div>
</div>
<script>
const video = document.getElementById('video');
const canvas = document.getElementById('canvas');
const ctx = canvas.getContext('2d');
const faceBoxes = document.getElementById('face-boxes');
const startButton = document.getElementById('startButton');
const statusDiv = document.getElementById('status');
const selfieGrid = document.getElementById('selfieGrid');
let stream = null;
let processing = false;
let animationId = null;
// Set canvas size to match video when it's known
function setCanvasSize() {
canvas.width = video.videoWidth;
canvas.height = video.videoHeight;
}
// Process frame and send to server
async function processFrame() {
if (!processing) return;
// Draw video frame to canvas
ctx.drawImage(video, 0, 0, canvas.width, canvas.height);
// Get image data
const imageData = canvas.toDataURL('image/jpeg');
try {
// Send to server for processing
const response = await fetch('/process_frame', {
method: 'POST',
headers: { 'Content-Type': 'application/json' },
body: JSON.stringify({ image: imageData })
});
const result = await response.json();
// Clear previous boxes
faceBoxes.innerHTML = '';
// Draw face boxes
result.faces.forEach(face => {
const box = document.createElement('div');
box.className = 'face-box';
box.style.left = `${face.x}px`;
box.style.top = `${face.y}px`;
box.style.width = `${face.w}px`;
box.style.height = `${face.h}px`;
faceBoxes.appendChild(box);
});
// If selfie was captured, add to grid
if (result.captured) {
const img = document.createElement('img');
img.className = 'selfie';
img.src = result.selfie_url;
selfieGrid.prepend(img);
statusDiv.textContent = 'Selfie captured! Keep smiling!';
setTimeout(() => {
statusDiv.textContent = 'Looking for smiles...';
}, 2000);
}
} catch (error) {
console.error('Error:', error);
}
// Continue processing
animationId = requestAnimationFrame(processFrame);
}
// Start camera
startButton.addEventListener('click', async () => {
try {
if (stream) {
// Stop existing stream
stream.getTracks().forEach(track => track.stop());
cancelAnimationFrame(animationId);
processing = false;
startButton.textContent = 'Start Camera';
statusDiv.textContent = 'Camera is off';
return;
}
statusDiv.textContent = 'Accessing camera...';
stream = await navigator.mediaDevices.getUserMedia({
video: {
width: { ideal: 640 },
height: { ideal: 480 },
facingMode: 'user'
},
audio: false
});
video.srcObject = stream;
video.onloadedmetadata = () => {
setCanvasSize();
startButton.textContent = 'Stop Camera';
statusDiv.textContent = 'Looking for smiles...';
processing = true;
processFrame();
};
} catch (err) {
statusDiv.textContent = `Error: ${err.message}`;
console.error('Camera error:', err);
}
});
// Clean up on page exit
window.addEventListener('beforeunload', () => {
if (stream) {
stream.getTracks().forEach(track => track.stop());
}
cancelAnimationFrame(animationId);
});
</script>
</body>
</html>This page:
- Lets users start or stop their webcam.
- Sends each frame to the Flask server via /process_frame.
- Draws bounding boxes around detected faces.
- Displays the captured selfies in a grid layout.
Step 6: Run the Flask App
Launch your Flask web server with HTTPS enabled.
python3 app.pyYour app will now listen on https://0.0.0.0:5000 with the SSL certificates. This makes it compatible with browsers requiring a secure context for webcam access.
Step 7: Access the Web Interface
Open your web browser and open the URL https://server-ip:5000.
Once the site loads, click on the “Start Camera” button. Allow camera access when prompted.
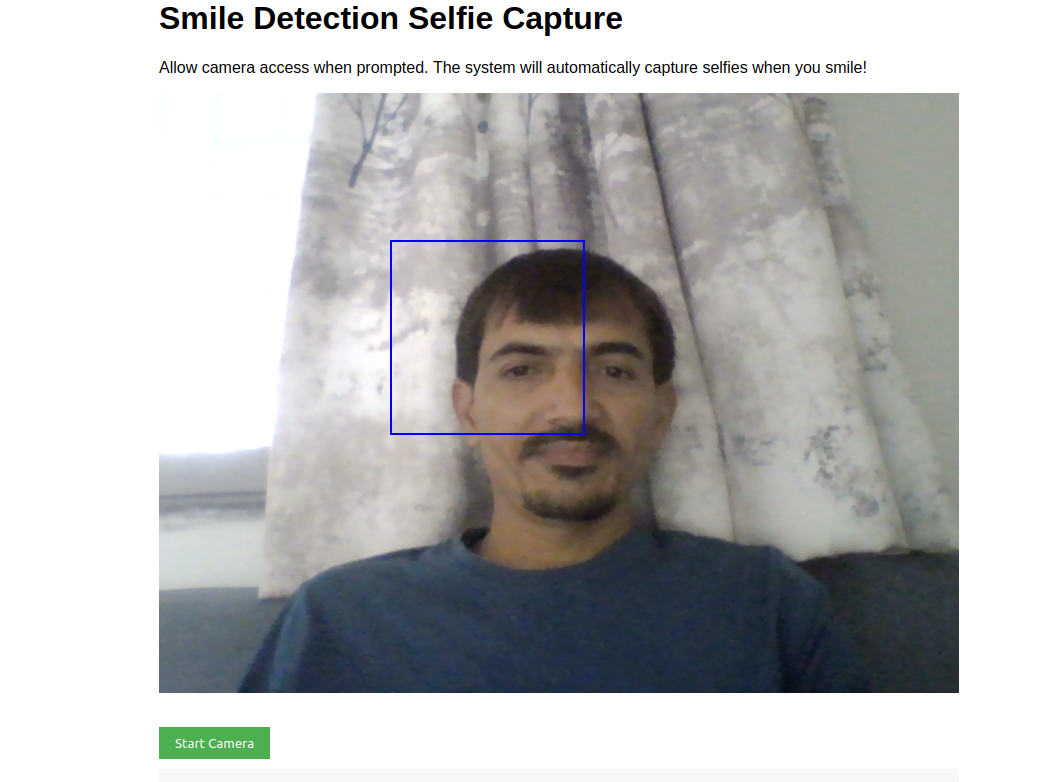
The system will now:
- Show your camera feed.
- Continuously scan for faces.
- Capture and save selfies when it detects a smile.
Every time you smile, the system detects it and captures a selfie, saving it to the static/selfies folder.
Conclusion
You’ve just built a complete smile-activated selfie system using OpenCV and Flask on an Ubuntu 24.04 server. This project is an excellent example of combining computer vision with web development to create real-time, interactive applications.
* This post is for informational purposes only and does not constitute professional, legal, financial, or technical advice. Each situation is unique and may require guidance from a qualified professional.
Readers should conduct their own due diligence before making any decisions.