Emojis and avatars help show feelings without using words. They are now a big part of online chats, product reviews, and even how people connect with brands. As a result, many researchers are investigating how emojis can aid in storytelling. Thanks to new tools like computer vision and deep learning, we can now understand human emotions just by looking at images.
In this tutorial, we’ll build an end-to-end system using deep learning to recognize facial expressions.
Prerequisites
- An Ubuntu 24.04 server with an NVIDIA GPU.
- A non-root user with sudo privileges.
- NVIDIA drivers installed.
Step 1: Setting Up the Environment
1. Install Python package manager and virtual environment tools.
apt install python3-pip python3-venv2. Create a new virtual environment called ’emojify-env’.
python3 -m venv emojify-env3. Activate the virtual environment.
source emojify-env/bin/activate4. Install Flask for the web interface and TensorFlow for deep learning.
pip install flask tensorflow opencv-python numpyStep 2: Project Structure Setup
Organizing files properly is crucial for maintainability. We’ll create a logical directory structure for our project.
1. Create a directory for your project.
mkdir emojify2. Navigate to the directory that was created.
cd emojify3. Create a static and templates directory.
mkdir templates data templates
mkdir -p static/uploads

mkdir -p static/emoji
Step 3: Dataset Preparation
Quality data is the foundation of any machine learning project. We’ll use a facial expression dataset from Kaggle.
1. Download the Emojis dataset from Kaggle.
2. Copy the dataset from your local machine to the server.
scp Downloads/archive.zip root@your-server-ip:/root/3. Unzip the downloaded file to the data directory.
unzip /root/archive.zip -d /root/emojify/dataStep 4: Model Training
The heart of our application is the deep learning model that classifies facial expressions.
1. Create the training script.
nano train.pyAdd the below code.
# train.py

import numpy as np
import cv2
import tensorflow as tf
from tensorflow.keras.models import Sequential
from tensorflow.keras.layers import Conv2D, MaxPooling2D, Dropout, Flatten, Dense
from tensorflow.keras.optimizers import Adam
from tensorflow.keras.preprocessing.image import ImageDataGenerator

# Disable OpenCL for OpenCV (helps avoid unnecessary GPU warnings)
cv2.ocl.setUseOpenCL(False)

# Paths to dataset folders
train_dir = 'data/train'
val_dir = 'data/test'

# Image data generators with rescaling
train_datagen = ImageDataGenerator(rescale=1.0 / 255)
val_datagen = ImageDataGenerator(rescale=1.0 / 255)

# Load training data
train_generator = train_datagen.flow_from_directory(
    train_dir,
    target_size=(48, 48),
    batch_size=64,
    color_mode="grayscale",
    class_mode='categorical'
)

# Load validation data
val_generator = val_datagen.flow_from_directory(
    val_dir,
    target_size=(48, 48),
    batch_size=64,
    color_mode="grayscale",
    class_mode='categorical'
)
# Define CNN model architecture
model = Sequential([
    Conv2D(32, (3, 3), activation='relu', input_shape=(48, 48, 1)),
    Conv2D(64, (3, 3), activation='relu'),
    MaxPooling2D(pool_size=(2, 2)),
    Dropout(0.25),

    Conv2D(128, (3, 3), activation='relu'),
    MaxPooling2D(pool_size=(2, 2)),
    Conv2D(128, (3, 3), activation='relu'),
    MaxPooling2D(pool_size=(2, 2)),
    Dropout(0.25),

    Flatten(),
    Dense(1024, activation='relu'),
    Dropout(0.5),
    Dense(7, activation='softmax')  # 7 emotion categories
])

# Compile model with optimizer and loss function
model.compile(
    loss='categorical_crossentropy',
    optimizer=Adam(learning_rate=0.0001, decay=1e-6),
    metrics=['accuracy']
)

# Train model
history = model.fit(
    train_generator,
    steps_per_epoch=train_generator.samples // train_generator.batch_size,
    epochs=50,
    validation_data=val_generator,
    validation_steps=val_generator.samples // val_generator.batch_size
)
# Save the trained weights
model.save_weights("emotion_model.weights.h5")

print("✅ Training complete. Weights saved to 'emotion_model.weights.h5'.")
2. Run the training script.
python3 train.pyAfter training completes, you should see:
✅ Training complete. Weights saved to 'emotion_model.weights.h5'.Step 5: Creating the Web Application
Now we’ll build the interface that allows users to interact with our model.
1. Create and edit the Flask application file.
nano app.pyAdd the following code to app.py:
# app.py

import os
import numpy as np
import cv2
from flask import Flask, request, render_template
from werkzeug.utils import secure_filename

import tensorflow as tf
from tensorflow.keras.models import Sequential
from tensorflow.keras.layers import Conv2D, MaxPooling2D, Dropout, Flatten, Dense, Input
from tensorflow.keras.optimizers import Adam

# Setup GPU memory growth (avoids memory overload)
gpus = tf.config.experimental.list_physical_devices('GPU')
if gpus:
    try:
        tf.config.experimental.set_memory_growth(gpus[0], True)
    except RuntimeError as e:
        print(e)

# Initialize Flask app
app = Flask(__name__)
app.config['UPLOAD_FOLDER'] = 'static/uploads'
os.makedirs(app.config['UPLOAD_FOLDER'], exist_ok=True)

# Load emotion model
model = Sequential()
model.add(Input(shape=(48, 48, 1)))
model.add(Conv2D(32, (3, 3), activation='relu'))
model.add(Conv2D(64, (3, 3), activation='relu'))
model.add(MaxPooling2D(pool_size=(2, 2)))
model.add(Dropout(0.25))

model.add(Conv2D(128, (3, 3), activation='relu'))
model.add(MaxPooling2D(pool_size=(2, 2)))
model.add(Conv2D(128, (3, 3), activation='relu'))
model.add(MaxPooling2D(pool_size=(2, 2)))
model.add(Dropout(0.25))

model.add(Flatten())
model.add(Dense(1024, activation='relu'))
model.add(Dropout(0.5))
model.add(Dense(7, activation='softmax'))

model.load_weights("emotion_model.weights.h5")

# Emotion labels
emotion_dict = {
    0: "Angry", 1: "Disgusted", 2: "Fearful",
    3: "Happy", 4: "Neutral", 5: "Sad", 6: "Surprised"
}

# Emoji image path map
emoji_paths = {
    0: "static/emojis/angry.png",
    1: "static/emojis/disgusted.png",
    2: "static/emojis/fearful.png",
    3: "static/emojis/happy.png",
    4: "static/emojis/neutral.png",
    5: "static/emojis/sad.png",
    6: "static/emojis/surprised.png"
}

@app.route('/', methods=['GET', 'POST'])
def index():
    if request.method == 'POST':
        file = request.files.get('image')
        if not file:
            return render_template('index.html', error="No image selected.")

        filename = secure_filename(file.filename)
        filepath = os.path.join(app.config['UPLOAD_FOLDER'], filename)
        file.save(filepath)

        try:
            # Load image and convert to grayscale
            img = cv2.imread(filepath)
            gray = cv2.cvtColor(img, cv2.COLOR_BGR2GRAY)

            # Face detection
            face_cascade = cv2.CascadeClassifier(
                cv2.data.haarcascades + "haarcascade_frontalface_default.xml")
            faces = face_cascade.detectMultiScale(gray, scaleFactor=1.3, minNeighbors=5)

            if len(faces) == 0:
                return render_template('index.html', image=filename, message="No face detected.")

            # Take first face detected
            (x, y, w, h) = faces[0]
            roi_gray = gray[y:y+h, x:x+w]
            roi = cv2.resize(roi_gray, (48, 48))
            roi = roi.astype("float32") / 255.0
            roi = np.expand_dims(np.expand_dims(roi, -1), 0)

            prediction = model.predict(roi)
            max_index = int(np.argmax(prediction))
            emotion = emotion_dict[max_index]
            emoji = emoji_paths[max_index]

            return render_template('index.html', image=filename, emotion=emotion, emoji=emoji)

        except Exception as e:
            return render_template('index.html', error=str(e))

    return render_template('index.html')
if __name__ == '__main__':
    app.run(host='0.0.0.0', port=5000, debug=True)
2. Create and edit the HTML template file.
nano templates/index.htmlAdd the following code.
<!DOCTYPE html>
<html>
<head>
    <title>Emojify - Image Upload</title>
</head>
<body style="text-align:center; font-family:Arial; background:#1c1c1c; color:white;">
    <h1>📸 Emojify from Uploaded Photo</h1>
    <form method="POST" enctype="multipart/form-data">
        <input type="file" name="image" required>
        <button type="submit">Upload and Detect</button>
    </form>

    {% if image %}
        <h2>Uploaded Image:</h2>
        <img src="{{ url_for('static', filename='uploads/' ~ image) }}" width="300"><br><br>
    {% endif %}

    {% if emotion %}
        <h2>Predicted Emotion: {{ emotion }}</h2>
        <img src="{{ emoji }}" width="100">
    {% elif message %}
        <h2>{{ message }}</h2>
    {% elif error %}
        <h2 style="color:red;">{{ error }}</h2>
    {% endif %}
</body>
</html>
Step 6: Running the Application
1. Run the Flask web application.
python3 app.pyYou should see output similar to:
* Running on all addresses (0.0.0.0)
* Running on http://127.0.0.1:5000
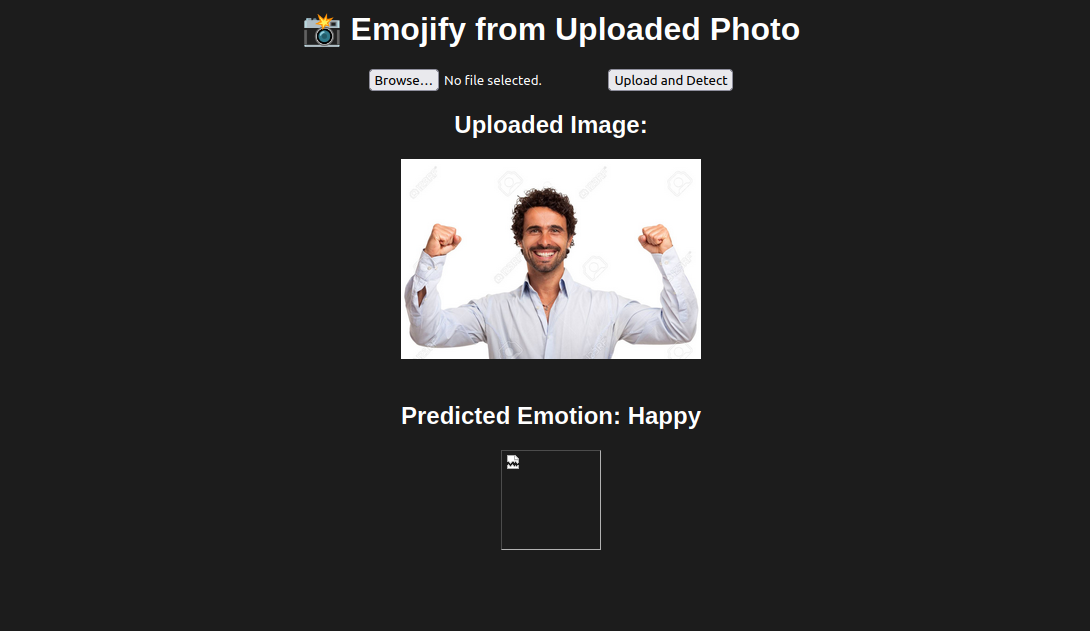
* Running on http://your-server-ip:5000Step 7: Test the Web Application
With everything set up, let’s test our application end-to-end.
1. Open your web browser and access your application using the URL http://your-server-ip:5000/
2. Click “Browse” to select an image from your computer.
3. Click “Upload and Detect” to submit the image.
4. The system will process the image and display the original uploaded image and detected emotion (e.g., Happy, Sad, Angry)
Conclusion
In this tutorial, we have successfully built a comprehensive deep learning pipeline for facial expression recognition and emoji generation. Starting from setting up an Ubuntu 24.04 GPU server, we installed the necessary dependencies, trained a CNN model using TensorFlow, and created a user-friendly web interface with Flask.
* This post is for informational purposes only and does not constitute professional, legal, financial, or technical advice. Each situation is unique and may require guidance from a qualified professional.
Readers should conduct their own due diligence before making any decisions.