Fake news has become a major challenge in today’s digital age, where false information spreads quickly across social media and online platforms. With the growing influence of news on public opinion, it’s essential to detect and stop misinformation before it goes viral.
Traditional methods for manually verifying news are no longer practical due to the sheer volume of content published daily. This is where Machine Learning (ML) plays a critical role — by automatically analyzing patterns in news articles to classify them as real or fake based on their content.
In this guide, we will show you how to build a Fake News Detection system using Machine Learning on an Ubuntu 24.04 GPU server.
Prerequisites
- An Ubuntu 24.04 server with an NVIDIA GPU.
- A non-root user or a user with sudo privileges.
- NVIDIA drivers are installed on your server.
Step 1: Set up Python Environment
First, update your system and install Python 3 along with essential tools.
apt update -y
apt install -y python3 python3-pip python3-venv build-essential
2. Create and activate a virtual environment.
python3 -m venv fakenews-venv
source fakenews-venv/bin/activate
3. Now, install all required Python packages using pip.
pip install numpy pandas scikit-learn flask4. We also install PyTorch libraries, which are not directly used in this project but can enable GPU acceleration for future improvements.
pip install torch torchvision5. We’ll use the Kaggle CLI tool to download the dataset directly from Kaggle.
pip install kaggleStep 2: Download and Prepare the Dataset
Now that your environment is ready, we’ll download the dataset and prepare it for model training.
1. Go to your Kaggle account settings.
2. Create and download an API token (a kaggle.json file).
3. Place kaggle.json in ~/.kaggle/.
4. Download the dataset from Kaggle.
kaggle datasets download -d emineyetm/fake-news-detection-datasets5. Once the download completes, unzip the dataset.
unzip fake-news-detection-datasets.zip6. You should see a folder called News _dataset containing two CSV files.
ls News\ _dataset/Output.
Fake.csv True.csv7. Let’s move the dataset files into the current working directory for convenience.
mv News\ _dataset/*.csv .Step 3: Prepare and Train Data
In this section, we’ll prepare the dataset and train a machine learning model to classify news as real or fake.
1. Create a Python script.
nano prepare_and_train_data.pyAdd the following code.
import pandas as pd
import re
from sklearn.model_selection import train_test_split
from sklearn.feature_extraction.text import TfidfVectorizer

# Step 1: Load and label data
fake = pd.read_csv('Fake.csv')
true = pd.read_csv('True.csv')
fake['label'] = 0
true['label'] = 1
data = pd.concat([fake, true]).sample(frac=1).reset_index(drop=True)

# Step 2: Preprocess text
def clean_text(text):
    text = re.sub(r'[^a-zA-Z ]', '', text)
    text = text.lower()
    return text

data['text'] = data['title'] + " " + data['text']
data['text'] = data['text'].apply(clean_text)

# Step 3: Feature extraction
X = data['text']
y = data['label']

X_train, X_test, y_train, y_test = train_test_split(
    X, y, test_size=0.2, random_state=42
)

vectorizer = TfidfVectorizer(stop_words='english', max_df=0.7)
X_train_tfidf = vectorizer.fit_transform(X_train)
X_test_tfidf = vectorizer.transform(X_test)

# Step 4: Train model

from sklearn.linear_model import LogisticRegression
from sklearn.metrics import accuracy_score, classification_report

# Train the Logistic Regression model
model = LogisticRegression(max_iter=1000)
model.fit(X_train_tfidf, y_train)

# Make predictions on the test set
y_pred = model.predict(X_test_tfidf)

# Print accuracy and a classification report
print("Accuracy:", accuracy_score(y_test, y_pred))
print("Classification report:\n", classification_report(y_test, y_pred))

# Step 5: Save the model

import joblib

# Save the trained model
joblib.dump(model, 'fakenews_model.pkl')

# Save the TF-IDF vectorizer
joblib.dump(vectorizer, 'tfidf_vectorizer.pkl')

print("Model and vectorizer saved successfully!")
This script loads and cleans fake and genuine news data, converts the text into numerical features using TF-IDF, and splits it into training and test sets. It trains a Logistic Regression model to classify news as fake or true, evaluates its performance, and saves both the trained model and vectorizer for future use.
2. Run the script to train and save the model.
python3 prepare_and_train_data.py Expected output.
Accuracy: 0.9867483296213808
Classification report:
               precision    recall  f1-score   support

           0       0.99      0.99      0.99      4705
           1       0.99      0.99      0.99      4275

    accuracy                           0.99      8980
   macro avg       0.99      0.99      0.99      8980
weighted avg       0.99      0.99      0.99      8980

Model and vectorizer saved successfully!
Step 4: Build Flask Web Application
Now that we have a trained model and vectorizer saved (fakenews_model.pkl and tfidf_vectorizer.pkl), we can build a simple web app using Flask, allowing users to paste news text and receive an instant prediction.
1. Create the Flask app.
nano app.pyAdd the following code:
from flask import Flask, render_template, request
import joblib

app = Flask(__name__)

model = joblib.load('fakenews_model.pkl')
vectorizer = joblib.load('tfidf_vectorizer.pkl')

@app.route('/', methods=['GET', 'POST'])
def index():
    prediction = None
    if request.method == 'POST':
        user_text = request.form['news']
        user_text_clean = user_text.lower()
        user_features = vectorizer.transform([user_text_clean])
        pred = model.predict(user_features)[0]
        prediction = 'Real News' if pred == 1 else 'Fake News'
    return render_template('index.html', prediction=prediction)

if __name__ == '__main__':
    app.run(host='0.0.0.0', port=5000, debug=True)
This script:
- Initializes the Flask app.
- Loads the saved model and vectorizer.
- Handles both GET (show empty form) and POST (process user input) requests.
- Displays the prediction back to the user.
2. Create a directory for templates.
mkdir templates3. Create the file index.html for the web interface.
nano templates/index.htmlAdd the following HTML code:
<!DOCTYPE html>
<html>
<head>
    <title>Fake News Detector</title>
</head>
<body>
    <h2>Fake News Detection Web App</h2>
    <form method="POST">
        <textarea name="news" rows="6" cols="60" placeholder="Paste news article or headline here"></textarea><br>
        <button type="submit">Detect</button>
    </form>
    {% if prediction %}
        <h3>Prediction: {{ prediction }}</h3>
    {% endif %}
</body>
</html>
Step 5: Run Flask Application
Now that both the backend (app.py) and frontend (index.html) are ready, let’s run the Flask app so it can serve predictions from your trained model.
1. Start the Flask server.
python3 app.pyOutput.
* Serving Flask app 'app'
* Debug mode: on
WARNING: This is a development server. Do not use it in a production deployment. Use a production WSGI server instead.
* Running on all addresses (0.0.0.0)
* Running on http://127.0.0.1:5000
* Running on http://149.28.70.3:5000
Press CTRL+C to quit
* Restarting with stat
* Debugger is active!
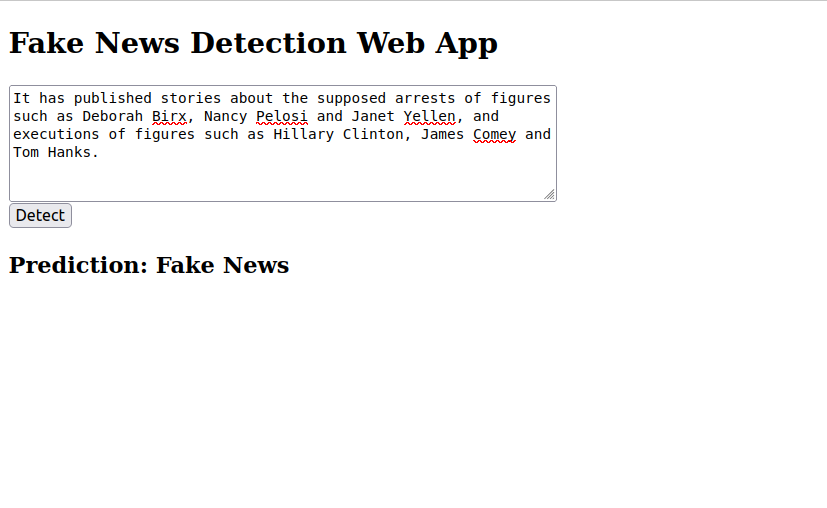
* Debugger PIN: 212-816-2102. Open your web browser and access the Flask app using the URL http://your-server-ip:5000. You should see a simple page titled ‘Fake News Detection Web App‘ with a text area and a ‘Detect’ button.
3. Copy a news article headline or snippet from any online news source. Paste it into the textarea and click the Detect button. The app will process your input, run it through the trained model, and return one of the following results.
Conclusion
In this guide, you built a fake news detection system using machine learning on an Ubuntu 24.04 GPU server. You trained a model, deployed it with Flask, and created a simple web interface for real-time predictions. This project provides a practical foundation for exploring text classification and machine learning deployment. You can now enhance the app further or share it with others for testing and feedback.
* This post is for informational purposes only and does not constitute professional, legal, financial, or technical advice. Each situation is unique and may require guidance from a qualified professional.
Readers should conduct their own due diligence before making any decisions.