Open WebUI is a self-hosted, open-source web interface that allows large language models (LLMs) to run easily. It integrates with Ollama and OpenAI-compatible APIs, so you can add custom AI models and plugins. Whether you’re a developer, researcher or AI enthusiast, Open WebUI is a robust platform for managing and interacting with LLMs.
In this guide, you’ll learn how to install Open WebUI on an Atlantic.Net Cloud GPU instance to run LLMs.
Prerequisites
Before starting, ensure you have the following:
- An Ubuntu 24.04 Cloud GPU Server with 8 GB of GPU memory.
- CUDA Toolkit and cuDNN Installed.
- Git installed: `sudo apt install git`
- A root or sudo privileges.
Step 1: Install Ollama
Ollama is a lightweight framework for running open-source LLMs like Llama, Code Llama, Mistral, and Gemma. It provides APIs for creating, managing, and customizing models, making it an essential component for running Open WebUI. Follow these steps to install Ollama and download a sample model.
1. Download the Ollama installation script:
wget https://ollama.ai/install.sh2. Grant execute permissions to the script:
chmod +x install.sh3. Run the script to install Ollama:
./install.shOutput.
>>> Installing ollama to /usr/local
>>> Downloading Linux amd64 bundle
############################################################################################################### 100.0%
>>> Creating ollama user...
>>> Adding ollama user to render group...
>>> Adding ollama user to video group...
>>> Adding current user to ollama group...
>>> Creating ollama systemd service...
>>> Enabling and starting ollama service...
Created symlink /etc/systemd/system/default.target.wants/ollama.service → /etc/systemd/system/ollama.service.
>>> NVIDIA GPU installed.
4. Enable the Ollama service to start at boot:
systemctl enable ollama5. Start the Ollama service:
systemctl start ollama6. Verify the Ollama service status:
systemctl status ollamaOutput.
● ollama.service - Ollama Service
     Loaded: loaded (/etc/systemd/system/ollama.service; enabled; preset: enabled)
     Active: active (running) since Tue 2025-03-18 11:26:38 UTC; 21min ago
   Main PID: 5783 (ollama)
      Tasks: 31 (limit: 17886)
     Memory: 5.0G (peak: 5.0G)
        CPU: 27.539s
     CGroup: /system.slice/ollama.service
             ├─5783 /usr/local/bin/ollama serve
             └─6864 /usr/local/bin/ollama runner --model /usr/share/ollama/.ollama/models/blobs/sha256-6a0746a1ec1aef3e7ec53868f220ff6e389f6f8ef87a01d77c96807de94ca2aa>

Mar 18 11:44:52 ubuntu ollama[5783]: llama_init_from_model:  CUDA_Host  output buffer size =     2.02 MiB
Mar 18 11:44:52 ubuntu ollama[5783]: llama_init_from_model:      CUDA0 compute buffer size =   560.00 MiB
Mar 18 11:44:52 ubuntu ollama[5783]: llama_init_from_model:  CUDA_Host compute buffer size =    24.01 MiB
Mar 18 11:44:52 ubuntu ollama[5783]: llama_init_from_model: graph nodes  = 1030
Mar 18 11:44:52 ubuntu ollama[5783]: llama_init_from_model: graph splits = 2
Mar 18 11:44:52 ubuntu ollama[5783]: time=2025-03-18T11:44:52.653Z level=INFO source=server.go:624 msg="llama runner started in 1.51 seconds"
Mar 18 11:44:53 ubuntu ollama[5783]: [GIN] 2025/03/18 - 11:44:53 | 200 |  2.827091744s |       127.0.0.1 | POST     "/api/chat"
Mar 18 11:44:56 ubuntu ollama[5783]: [GIN] 2025/03/18 - 11:44:56 | 200 |  2.410066333s |       127.0.0.1 | POST     "/api/chat"
Mar 18 11:44:56 ubuntu ollama[5783]: [GIN] 2025/03/18 - 11:44:56 | 200 |   256.13705ms |       127.0.0.1 | POST     "/api/chat"
Mar 18 11:44:57 ubuntu ollama[5783]: [GIN] 2025/03/18 - 11:44:57 | 200 |  803.167998ms |       127.0.0.1 | POST     "/api/chat"
7. Use Ollama to download a sample model, such as llama3:8b:
ollama pull llama3:8bStep 2: Install Open WebUI
Open WebUI can be installed using Python Pip or Docker. The Pip method requires Python 3.11 or greater version.
1. Install Pythen3 and additional dependencies.
apt install python3-venv python3-pip2. Create a Python virtual environment and activate it.
python3 -m venv venv
source venv/bin/activate
3. Install Open WebUI.
pip install open-webui4. Upgrade the Pillow and pyopenssl modules.
pip install -U Pillow pyopenssl5. Install additional libraries.
pip install ffmpeg uvicorn6. Run Open WebUI and verify it starts without errors.
open-webui serve &Output.
WARNING: CORS_ALLOW_ORIGIN IS SET TO '*' - NOT RECOMMENDED FOR PRODUCTION DEPLOYMENTS.

INFO  [open_webui.env] Embedding model set: sentence-transformers/all-MiniLM-L6-v2
/root/venv/lib/python3.12/site-packages/pydub/utils.py:170: RuntimeWarning: Couldn't find ffmpeg or avconv - defaulting to ffmpeg, but may not work
  warn("Couldn't find ffmpeg or avconv - defaulting to ffmpeg, but may not work", RuntimeWarning)
WARNI [langchain_community.utils.user_agent] USER_AGENT environment variable not set, consider setting it to identify your requests.

 ██████╗ ██████╗ ███████╗███╗   ██╗    ██╗    ██╗███████╗██████╗ ██╗   ██╗██╗
██╔═══██╗██╔══██╗██╔════╝████╗  ██║    ██║    ██║██╔════╝██╔══██╗██║   ██║██║
██║   ██║██████╔╝█████╗  ██╔██╗ ██║    ██║ █╗ ██║█████╗  ██████╔╝██║   ██║██║
██║   ██║██╔═══╝ ██╔══╝  ██║╚██╗██║    ██║███╗██║██╔══╝  ██╔══██╗██║   ██║██║
╚██████╔╝██║     ███████╗██║ ╚████║    ╚███╔███╔╝███████╗██████╔╝╚██████╔╝██║
 ╚═════╝ ╚═╝     ╚══════╝╚═╝  ╚═══╝     ╚══╝╚══╝ ╚══════╝╚═════╝  ╚═════╝ ╚═╝


v0.5.20 - building the best open-source AI user interface.

https://github.com/open-webui/open-webui
7. Allow the Open WebUI port 8080 via UFW.
ufw allow 8080Step 3: Access Open WebUI
Once Open WebUI is installed, you can access it via your server IP. Follow these steps to set up an administrator account and start using the interface.
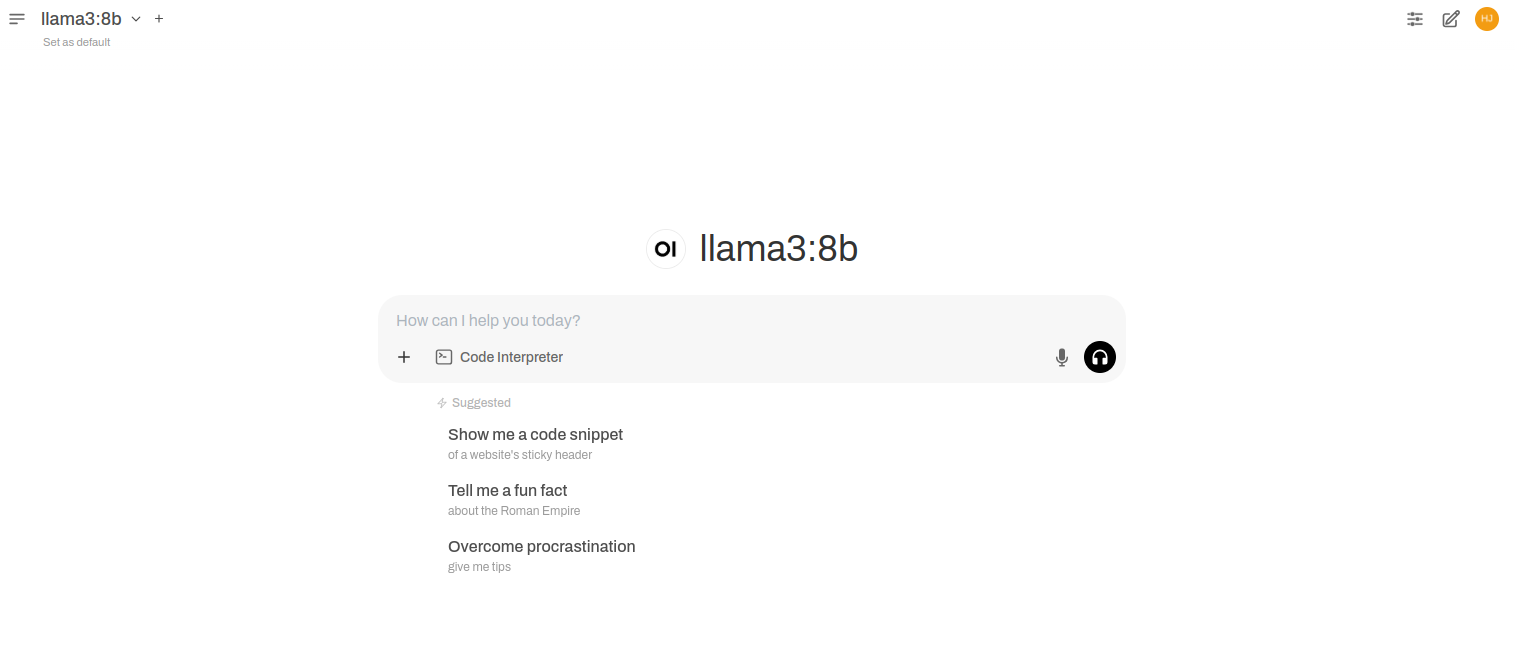
1. Access your Open WebUI using the URL http://your-server-ip:8080.

2. Click Get Started to open the web interface.
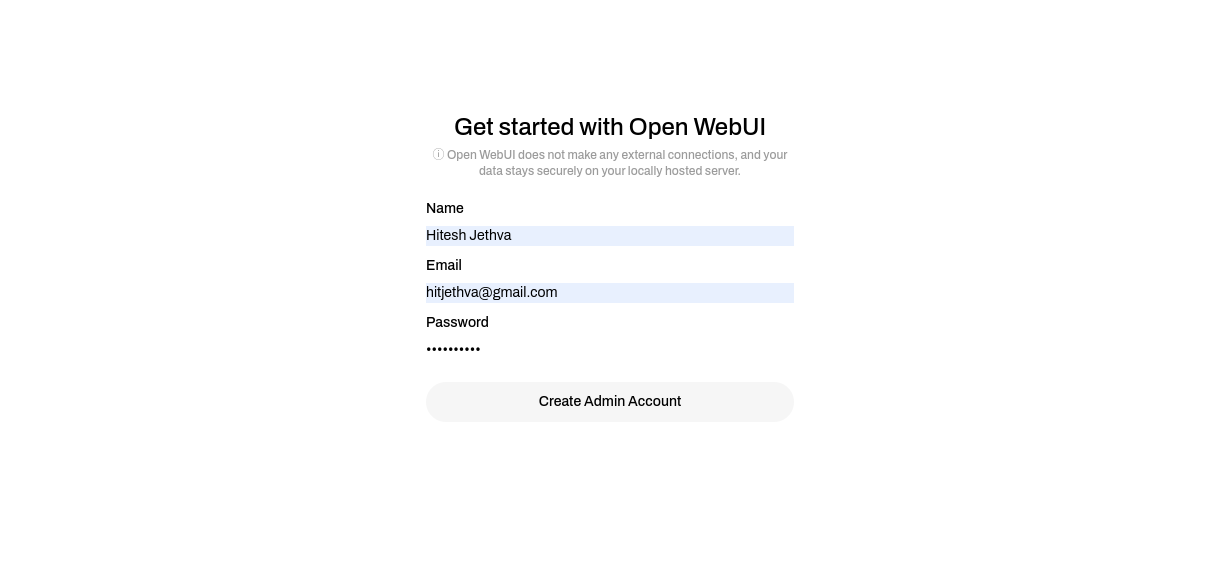
3. Create a new administrator account by entering a username, email address, and password. Then, click on Create Admin Account.
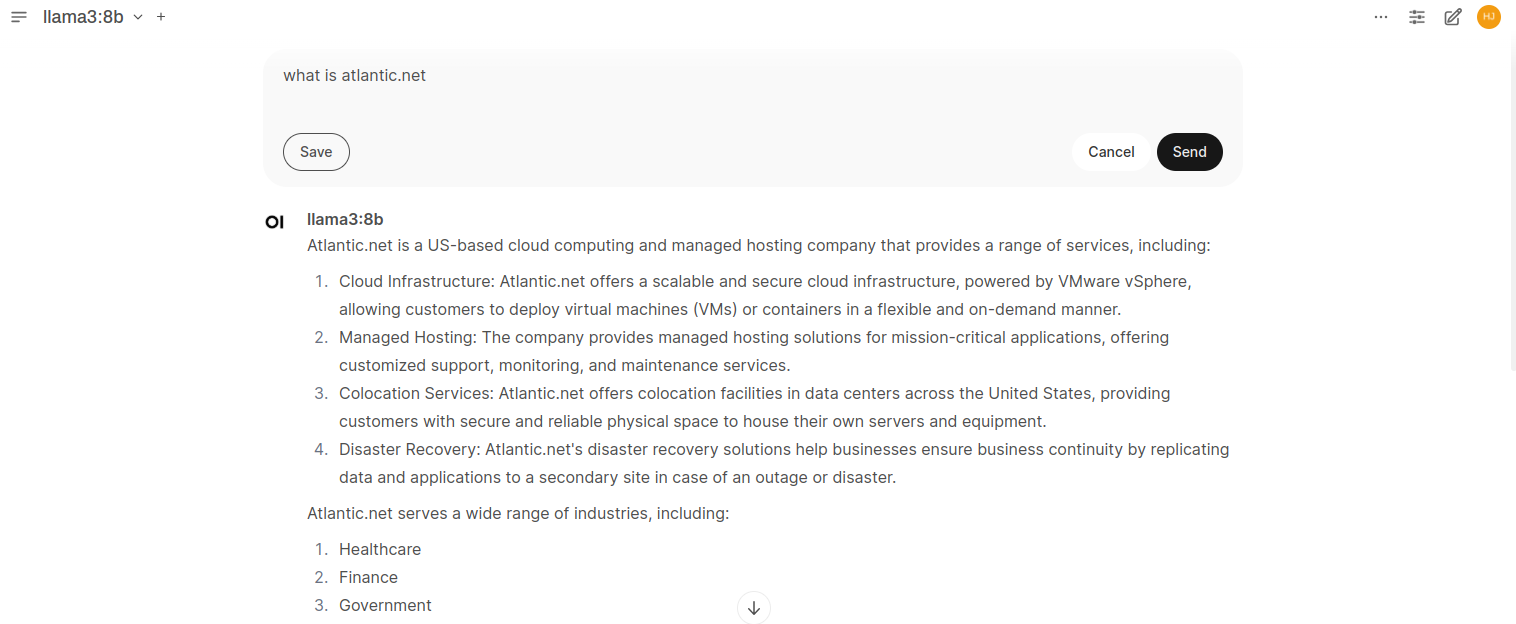
4. Enter a prompt, “What is atlantic.net?” Then click on Send to generate a response using the model. You will see the answer on the following screen.
Conclusion
Open WebUI is a powerful and flexible web interface to run large language models on your server. You’ve now installed Open WebUI on an Atlantic.Net Cloud GPU instance, configured it with Ollama and added SSL certificates. You can now customize the interface, add more models and create multiple user accounts to share your LLMs.
* This post is for informational purposes only and does not constitute professional, legal, financial, or technical advice. Each situation is unique and may require guidance from a qualified professional.
Readers should conduct their own due diligence before making any decisions.