Table of Contents
- Prerequisites
- Step 1: Install System Dependencies
- Step 2: Create and Activate a Python Virtual Environment
- Step 3: Upgrade pip and install Whisper
- Step 4: Install PyTorch with CUDA Support
- Step 5: Install Additional Required Packages
- Step 6: Create the Application Script
- Step 7: Run the Application
- Step 6: Accessing the Web Interface
- Conclusion
Real-time transcription of spoken language into text has numerous applications, ranging from live captioning and meeting transcription to accessibility tools and virtual assistants. OpenAI’s Whisper model provides powerful multilingual speech recognition capabilities, and when deployed on a GPU-enabled Ubuntu 24.04 server, it can handle real-time audio with high accuracy and minimal latency.
In this guide, you’ll learn how to set up and run Whisper for real-time speech-to-text on Ubuntu 24.04 with GPU support.
Prerequisites
- An Ubuntu 24.04 server with an NVIDIA GPU.
- A non-root user with sudo privileges.
- NVIDIA drivers installed.
Step 1: Install System Dependencies
First, we need to install the essential system packages that Whisper and its supporting libraries require.
apt install -y ffmpeg python3 python3-venv python3-pip portaudio19-devStep 2: Create and Activate a Python Virtual Environment
Using a virtual environment isolates our Whisper installation, preventing conflicts with system Python packages.
python3 -m venv whisper-env
source whisper-env/bin/activate
Step 3: Upgrade pip and install Whisper
With our environment ready, we can now install Whisper and its dependencies.
First, upgrade pip to the latest version.
pip install --upgrade pipInstall Whisper.
pip install git+https://github.com/openai/whisper.gitStep 4: Install PyTorch with CUDA Support
For GPU acceleration, we need to install PyTorch with CUDA 12.1 support (compatible with NVIDIA GPUs).
pip install torch torchvision torchaudio --index-url https://download.pytorch.org/whl/cu121Step 5: Install Additional Required Packages
We will need a few additional Python packages for audio handling and our web interface.
pip install sounddevice numpy gradio- sounddevice for microphone access
- numpy for numerical operations
- gradio for creating a web interface
Step 6: Create the Application Script
Now we’ll create a Python script that loads the Whisper model and provides a web interface for transcription.
Create a new file named app.py:
nano app.pyAdd the following code.
import whisper
import gradio as gr
import datetime

# Load Whisper model (use "medium" or "large" for better accuracy if needed)
model = whisper.load_model("base")

# Error log file
LOG_FILE = "error_logs.txt"

# Log errors to file
def log_error(error_message):
    with open(LOG_FILE, "a") as f:
        timestamp = datetime.datetime.now().strftime("%Y-%m-%d %H:%M:%S")
        f.write(f"[{timestamp}] {error_message}\n")

# Transcription logic
def transcribe_audio(audio):
    try:
        if audio is None:
            return "❌ No audio received. Please record or upload an audio file."
        result = model.transcribe(audio)
        return result["text"]
    except Exception as e:
        log_error(str(e))
        return f"⚠️ Error occurred: {e}"

# Gradio interface
with gr.Blocks() as demo:
    gr.Markdown("## 🎙️ Whisper Real-Time Speech-to-Text on Ubuntu 24.04 GPU Server")

    # Input type selection
    input_method = gr.Radio(["Upload Audio File", "Record via Microphone"], label="Choose Input Method", value="Upload Audio File")

    # Both audio components are now the same due to gradio v4+ behavior
    upload_audio = gr.Audio(type="filepath", label="📂 Upload Audio File", visible=True)
    record_audio = gr.Audio(type="filepath", label="🎤 Record via Microphone", visible=False)

    output_text = gr.Textbox(label="📝 Transcribed Text")

    # Show/hide audio inputs dynamically
    def toggle_inputs(method):
        return (
            gr.update(visible=(method == "Upload Audio File")),
            gr.update(visible=(method == "Record via Microphone"))
        )

    input_method.change(fn=toggle_inputs, inputs=input_method, outputs=[upload_audio, record_audio])

    # Decide which audio input to use and transcribe
    def handle_transcription(upload, record, method):
        audio = upload if method == "Upload Audio File" else record
        return transcribe_audio(audio)

    transcribe_button = gr.Button("🔍 Transcribe")
    transcribe_button.click(fn=handle_transcription, inputs=[upload_audio, record_audio, input_method], outputs=output_text)

# Launch app with public sharing link
demo.launch(share=True)
This script:
- Loads the Whisper base model (you can change to “medium” or “large” for better accuracy)
- Sets up error logging to a file
- Creates a Gradio web interface with options to either upload audio files or record directly
- Implements the transcription logic that processes audio through Whisper
- Provides a clean interface for viewing results
Step 7: Run the Application
With everything set up, launch the application:
python3 app.pyThis starts the web server and provides both local and public URLs to access the interface.
 checkpoint = torch.load(fp, map_location=device)
* Running on local URL:  http://127.0.0.1:7860
* Running on public URL: https://c914b0a89448da8a6d.gradio.live
Step 6: Accessing the Web Interface
Open your web browser and access the web UI using the URL https://c914b0a89448da8a6d.gradio.live from the above output.
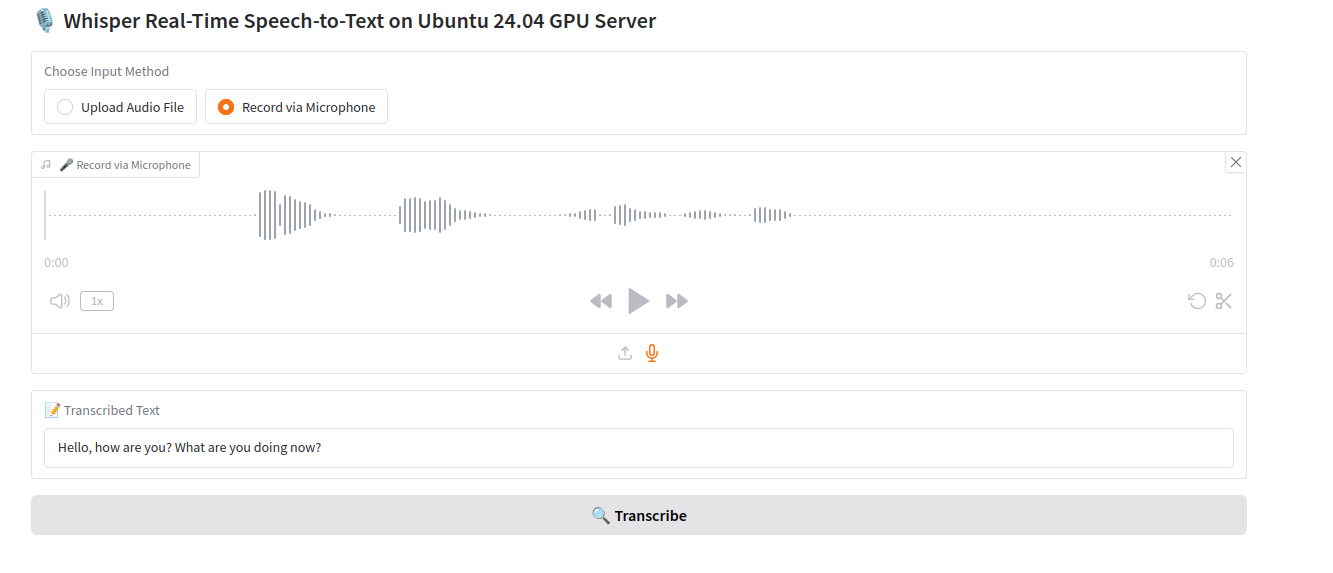
Select “Record via Microphone” as the input method.
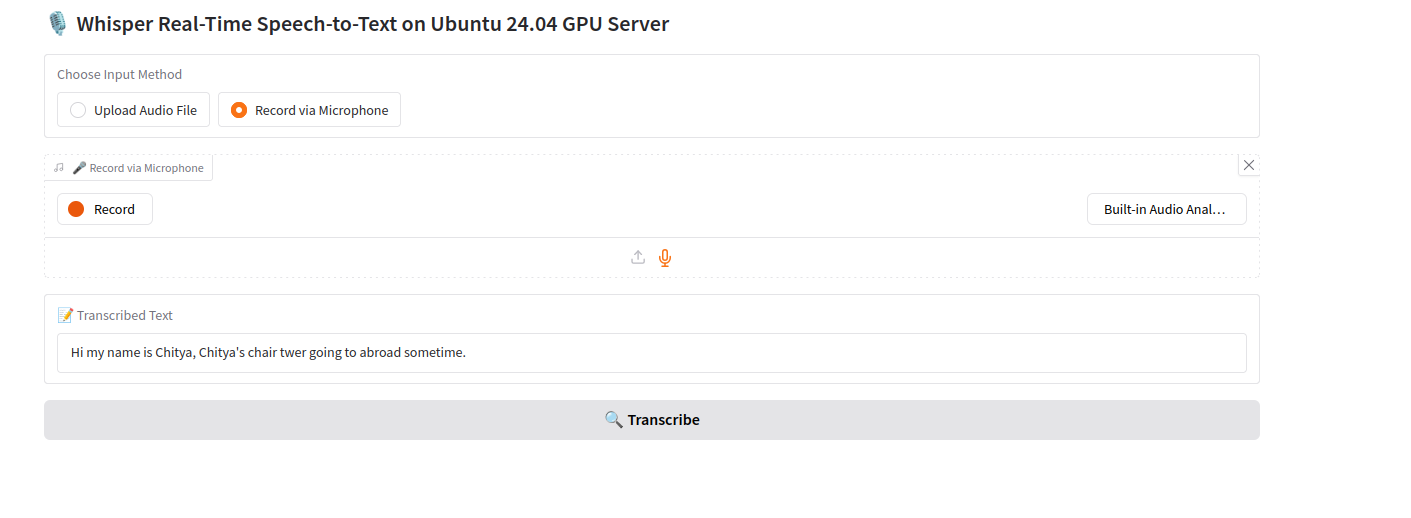
Click the microphone icon on the interface and click on Record to start recording.
Stop recording by clicking the same icon again.
Click “Transcribe” to process the recording. Whisper transcribes the audio and displays the resulting text.
Conclusion
You have successfully set up Whisper for real-time speech-to-text transcription on your Ubuntu GPU server, complete with a web-based user interface. You can further customize the Whisper model or enhance the web application according to your needs.
* This post is for informational purposes only and does not constitute professional, legal, financial, or technical advice. Each situation is unique and may require guidance from a qualified professional.
Readers should conduct their own due diligence before making any decisions.