Table of Contents
- Prerequisites
- Step 1 - Install Required Packages
- Step 2 - Create a JupyterLite Project
- Step 3 - Install JupyterLite and Dependencies
- Step 4 - Build and Serve JupyterLite Locally
- Step 5 - Create a Sample Notebook
- Step 6 - Rebuild JupyterLite with Custom Content
- Step 7 - Configure NGINX as a Reverse Proxy
- Step 8 - Access JupyterLite in the Browser
- Conclusion
Jupyter notebooks are one of the most popular tools for data science, machine learning, and interactive coding. Traditionally, they run on a backend kernel such as Python, R, or Julia, requiring you to install Jupyter Notebook or JupyterLab along with all dependencies on your server. But with JupyterLite, things work differently.
JupyterLite is a lightweight distribution of JupyterLab that runs entirely in the browser, powered by WebAssembly and Pyodide. This means you can open and execute notebooks directly from your web browser without needing a dedicated Python kernel running in the background. It’s fast, portable, and ideal for lightweight coding, education, and demos.
In this guide, you’ll learn how to set up JupyterLite on an Ubuntu 24.04 GPU server.
Prerequisites
- An Ubuntu 24.04 server with an NVIDIA GPU.
- A non-root user or a user with sudo privileges.
- NVIDIA drivers are installed on your server.
Step 1 – Install Required Packages
To begin, you need to install Python, pip, and the virtual environment tools that will help you isolate your JupyterLite setup from the system environment. Ubuntu 24.04 already comes with Python 3, but it’s good practice to install the latest packages and confirm everything is ready.
1. Update all system packages.
apt update -y
2. Install Python3 and other packages.
apt install -y python3 python3-pip python3-venv
3. Once installed, check the versions to confirm everything is in place.
python3 --version
Step 2 – Create a JupyterLite Project
Now that you have Python and pip installed, the next step is to create a dedicated project directory for JupyterLite. This keeps everything organized and avoids cluttering your system with random files.
1. Create a new directory and navigate into it.
mkdir ~/jupyterlite-project
cd ~/jupyterlite-project
2. Create a virtual environment for your project.
python3 -m venv venv
3. Activate the virtual environment.
source venv/bin/activate
With the environment ready, the next step is to install JupyterLite and its dependencies.
Step 3 – Install JupyterLite and Dependencies
With your virtual environment active, you can now install JupyterLite and the supporting packages it needs to run.
1. First, upgrade pip so you’re working with the latest package manager:
pip install --upgrade pip
2. Next, install JupyterLite along with the Pyodide kernel and required Jupyter components:
pip install jupyterlite-core jupyterlite-pyodide-kernel jupyter-server jupyterlab_server
3. After installation, verify that JupyterLite is available by checking its version:
jupyter lite --version
Output.
0.6.4
This confirms that JupyterLite is successfully installed and ready to build.
Step 4 – Build and Serve JupyterLite Locally
With JupyterLite installed, the next step is to build the project and launch it in your browser. JupyterLite generates a static site containing your notebook environment, which can then be served locally or via a web server.
1. Run the following command to build the JupyterLite site.
jupyter lite build
This creates an _output directory inside your project folder. It contains the HTML, JavaScript, and configuration files that power JupyterLite.
2. Once the build is complete, start the local debug server.
jupyter lite serve
You should see output similar to:
		Serving JupyterLite Debug Server from:
			/root/jupyterlite-project/_output
		on:
			http://127.0.0.1:8888/index.html
Press CTRL + C in the terminal to stop the server when you’re done testing.
Step 5 – Create a Sample Notebook
Now that JupyterLite is running, let’s add some real content. By default, JupyterLite serves an empty environment. To make it more useful, you can create and include your own notebooks.
1. First, install the nbformat package, which lets you programmatically create Jupyter notebooks.
pip install nbformat
2. Inside your project, create a directory named content. This is where your notebooks will be stored.
mkdir content
3. Use Python to generate a simple notebook with both Markdown and code cells.
python3 <
4. List the content directory to confirm the notebook was created.
ls content
Output.
sample_notebook.ipynb
Step 6 – Rebuild JupyterLite with Custom Content
Now that you’ve created a sample notebook, you need to rebuild JupyterLite to include the new content. By default, JupyterLite won’t automatically detect new files — you must clean the old build and rebuild it with your content folder.
1. Run the following command to remove the old build files.
jupyter lite clean
This clears the _output directory so the next build will start fresh.
2. Next, rebuild JupyterLite while pointing it to the content directory.
jupyter lite build --contents content/
This process copies your sample_notebook.ipynb file into the JupyterLite site, making it available in the browser.
3. Now, start the Jupyter server.
jupyter lite serve --port 8888 --host 0.0.0.0 &
Step 7 – Configure NGINX as a Reverse Proxy
Right now, JupyterLite is running on port 8888, which isn’t very convenient to access. To make it accessible via a clean domain name (like http://jupyter.mydomain.com), you can set up NGINX as a reverse proxy.
1. First, install NGINX on your server.
apt install nginx -y
2. Open the default site configuration file.
nano /etc/nginx/sites-enabled/default
Replace its contents with the following configuration.
server {
    listen 80;
    server_name jupyter.mydomain.com;

    location / {
        proxy_pass http://127.0.0.1:8888;
        proxy_set_header Host $host;
        proxy_set_header X-Real-IP $remote_addr;
    }
}
3. Before applying changes, test the configuration to ensure there are no syntax errors.
nginx -t
4. If the test passes, restart NGINX.
systemctl restart nginx
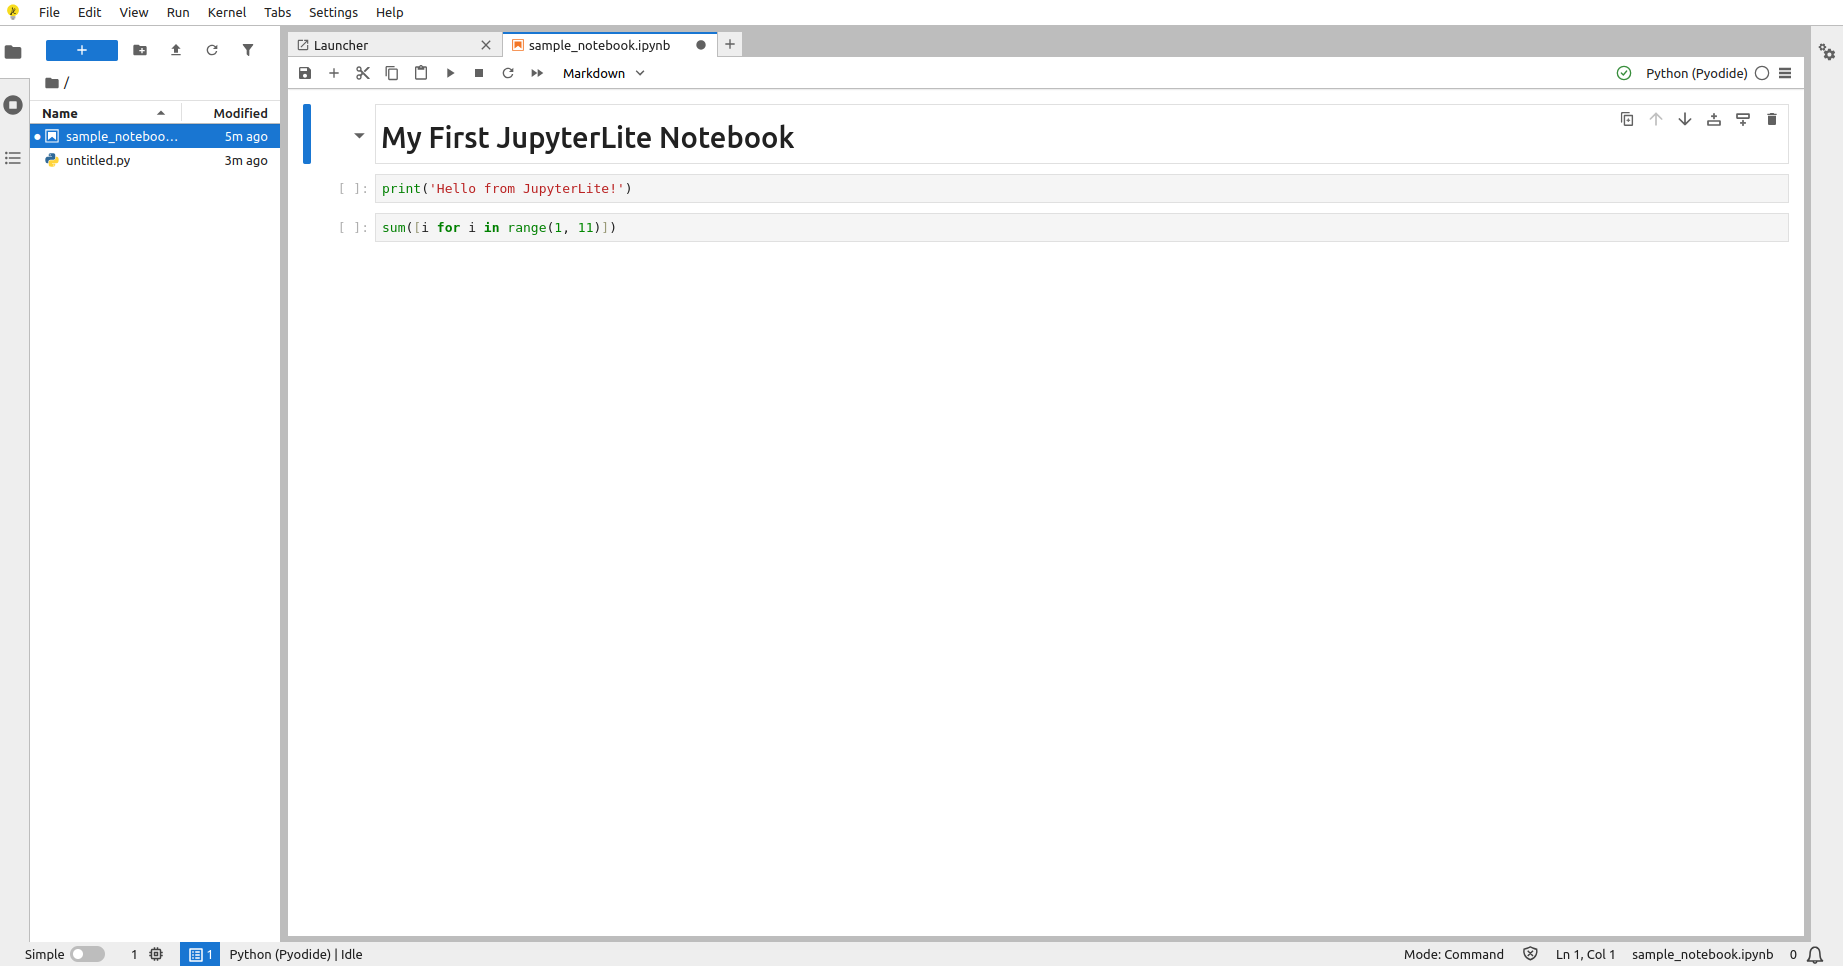
Step 8 – Access JupyterLite in the Browser
With NGINX configured, your JupyterLite environment is now accessible through a simple domain name.
1. Open your browser and go to http://jupyter.mydomain.com. From the file browser, open the notebook you created earlier. You will see the screen below.
Conclusion
In this tutorial, you have installed JupyterLite on Ubuntu 24.04, built a custom project, created a sample notebook, and served it in the browser using NGINX. This setup provides a lightweight Jupyter environment that runs entirely on the client side, eliminating the need for a backend kernel. With your domain pointing to JupyterLite, you can now share notebooks that anyone can open and run directly from their browser. To take it further, you can secure your deployment with HTTPS, add more notebooks, and use this setup for teaching, demos, or quick coding tasks.
* This post is for informational purposes only and does not constitute professional, legal, financial, or technical advice. Each situation is unique and may require guidance from a qualified professional.
Readers should conduct their own due diligence before making any decisions.