TensorFlow is a popular open-source tool that makes it easier to build and train machine learning and deep learning models. It’s widely used by developers and companies to solve real-world problems using AI. TensorFlow provides everything needed to create powerful and scalable machine learning applications.
This guide shows you how to set up a temporary or permanent TensorFlow workspace using Docker and NVIDIA’s GPU tools.
Prerequisites
Before getting started, ensure you have:
- An Ubuntu 24.04 server with NVIDIA GPU(s).
- NVIDIA drivers installed.
- A non-root user with sudo privileges.
Step 1: Check if Your GPU is Working
Before starting, make sure your GPU is available.
1. Run this command on your server:
nvidia-smiThis will show GPU details like model, memory, and usage.
Sat Jun  7 07:20:18 2025
+-----------------------------------------------------------------------------------------+
| NVIDIA-SMI 550.90.07              Driver Version: 550.90.07      CUDA Version: 12.9     |
|-----------------------------------------+------------------------+----------------------+
| GPU  Name                 Persistence-M | Bus-Id          Disp.A | Volatile Uncorr. ECC |
| Fan  Temp   Perf          Pwr:Usage/Cap |           Memory-Usage | GPU-Util  Compute M. |
|                                         |                        |               MIG M. |
|=========================================+========================+======================|
|   0  NVIDIA A40-12Q                 On  |   00000000:06:00.0 Off |                    0 |
| N/A   N/A    P0             N/A /  N/A  |       1MiB /  12288MiB |      0%      Default |
|                                         |                        |                  N/A |
+-----------------------------------------+------------------------+----------------------+

+-----------------------------------------------------------------------------------------+
| Processes:                                                                              |
|  GPU   GI   CI        PID   Type   Process name                              GPU Memory |
|        ID   ID                                                               Usage      |
|=========================================================================================|
|  No running processes found                                                             |
+-----------------------------------------------------------------------------------------+
2. Run the nvidia-smi command inside a container to check if Docker can access the GPU.
docker run --rm --gpus all nvidia/cuda:12.9.0-base-ubuntu24.04 nvidia-smiExplanation:
- –rm deletes the container after use.
- –gpus all lets Docker use the GPU.
If you see GPU info, everything is working!
Sat Jun  7 08:05:20 2025
+-----------------------------------------------------------------------------------------+
| NVIDIA-SMI 550.90.07              Driver Version: 550.90.07      CUDA Version: 12.9     |
|-----------------------------------------+------------------------+----------------------+
| GPU  Name                 Persistence-M | Bus-Id          Disp.A | Volatile Uncorr. ECC |
| Fan  Temp   Perf          Pwr:Usage/Cap |           Memory-Usage | GPU-Util  Compute M. |
|                                         |                        |               MIG M. |
|=========================================+========================+======================|
|   0  NVIDIA A40-12Q                 On  |   00000000:06:00.0 Off |                    0 |
| N/A   N/A    P0             N/A /  N/A  |       1MiB /  12288MiB |      0%      Default |
|                                         |                        |                  N/A |
+-----------------------------------------+------------------------+----------------------+

+-----------------------------------------------------------------------------------------+
| Processes:                                                                              |
|  GPU   GI   CI        PID   Type   Process name                              GPU Memory |
|        ID   ID                                                               Usage      |
|=========================================================================================|
|  No running processes found                                                             |
+-----------------------------------------------------------------------------------------+
3. Install required dependencies.
apt install -y python3-pip python3-venv 4. Create and activate the Python virtual environment.
python3 -m venv venv
source venv/bin/activate
5. Install Jupyter notebook.
pip install jupyterStep 2: Set Up a Temporary TensorFlow Workspace
Atlantic.Net Cloud GPU servers let you use powerful GPUs without buying expensive hardware. These servers are great for training machine learning models faster. In this section, we’ll show you how to quickly set up a temporary TensorFlow workspace on an Atlantic.Net Cloud GPU server.
1. Run TensorFlow in a Docker container.
docker run --rm --gpus all -p 8888:8888 -v /root/notebooks:/tf/notebooks tensorflow/tensorflow:2.15.0-gpu-jupyterExplanation:
- -p 8888:8888 makes Jupyter Notebook accessible on port 8888.
- -v /root/notebooks:/tf/notebooks saves notebooks to your server.
You will see the following output containing Jupyter URL.
    To access the server, open this file in a browser:
        file:///root/.local/share/jupyter/runtime/jpserver-1-open.html
    Or copy and paste one of these URLs:
        http://c9af04990219:8888/tree?token=73873d6313d74f4477d83e15ffc4d95983ab8fd8e9f24be2
        http://127.0.0.1:8888/tree?token=73873d6313d74f4477d83e15ffc4d95983ab8fd8e9f24be2
2. Open a web browser and access the Jupyter notebook using the URL http://your-server-ip:8888/tree?token=73873d6313d74f4477d83e15ffc4d95983ab8fd8e9f24be2
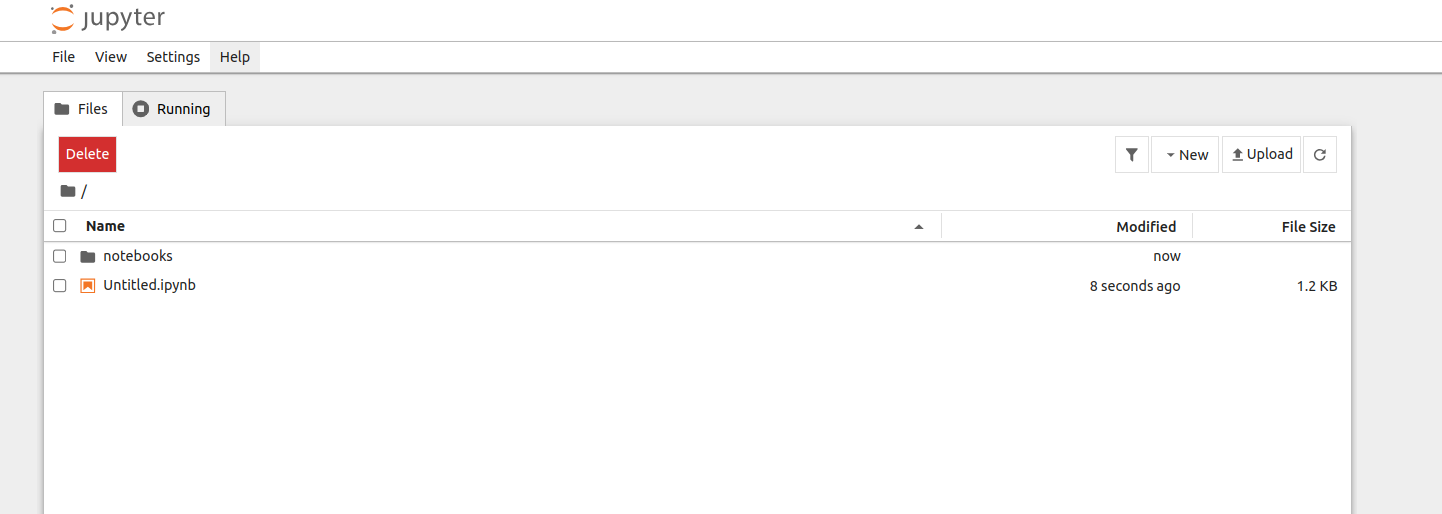
3. Create a new notebook from the top left menu (file > new) .
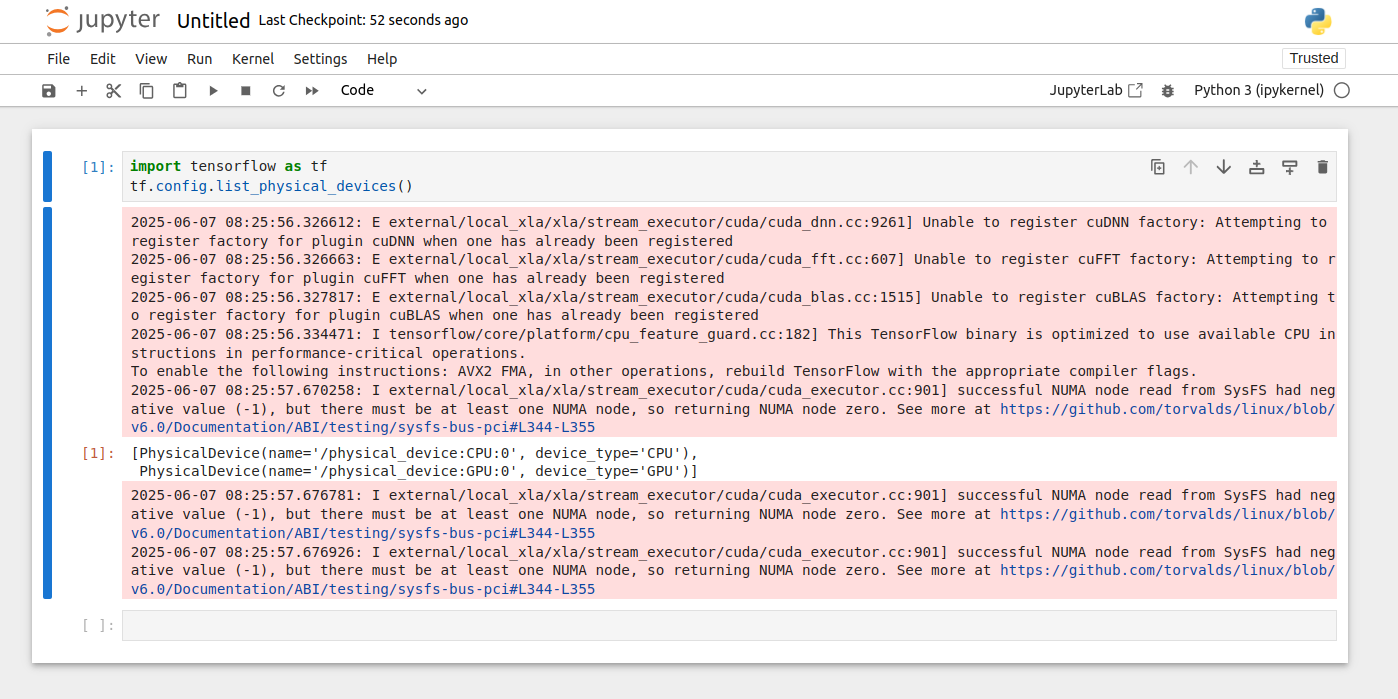
4. Run the following code in the Notebook cell.
import tensorflow as tf
tf.config.list_physical_devices()
If you see CPU and GPU listed, TensorFlow is using the GPU!
[PhysicalDevice(name='/physical_device:CPU:0', device_type='CPU'),
 PhysicalDevice(name='/physical_device:GPU:0', device_type='GPU')]
Step 3: Set Up a Permanent TensorFlow Workspace
For long-term use, we’ll use Docker Compose with Nginx (for secure access) and HTTPS.
1. Install Docker Compose.
apt install docker-compose -y2. Create and navigate to the new directory named tensorflow-workspace.
mkdir ~/tensorflow-workspace
cd ~/tensorflow-workspace
3. Create a docker-compose.yaml file.
nano docker-compose.yamlAdd the following content.
services:

  jupyter:
    image: tensorflow/tensorflow:2.15.0-gpu-jupyter
    restart: unless-stopped
    volumes:
      - "/root/notebooks:/tf/notebooks"
    deploy:
      resources:
        reservations:
          devices:
            - capabilities: [gpu]

  nginx:
    image: nginx
    restart: unless-stopped
    ports:
      - 80:80
      - 443:443
    volumes:
      - ./nginx/nginx.conf:/etc/nginx/nginx.conf
      - ./nginx/dhparam.pem:/etc/ssl/certs/dhparam.pem
      - ./certbot/conf:/etc/letsencrypt
      - ./certbot/www:/var/www/certbot
  certbot:
    image: certbot/certbot
    container_name: certbot
    volumes:
      - ./certbot/conf:/etc/letsencrypt
      - ./certbot/www:/var/www/certbot
    command: certonly --webroot -w /var/www/certbot --email [email protected] -d your_domain.com --agree-tos --no-eff-email
The above setup includes three services.
- The jupyter service runs a container with TensorFlow and GPU support, and it saves all your notebooks in the /root/notebooks folder.
- The nginx service uses the official Nginx container to work as a reverse proxy, passing traffic between users and the jupyter server.
- The certbot service uses the official Certbot container to get a free SSL certificate from Let’s Encrypt for your domain name.
4. Create a new directory for Nginx.
mkdir nginx5. Create an Nginx configuration file.
nano nginx/nginx.confAdd the following configuration.
events {}

http {
    server_tokens off;
    charset utf-8;

    server {
        listen 80;
        server_name tensorflow.example.com;

        location ~ /.well-known/acme-challenge/ {
            root /var/www/certbot;
        }
    }
}
The above setup tells the Nginx server to handle the special verification files created by Certbot. This step is needed so Certbot can prove that you own the domain name and then issue a free SSL certificate for it.
6. Create a directory structure for Let’s Encrypt challenge.
mkdir -p certbot/www/.well-known/acme-challenge7. Deploy the Docker Compose services.
docker-compose up -dThe above command starts the services defined in the docker-compose.yaml file in detached mode.
8. Verify the SSL issuance.
ls certbot/conf/live/tensorflow.example.com/Output.
cert.pem chain.pem fullchain.pem privkey.pem README9. Edit the Nginx configuration file.
nano nginx/nginx.confRemove all existing content and add the below configuration.
events {}

http {
    server_tokens off;
    charset utf-8;

    map $http_upgrade $connection_upgrade {
        default upgrade;
        '' close;
    }

    server {
        listen 80;
        server_name tensorflow.example.com;

        return 301 https://$host$request_uri;
    }

    server {
        listen 443 ssl http2;

        server_name tensorflow.example.com;

        ssl_certificate     /etc/letsencrypt/live/tensorflow.example.com/fullchain.pem;
        ssl_certificate_key /etc/letsencrypt/live/tensorflow.example.com/privkey.pem;

        ssl_protocols TLSv1.2 TLSv1.3;
        ssl_prefer_server_ciphers on;
        ssl_ciphers 'ECDHE-ECDSA-AES128-GCM-SHA256:ECDHE-RSA-AES128-GCM-SHA256:ECDHE-ECDSA-AES256-GCM-SHA384:ECDHE-RSA-AES256-GCM-SHA384:ECDHE-ECDSA-CHACHA20-POLY1305:ECDHE-RSA-CHACHA20-POLY1305:DHE-RSA-AES128-GCM-SHA256:DHE-RSA-AES256-GCM-SHA384';
        ssl_session_timeout 1d;
        ssl_session_cache shared:SSL:50m;
        ssl_stapling on;
        ssl_stapling_verify on;
        add_header Strict-Transport-Security max-age=15768000;

        location / {
            proxy_pass http://jupyter:8888;
            proxy_set_header X-Real-IP $remote_addr;
            proxy_set_header Host $host;
            proxy_set_header X-Forwarded-For $proxy_add_x_forwarded_for;

            proxy_http_version 1.1;
            proxy_set_header Upgrade $http_upgrade;
            proxy_set_header Connection $connection_upgrade;
            proxy_set_header X-Scheme $scheme;

            proxy_buffering off;
        }

        location ~ /.well-known/acme-challenge/ {
            root /var/www/certbot;
        }
    }
}
The above setup uses the SSL certificate from Certbot along with extra security settings to protect your workspace. It also sets up a reverse proxy server that sends incoming traffic to the Jupyter container running on port 8888.
10. Restart the Nginx container to apply the changes.
docker-compose restart nginx11. Retrieve the token from the Docker logs.
docker-compose logs jupyterThis command outputs the logs generated by the jupyter container. It contains the token to access the Jupyter notebook interface.
jupyter_1  |     To access the server, open this file in a browser:
jupyter_1  |         file:///root/.local/share/jupyter/runtime/jpserver-1-open.html
jupyter_1  |     Or copy and paste one of these URLs:
jupyter_1  |         http://19880e871edf:8888/tree?token=cfecf37285dccaf783a751bda24b4497a1279487ebd70c03
jupyter_1  |         http://127.0.0.1:8888/tree?token=cfecf37285dccaf783a751bda24b4497a1279487ebd70c03
12. Open your web browser and access the Jupyter notebook using https://tensorflow.example.com.
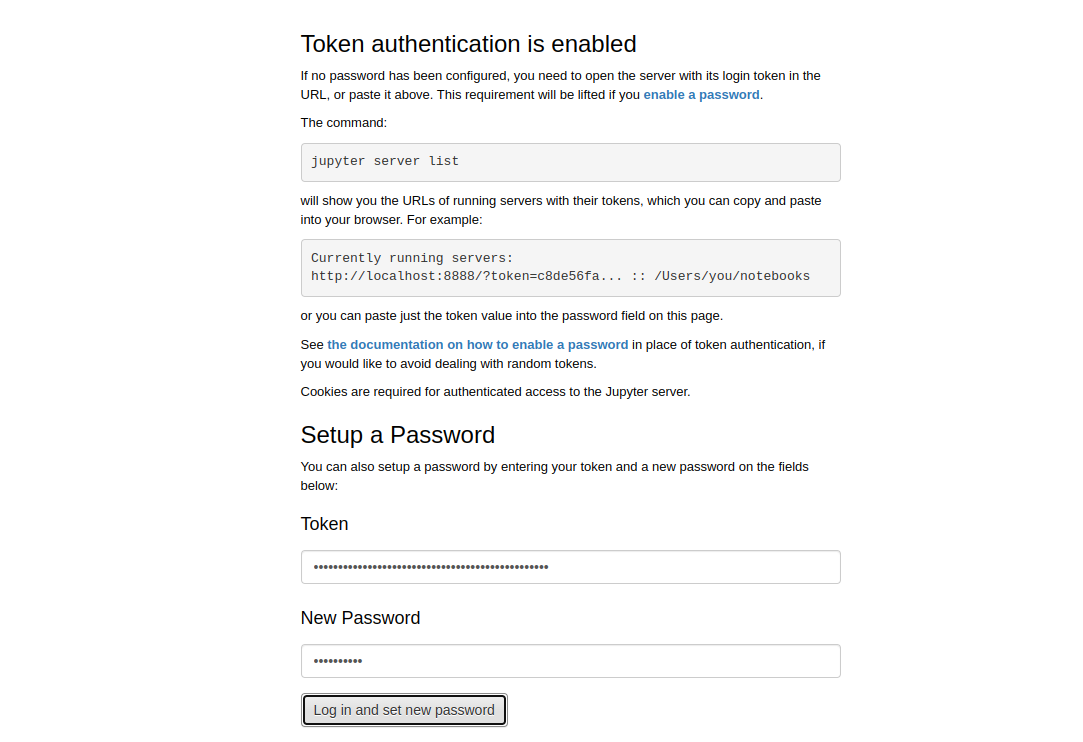
13. Scroll down to the “Setup a Password” section. Enter the token fetched from the Docker Compose logs. Enter the password you want to use to protect the interface. Click the “Log in and set new password” button. You will see the Jupyter notebook dashboard.
Conclusion
This article showed how to set up a temporary or long-term TensorFlow workspace using the official Docker image and NVIDIA Docker Toolkit. You can create a temporary setup to use the powerful hardware from Atlantic.Net for tasks like training models or creating visualizations. You can also set up a permanent workspace, which gives you a stable environment for remote development. With the Jupyter notebook interface, it’s easy to collaborate with others on your machine learning projects – try it on GPU Hosting from Atlantic.Net.
* This post is for informational purposes only and does not constitute professional, legal, financial, or technical advice. Each situation is unique and may require guidance from a qualified professional.
Readers should conduct their own due diligence before making any decisions.