In this machine learning project, we’ll develop a Language Translator application using a many-to-many encoder-decoder sequence model on an Ubuntu 24.04 GPU server. Our model will use LSTM (Long Short-Term Memory) networks to translate English text to French. This implementation leverages the power of GPU acceleration to achieve faster training and improved performance.
Prerequisites
- An Ubuntu 24.04 server with an NVIDIA GPU.
- A non-root user with sudo privileges.
- NVIDIA drivers installed.
Step 1: Setting Up the Environment
1. First, let’s install the necessary packages.
apt install python3-pip python3-tk python3-venv graphviz2. Create a virtual environment and activate it.
python3 -m venv lang-env
source lang-env/bin/activate
3. Install Tensorflow and other packages.
pip3 install tensorflow scikit-learn numpy pydot graphviz flaskStep 2: Downloading the Dataset
A quality dataset is the foundation of any machine learning project. We’ll use an English-French parallel corpus that contains aligned sentence pairs for training our translation model.
You can download it with the following command.
wget https://raw.githubusercontent.com/hitjethva/linuxbuz/master/eng-french.txtStep 3: Building the Translation Model
The model architecture is the heart of our translation system. We’ll implement an encoder-decoder LSTM network that can learn the complex patterns between English and French sentences.
1. Create a new Python file named LangTraining.py.
nano LangTraining.pyAdd the following code.
# LangTraining.py

#Load all the required modules.
from tensorflow.keras.models import Model
from tensorflow.keras import models
from tensorflow.keras.utils import plot_model
from tensorflow.keras.layers import Input,LSTM,Dense
from sklearn.feature_extraction.text import CountVectorizer
import numpy as np
import pickle

#initialize all variables
input_texts=[]
target_texts=[]
input_characters=set()
target_characters=set()

#read dataset file
with open('eng-french.txt','r',encoding='utf-8') as f:
    rows=f.read().split('\n')
#read first 10,000 rows from dataset
for row in rows[:10000]:
    #split input and target by '\t'=tab
    input_text,target_text = row.split('\t')
    #add '\t' at start and '\n' at end of text.
    target_text='\t' + target_text + '\n'
    input_texts.append(input_text.lower())
    target_texts.append(target_text.lower())
    #split character from text and add in respective sets
    input_characters.update(list(input_text.lower()))
    target_characters.update(list(target_text.lower()))

#sort input and target characters
input_characters = sorted(list(input_characters))
target_characters = sorted(list(target_characters))
#get the total length of input and target characters
num_en_chars = len(input_characters)
num_dec_chars = len(target_characters)
#get the maximum length of input and target text.
max_input_length = max([len(i) for i in input_texts])
max_target_length = max([len(i) for i in target_texts])

def bagofcharacters(input_texts,target_texts):
  #inintialize encoder , decoder input and target data.
  en_in_data=[] ; dec_in_data=[] ; dec_tr_data=[]
  #padding variable with first character as 1 as rest all 0.
  pad_en=[1]+[0]*(len(input_characters)-1)
  pad_dec=[0]*(len(target_characters)) ; pad_dec[2]=1
  #countvectorizer for one hot encoding as we want to tokenize character so
  #anlyzer is true and None the stopwords action.
  cv=CountVectorizer(binary=True,tokenizer=lambda txt: txt.split(),stop_words=None,analyzer='char')
  for i,(input_t,target_t) in enumerate(zip(input_texts,target_texts)):
    #fit the input characters into the CountVectorizer function
    cv_inp= cv.fit(input_characters)

    #transform the input text from the help of CountVectorizer fit.
    #it character present than put 1 and 0 otherwise.
    en_in_data.append(cv_inp.transform(list(input_t)).toarray().tolist())
    cv_tar= cv.fit(target_characters)
    dec_in_data.append(cv_tar.transform(list(target_t)).toarray().tolist())
    #decoder target will be one timestep ahead because it will not consider
    #the first character i.e. '\t'.
    dec_tr_data.append(cv_tar.transform(list(target_t)[1:]).toarray().tolist())

    #add padding variable if the length of the input or target text is smaller
    #than their respective maximum input or target length.
    if len(input_t) < max_input_length:
      for _ in range(max_input_length-len(input_t)):
        en_in_data[i].append(pad_en)
    if len(target_t) < max_target_length:
      for _ in range(max_target_length-len(target_t)):
        dec_in_data[i].append(pad_dec)
    if (len(target_t)-1) < max_target_length:
      for _ in range(max_target_length-len(target_t)+1):
        dec_tr_data[i].append(pad_dec)

  #convert list to numpy array with data type float32
  en_in_data=np.array(en_in_data,dtype="float32")
  dec_in_data=np.array(dec_in_data,dtype="float32")
  dec_tr_data=np.array(dec_tr_data,dtype="float32")

  return en_in_data,dec_in_data,dec_tr_data

#create input object of total number of encoder characters
en_inputs = Input(shape=(None, num_en_chars))
#create LSTM with the hidden dimension of 256
#return state=True as we don't want output sequence.
encoder = LSTM(256, return_state=True)
#discard encoder output and store hidden and cell state.
en_outputs, state_h, state_c = encoder(en_inputs)
en_states = [state_h, state_c]

#create input object of total number of decoder characters
dec_inputs = Input(shape=(None, num_dec_chars))
#create LSTM with the hidden dimension of 256
#return state and return sequences as we want output sequence.
dec_lstm = LSTM(256, return_sequences=True, return_state=True)
#initialize the decoder model with the states on encoder.
dec_outputs, _, _ = dec_lstm(dec_inputs, initial_state=en_states)
#Output layer with shape of total number of decoder characters
dec_dense = Dense(num_dec_chars, activation="softmax")
dec_outputs = dec_dense(dec_outputs)

#create Model and store all variables
model = Model([en_inputs, dec_inputs], dec_outputs)
pickle.dump({'input_characters':input_characters,'target_characters':target_characters,
             'max_input_length':max_input_length,'max_target_length':max_target_length,
             'num_en_chars':num_en_chars,'num_dec_chars':num_dec_chars},open("training_data.pkl","wb"))

#load the data and train the model
en_in_data,dec_in_data,dec_tr_data = bagofcharacters(input_texts,target_texts)
model.compile(
    optimizer="adam", loss="categorical_crossentropy", metrics=["accuracy"]
)
model.fit(
    [en_in_data, dec_in_data],
    dec_tr_data,
    batch_size=64,
    epochs=200,
    validation_split=0.2,
)
# Save model
model.save("s2s.keras")


#summary and model plot
model.summary()
plot_model(model, to_file='model_plot.png', show_shapes=True, show_layer_names=True)
2. Run the training script.
python3 LangTraining.pyOnce training is completed, you will see the following output.
Please note the training will take several minutes to complete.
Model: "functional"
┏━━━━━━━━━━━━━━━━━━━━━━━━━━━━━━━┳━━━━━━━━━━━━━━━━━━━━━━━━━━━┳━━━━━━━━━━━━━━━━━┳━━━━━━━━━━━━━━━━━━━━━━━━━━━━┓
┃ Layer (type)                  ┃ Output Shape              ┃         Param # ┃ Connected to               ┃
┡━━━━━━━━━━━━━━━━━━━━━━━━━━━━━━━╇━━━━━━━━━━━━━━━━━━━━━━━━━━━╇━━━━━━━━━━━━━━━━━╇━━━━━━━━━━━━━━━━━━━━━━━━━━━━┩
│ input_layer (InputLayer)      │ (None, None, 47)          │               0 │ -                          │
├───────────────────────────────┼───────────────────────────┼─────────────────┼────────────────────────────┤
│ input_layer_1 (InputLayer)    │ (None, None, 67)          │               0 │ -                          │
├───────────────────────────────┼───────────────────────────┼─────────────────┼────────────────────────────┤
│ lstm (LSTM)                   │ [(None, 256), (None,      │         311,296 │ input_layer[0][0]          │
│                               │ 256), (None, 256)]        │                 │                            │
├───────────────────────────────┼───────────────────────────┼─────────────────┼────────────────────────────┤
│ lstm_1 (LSTM)                 │ [(None, None, 256),       │         331,776 │ input_layer_1[0][0],       │
│                               │ (None, 256), (None, 256)] │                 │ lstm[0][1], lstm[0][2]     │
├───────────────────────────────┼───────────────────────────┼─────────────────┼────────────────────────────┤
│ dense (Dense)                 │ (None, None, 67)          │          17,219 │ lstm_1[0][0]               │
└───────────────────────────────┴───────────────────────────┴─────────────────┴────────────────────────────┘
 Total params: 1,980,875 (7.56 MB)
 Trainable params: 660,291 (2.52 MB)
 Non-trainable params: 0 (0.00 B)
 Optimizer params: 1,320,584 (5.04 MB)
Step 4: Creating the GUI Application
A user-friendly interface makes our translation system accessible to end-users. We’ll build a web-based interface using Flask that allows users to input English text and receive French translations.
1. Create a new file named LangTransGui.py.
nano LangTransGui.pyAdd the following code.
# LangTransWeb.py

from flask import Flask, render_template, request
import pickle
import numpy as np
from sklearn.feature_extraction.text import CountVectorizer
from tensorflow.keras.models import load_model, Model
from tensorflow.keras.layers import Input

app = Flask(__name__)

# Load preprocessed data
data = pickle.load(open("training_data.pkl", "rb"))
input_characters = data['input_characters']
target_characters = data['target_characters']
max_input_length = data['max_input_length']
max_target_length = data['max_target_length']
num_en_chars = data['num_en_chars']
num_dec_chars = data['num_dec_chars']

# Prepare CountVectorizer
cv = CountVectorizer(binary=True, tokenizer=lambda txt: txt.split(), stop_words=None, analyzer='char')

# Load the trained model
model = load_model("s2s.keras")

# Build encoder model
encoder_outputs, state_h_enc, state_c_enc = model.layers[2].output
encoder_model = Model(model.input[0], [state_h_enc, state_c_enc])

# Decoder setup
decoder_state_input_h = Input(shape=(256,), name="input_3")
decoder_state_input_c = Input(shape=(256,), name="input_4")
decoder_states_inputs = [decoder_state_input_h, decoder_state_input_c]

decoder_lstm = model.layers[3]
decoder_outputs, state_h_dec, state_c_dec = decoder_lstm(
    model.input[1], initial_state=decoder_states_inputs
)
decoder_states = [state_h_dec, state_c_dec]
decoder_dense = model.layers[4]
decoder_outputs = decoder_dense(decoder_outputs)

decoder_model = Model(
    [model.input[1]] + decoder_states_inputs,
    [decoder_outputs] + decoder_states
)

reverse_target_char_index = dict(enumerate(target_characters))

# Function to vectorize input
def vectorize_input(input_text):
    en_in_data = []
    pad_en = [1] + [0] * (len(input_characters) - 1)
    cv_inp = cv.fit(input_characters)
    en_in_data.append(cv_inp.transform(list(input_text)).toarray().tolist())
    if len(input_text) < max_input_length: for _ in range(max_input_length - len(input_text)): en_in_data[0].append(pad_en) return np.array(en_in_data, dtype="float32") # Decode sequence using trained model def decode_sequence(input_seq): states_value = encoder_model.predict(input_seq) co = cv.fit(target_characters) target_seq = np.array([co.transform(list("\t")).toarray().tolist()], dtype="float32") decoded_sentence = "" stop_condition = False while not stop_condition: output_tokens, h, c = decoder_model.predict([target_seq] + states_value) sampled_token_index = np.argmax(output_tokens[0, -1, :]) sampled_char = reverse_target_char_index[sampled_token_index] decoded_sentence += sampled_char if sampled_char == "\n" or len(decoded_sentence) > max_target_length:
            stop_condition = True
        target_seq = np.zeros((1, 1, num_dec_chars))
        target_seq[0, 0, sampled_token_index] = 1.0
        states_value = [h, c]

    return decoded_sentence.strip()

# Route: Home Page
@app.route("/", methods=["GET", "POST"])
def home():
    translation = ""
    if request.method == "POST":
        input_text = request.form["input_text"]
        vectorized_input = vectorize_input(input_text.lower())
        translation = decode_sequence(vectorized_input)
    return render_template("index.html", translation=translation)

if __name__ == "__main__":
    app.run(host="0.0.0.0", port=5000, debug=True)
2. Create a templates directory and create a file inside it.
mkdir templates
nano templates/index.html
Add the below code.
<!DOCTYPE html>
<html>
<head>
    <title>Language Translator</title>
    <style>
        body { background-color: #000; color: white; font-family: Arial, sans-serif; text-align: center; }
        input[type="text"] { width: 60%; padding: 12px; font-size: 16px; }
        input[type="submit"] { padding: 10px 20px; font-size: 16px; margin-left: 10px; }
        .box { margin-top: 100px; }
    </style>
</head>
<body>
    <div class="box">
        <h1>Language Translator: English to French</h1>
        <form method="post">
            <input type="text" name="input_text" placeholder="Enter English sentence" required>
            <input type="submit" value="Translate">
        </form>
        {% if translation %}
            <h2>Translation:</h2>
            <p style="color: lightgreen; font-size: 20px;">{{ translation }}</p>
        {% endif %}
    </div>
</body>
</html>
Step 5: Running the Application
With all components ready, we can launch our translation service. The Flask application will serve our model through a web interface.
Run the GUI application using the command below.
python3 LangTransGui.pyYou will see the following output.
 * Running on all addresses (0.0.0.0)
 * Running on http://127.0.0.1:5000
 * Running on http://your-server-ip:5000
Press CTRL+C to quit
Step 6: Access and Test the Application
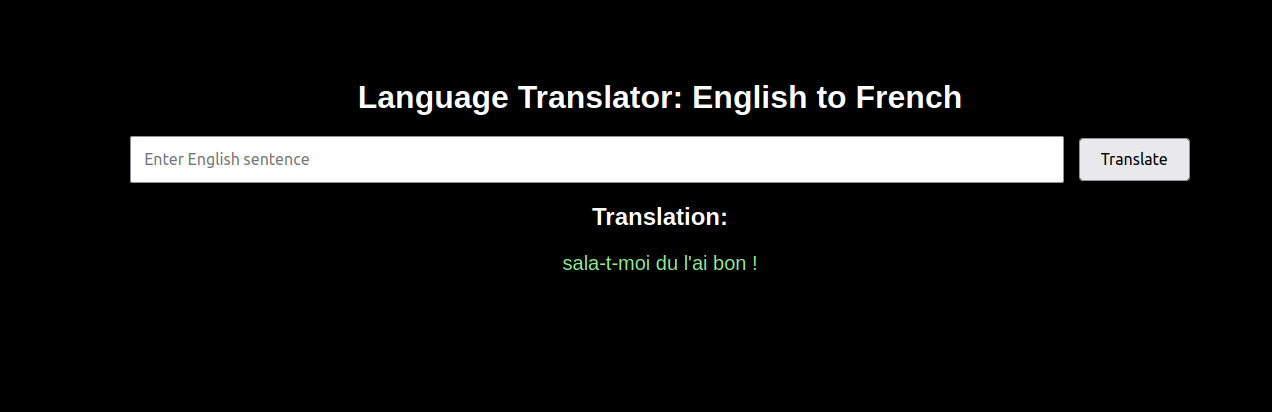
1. Now that our translation service is running. Now, open your web browser and access it using the URL http://your-server-ip:5000. You’ll see a clean interface with an input field.
2. Type an English sentence like “Hello, How Are You” and click Translate.
3. The system will process your input and display the French translation.
Conclusion
This article demonstrates how to build a comprehensive English-to-French translation system using Long Short-Term Memory (LSTM) networks on Ubuntu 24.04. By leveraging GPU acceleration, we achieved efficient training of our sequence-to-sequence model, while the Flask web interface makes the technology accessible to end users.
* This post is for informational purposes only and does not constitute professional, legal, financial, or technical advice. Each situation is unique and may require guidance from a qualified professional.
Readers should conduct their own due diligence before making any decisions.