MariaDB is free, open-source, and one of the most popular database servers in the world. It is a community-developed fork of the very popular MySQL database management system. MariaDB provides support for PHP and uses a standard and popular querying language. MariaDB comes with a wide range of storage engines and several optimizations that can be used to improve the database performance.
In this tutorial, we will show you how to manage databases in MariaDB on Ubuntu 18.04.
Step 1 – Install MariaDB
By default, the latest version of MariaDB is not available in the Ubuntu 18.04 default repository. Therefore, it is recommended to install MariaDB from the MariaDB repository.
First, download and add the MariaDB GPG key to your system with the following command:
apt-get update -y
apt-get upgrade -y
apt-key adv --recv-keys --keyserver hkp://keyserver.ubuntu.com:80 0xF1656F24C74CD1D8
Next, add the MariaDB repository using the following command:
add-apt-repository 'deb [arch=amd64,arm64,ppc64el] http://ftp.utexas.edu/mariadb/repo/10.3/ubuntu bionic main'
Next, update the repository and install MariaDB using the following commands:
apt-get update -y
apt-get install mariadb-server -y
After installing MariaDB, check the status of MariaDB with the following command:
systemctl status mariadb
You should see the following output:
● mariadb.service - MariaDB 10.3.19 database server
Loaded: loaded (/lib/systemd/system/mariadb.service; enabled; vendor preset: enabled)
Drop-In: /etc/systemd/system/mariadb.service.d
└─migrated-from-my.cnf-settings.conf
Active: active (running) since Wed 2019-11-06 04:25:01 UTC; 24s ago
Docs: man:mysqld(8)
https://mariadb.com/kb/en/library/systemd/
Main PID: 4538 (mysqld)
Status: "Taking your SQL requests now..."
Tasks: 32 (limit: 1114)
CGroup: /system.slice/mariadb.service
└─4538 /usr/sbin/mysqld

Nov 06 04:25:03 ubuntu1804 /etc/mysql/debian-start[4584]: Phase 6/7: Checking and upgrading tables
Nov 06 04:25:03 ubuntu1804 /etc/mysql/debian-start[4584]: Running 'mysqlcheck' with connection arguments: --port='3306' --socket='/var/run/mysq
Nov 06 04:25:03 ubuntu1804 /etc/mysql/debian-start[4584]: # Connecting to localhost...
Nov 06 04:25:03 ubuntu1804 /etc/mysql/debian-start[4584]: # Disconnecting from localhost...
Nov 06 04:25:03 ubuntu1804 /etc/mysql/debian-start[4584]: Processing databases
Nov 06 04:25:03 ubuntu1804 /etc/mysql/debian-start[4584]: information_schema
Nov 06 04:25:03 ubuntu1804 /etc/mysql/debian-start[4584]: performance_schema
Step 2 – Create a New Database
To create a new database, first log in to MariaDB shell with the following command:
mysql -u root -p
Enter your root password when prompted, then create a database with the following command:
CREATE DATABASE db1;
After creating a new database, you can list all databases with the following command:
SHOW DATABASES;
You should see the following output:
+--------------------+
| Database           |
+--------------------+
| db1                |
| information_schema |
| mysql              |
| performance_schema |
+--------------------+
4 rows in set (0.002 sec)
Step 3 – Create a New User Account
You can create a new MariaDB user account by running the following command:
CREATE USER 'dbuser'@'localhost' IDENTIFIED BY 'yourpassword';
In this line, the variables are defined as follows:
dbuser: The name of the MariaDB user.
localhost: This option specifies that the user can connect to the MariaDB server only from the localhost.
yourpassword: The password of the MariaDB user.
If you want to change the MariaDB user account password, then run the following command:
ALTER USER 'dbuser'@'localhost' IDENTIFIED BY 'yournewpassword';
To list all MariaDB user accounts, run the following command:
SELECT user, host FROM mysql.user;
You should get the following output:
+------------------+-----------+
| user             | host      |
+------------------+-----------+
| root             | 127.0.0.1 |
| root             | ::1       |
| dbuser           | localhost |
| debian-sys-maint | localhost |
| root             | localhost |
+------------------+-----------+
5 rows in set (0.003 sec)
Step 4 – Grant Privileges to User Account
You can grant multiple types of privileges to the MariaDB user account.
To grant all privileges to a user (dbuser) over a specific database (db1), run the following command:
GRANT ALL PRIVILEGES ON db1.* TO 'dbuser'@'localhost';
To grant all privileges to a user (dbuser) over all databases, run the following command:
GRANT ALL PRIVILEGES ON *.* TO 'dbuser'@'localhost';
To grant only specific privileges to a user (dbuser) over a specific database (db1), run the following command:
GRANT SELECT, INSERT, DELETE ON db1.* TO dbuser@'localhost';
You can see all the privileges granted to a specific user account with the following command:
SHOW GRANTS FOR 'dbuser'@'localhost';
You should see the following output:
+------------------------------------------------------------------------------------------------------------------------+
| Grants for dbuser@localhost                                                                                            |
+------------------------------------------------------------------------------------------------------------------------+
| GRANT ALL PRIVILEGES ON *.* TO 'dbuser'@'localhost' IDENTIFIED BY PASSWORD '*7F99F4477B835ED95816BC01E9823771AE2A3F1C' |
| GRANT ALL PRIVILEGES ON `db1`.* TO 'dbuser'@'localhost'                                                                |
+------------------------------------------------------------------------------------------------------------------------+
2 rows in set (0.000 sec)
Step 5 – Deleting Databases and Users
You can delete a database with the following command:
DROP DATABASE db1;
To delete a user account, run the following command:
DROP USER 'dbuser'@'localhost';
Step 6 – Reset MariaDB Root Password
If you have forgotten your MariaDB root password, then you can recover it easily by following the below steps.
First, stop the running MariaDB service with the following command:
systemctl stop mariadb
Next, you will need to start MariaDB service with –skip-grant-tables option. This will allow you to connect to the database server without a password:
You can start MariaDB service without loading the grant tables by running the following command:
mysqld_safe --skip-grant-tables &

Now, you can connect to the MariaDB server as a root user without a password as shown below:
mysql -u root

After successful login, run the following command to reset the root password:
ALTER USER 'root'@'localhost' IDENTIFIED BY 'your-new-password';
FLUSH PRIVILEGES;

If the above command doesn’t work, run the following command:
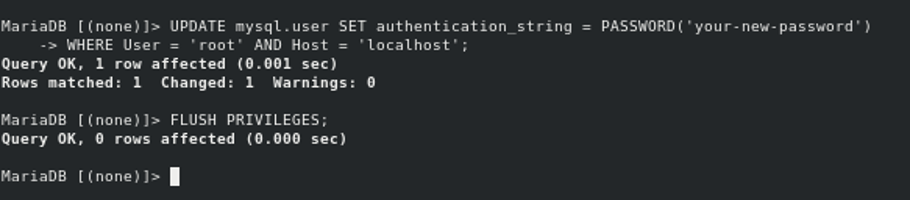
UPDATE mysql.user SET authentication_string = PASSWORD('your-new-password')
WHERE User = 'root' AND Host = 'localhost';
FLUSH PRIVILEGES;
Next, stop the MariaDB service and start it normally with the following commands:
mysqladmin -u root -p shutdown

Provide your root password when prompted to stop the MariaDB service.
Next, start the MariaDB service normally with the following command:
systemctl start mariadb
Conclusion
In the above tutorial, we learned how to create and manage databases and user accounts in MariaDB. We also learned how to reset the MariaDB root password. For more information, visit the MariaDB official documentation at MariaDB Doc.