Gollum is wiki software based on Git using GitHub Wiki as a backend. This free, open-source software is written in Ruby and comes with a simple web interface to create and manage pages from the web browser. Gollum supports a variety of formats including Markdown, AsciiDoc, ReStructuredText, Creole, and MediaWiki markup.
In this tutorial, we will show you how to install Gollum with Nginx as a reverse proxy on Debian 10.
Step 1 – Install Required Dependencies
Gollum is written in Ruby, so you will need to install Ruby and other dependencies in your system. You can install all of them using the following command:
apt-get update -y
apt-get install ruby ruby-dev cmake libssl-dev pkg-config build-essential zlib1g-dev libicu-dev git -
y
Once all the packages are installed, you can proceed to the next step.
Step 2 – Install Gollum
Next, run the following command to install Gollum with other required packages:
gem install gollum org-ruby omnigollum github-markup omniauth-github
Next, install the GitHub Flavored Markdown, Textile and MediaWiki type markups using the following command:
gem install wikicloth
gem install RedCloth
gem install github-markdown
After installing all packages, you can proceed to the next step.
Step 3 – Setup Git Repository
Next, you will need to setup a Git repository for Gollum. First, configure Git username and email address with the following command:
git config --global user.name "Gollum Admin"
git config --global user.email "[email protected]"
Next, create a directory name mywiki and initialize it with the following command:
mkdir mywiki
cd mywiki
git init .
Once you are finished, you can proceed to the next step.
Step 4 – Configure Gollum
Next, you will need to create a Gollum configuration directory in your system. You can create it with the following command:
mkdir /etc/gollum/
Next, create a Gollum configuration file using the following command:
nano /etc/gollum/config.rb
Add the following lines:
=begin
This file can be used to (e.g.):
- alter certain inner parts of Gollum,
- extend it with your stuff.

It is especially useful for customizing supported formats/markups. For more information and
examples:
- https://github.com/gollum/gollum#config-file

=end
Save and close the file when you are finished.
Step 5 – Create a Systemd Service File for Gollum
Next, you will need to create a Gollum systemd service file to manage the Gollum service. You can create it with the following command:
nano /etc/systemd/system/gollum.service
Add the following lines:
[Unit]
Description=Gollum wiki server
After=network.target
After=syslog.target

[Service]
Type=simple
User=root
Group=root
WorkingDirectory=/root/mywiki/
ExecStart=/usr/local/bin/gollum --config "/etc/gollum/config.rb"
Restart=on-abort

[Install]
WantedBy=multi-user.target
Save and close the file, then reload the systemd daemon with the following command:
systemctl daemon-reload
Next, start the Gollum service and enable it to start at system reboot with the following command:
systemctl start gollum
systemctl enable gollum
You can verify the status of the Gollum service using the following command:
systemctl status gollum
You should get the following output:
-
gollum.service - Gollum wiki server
Loaded: loaded (/etc/systemd/system/gollum.service; enabled; vendor preset: enabled)
Active: active (running) since Sat 2020-10-10 15:28:00 UTC; 3s ago
Main PID: 23069 (gollum)
Tasks: 2 (limit: 4701)
Memory: 61.8M
CGroup: /system.slice/gollum.service
└─23069 /usr/bin/ruby2.5 /usr/local/bin/gollum --config /etc/gollum/config.rb
Oct 10 15:28:00 debian10 systemd[1]: Started Gollum wiki server.
At this point, Gollum is started and listening on port 4567. You can check it with the following command:
ss -tunelp | grep 4567
You should get the following output:
tcp LISTEN 0 128 0.0.0.0:4567 0.0.0.0:*
users:(("gollum",pid=23069,fd=7)) ino:41646 sk:9 <->
Step 6 – Configure Nginx for Gollum
Next, you will need to install and configure Nginx as a reverse proxy to access Gollum using port 80. First, install the Nginx web server by running the following command:
apt-get install nginx -y
Once installed, create a new Nginx virtual host configuration file with the following command:
nano /etc/nginx/conf.d/gollum.conf
Add the following lines:
server {
listen 80;
server_name gollum.example.com;

location / {
proxy_pass http://127.0.0.1:4567;
proxy_set_header Host $host;
proxy_set_header X-Real-IP $remote_addr;
proxy_set_header X-Forwarded-For $proxy_add_x_forwarded_for;
proxy_connect_timeout 150;
proxy_send_timeout 100;
proxy_read_timeout 100;
proxy_buffers 4 32k;
client_max_body_size 500m;
client_body_buffer_size 128k;
}
access_log /var/log/nginx/gollum-access.log;
error_log /var/log/nginx/gollum-error.log;

}
Save and close the file when you are finished. Then, restart the Nginx service to apply the changes:
.
If you get any errors, then you will need to edit the Nginx default server configuration file and set server_names_hash_bucket_size:
nano /etc/nginx/nginx.conf
Add the following line below http {:
server_names_hash_bucket_size 64;
Save and close the file, then restart the Nginx service to apply the changes:
systemctl restart nginx
Step 7 – Access Gollum Web UI
Now, open your web browser and type the URL http://gollum.example.com. You should see the Gollum dashboard in the following screen:
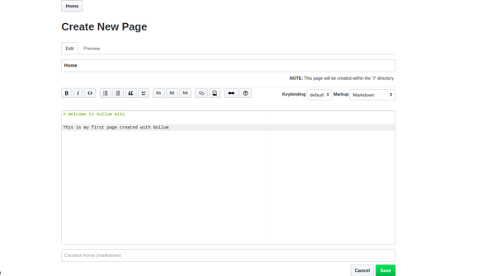
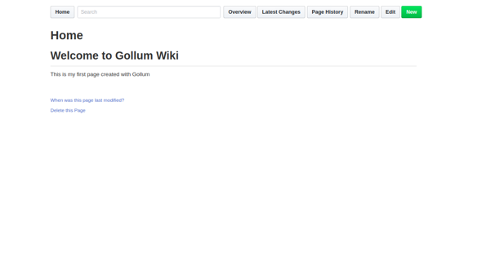
Now, create your first page by adding some content and click on the Save button. You should see your Home page in the following screen:
Conclusion
In the above guide, you learned how to install Gollum wiki with Nginx as a reverse proxy on Debian 10. You can now easily deploy GitHub style wiki with Gollum. Try Gollum on VPS Hosting from Atlantic.Net today!