Kanboard is a free and open-source project management software that helps you visualize and limit your work in progress to focus on your goal. It follows the Kanban methodology and is specially designed for those people who want to manage their projects efficiently and simply. Kanboard also supports reports and analytics and can be integrated with external services. It allows you to create multiple projects and customize your boards according to your needs.
In this tutorial, we will learn how to install the Kanboard software on Ubuntu 20.04.
Step 1 – Install Apache, MariaDB, and PHP
First, you must install your system’s Apache web server, MariaDB, PHP, and other necessary extensions. You can install all of them with the following command:
apt-get update -y
apt-get install apache2 mariadb-server php libapache2-mod-php php-common php-curl php-intl
php-mbstring php-xmlrpc php-mysql php-gd php-pgsql php-xml php-cli php-zip unzip wget curl git
-y
After installing all the packages, edit the php.ini file and make some desired changes:
nano /etc/php/7.4/apache2/php.ini
Change the following lines:
file_uploads = On
allow_url_fopen = On
short_open_tag = On
memory_limit = 512M
upload_max_filesize = 150M
max_execution_time = 360
date.timezone = America/Chicago
Save and close the file, then restart the Apache service to apply the changes:
systemctl restart apache2
Step 2 – Create a Database for Kanboard
Next, you will need to create a database and user for Kanboard. First, log into MariaDB with the following command:
mysql
Once logged in, create a database and user with the following command:
CREATE DATABASE kanboard;
CREATE USER 'kanboard'@'localhost' IDENTIFIED BY 'password';
Next, grant all the privileges to the database with the following command:
GRANT ALL ON kanboard.* TO 'kanboard'@'localhost' WITH GRANT OPTION;
Next, flush the privileges and exit from the MariaDB with the following command:
FLUSH PRIVILEGES;
EXIT;
At this point, your database and user are created. You can now proceed to the next step.
Step 3 – Download Kanboard
First, download the latest version of Kanboard from the Git repository using the following command:
wget https://github.com/kanboard/kanboard/archive/v1.2.15.zip
Once downloaded, unzip the downloaded file with the following command:
unzip v1.2.15.zip
Next, move the extracted directory to the Apache root directory:
mv kanboard-1.2.15 /var/www/html/kanboard
Next, change the directory to kanboard and rename the default configuration file:
cd /var/www/html/kanboard
cp config.default.php config.php
Next, edit the default configuration file with the following command:
nano config.php
Define your database setting as shown below, and ensure you overwrite the default entries already in confiig.php:
// Database driver: sqlite, mysql or postgres (sqlite by default)
define('DB_DRIVER', 'mysql');

// Mysql/Postgres username
define('DB_USERNAME', 'kanboard');

// Mysql/Postgres password
define('DB_PASSWORD', 'password');

// Mysql/Postgres hostname
define('DB_HOSTNAME', 'localhost');

// Mysql/Postgres database name
define('DB_NAME', 'kanboard');
Save and close the file, then give proper ownership and permissions to Kanboard:
chown -R www-data:www-data /var/www/html/kanboard
chmod -R 755 /var/www/html/kanboard
Step 4 – Configure Apache for Kanboard
First, create an Apache virtual host configuration file using the following command:
nano /etc/apache2/sites-available/kanboard.conf
Add the following lines:
<VirtualHost *:80>
ServerAdmin [email protected]
DocumentRoot /var/www/html/kanboard
ServerName your-domain.com

<Directory /var/www/html/kanboard/>
Options FollowSymlinks
AllowOverride All
Require all granted
</Directory>
ErrorLog ${APACHE_LOG_DIR}/error.log
CustomLog ${APACHE_LOG_DIR}/access.log combined

</VirtualHost>
Save and close the file, then activate the virtual host and enable the Apache rewrite module with the following command:
a2ensite kanboard.conf
a2enmod rewrite
Finally, restart the Apache service to apply the changes:
systemctl restart apache2
Step 5 – Access Kanboard UI
Now, open your web browser and access Kanboard using the URL http://your-domain.com. You will be redirected to the Kanboard login page:
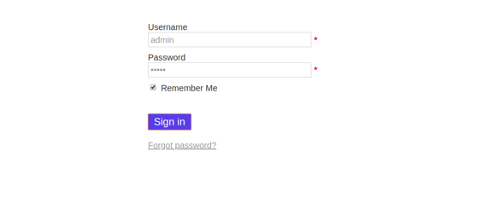
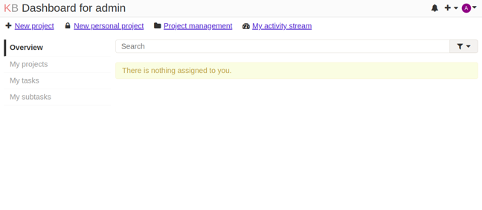
Provide the default username and password as admin/admin and click the Sign in button. You should see the Kanboard dashboard on the following page:
Conclusion
Congratulations! You have successfully installed Kanboard on the Ubuntu 20.04 server. You can now create your project, create a board, and manage project workflow using the Kanban methodology. Try Kanboard on VPS Hosting from Atlantic.Net using the tutorial above!