XWiki is a simple, lightweight, powerful wiki platform that allows you to customize the wiki to your specific needs. It is written in Java and runs on servlet containers like JBoss or Tomcat. XWiki provides a simple and user-friendly web interface that helps you create and manage your content from any device and browser. It comes with a rich set of features including WYSIWYG editing, OpenDocument-based document import/export, tagging, version control, powerful wiki syntax, advanced search functionality and many more.
In this tutorial, we will show you how to install XWiki on Ubuntu 20.04.
Step 1 – Install Java
XWiki is written in Java, so you will need to install Java in your system. You can install Java using the following command:
apt-get install default-jdk gnupg2 -y
Once Java is installed, you can verify the Java version with the following command:
java --version
You should get the following output:
openjdk 11.0.9.1 2020-11-04
OpenJDK Runtime Environment (build 11.0.9.1+1-Ubuntu-0ubuntu1.20.04)
OpenJDK 64-Bit Server VM (build 11.0.9.1+1-Ubuntu-0ubuntu1.20.04, mixed mode, sharing)
Step 2 – Install XWiki
By default, XWiki is not available in the Ubuntu 20.04 default repository, so you will need to add the XWiki official repository to your system.
First, add the GPG key with the following command:
wget -q "https://maven.xwiki.org/public.gpg" -O- | apt-key add -
Next, add the XWiki repository with the following command:
wget "https://maven.xwiki.org/stable/xwiki-stable.list" -P /etc/apt/sources.list.d/
Next, update the repository with the following command:
apt-get update -y
Once the repository is updated, you can install XWiki by running the following command:
apt-get install xwiki-tomcat9-common xwiki-tomcat9-mariadb -y
During the installation, you will be asked to configure a database for XWiki as shown below:
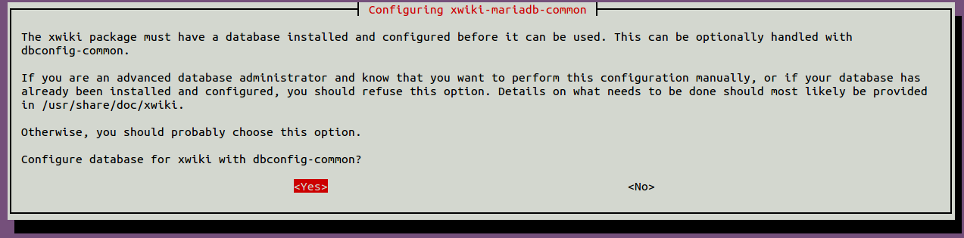
Select yes and hit Enter. You will need to set a password for the xwiki database as shown below:

Provide your desired password and hit Enter to finish the installation.
After installing XWiki, you can verify the Tomcat service using the following command:
systemctl status tomcat9.service
You should get the following output:
-
tomcat9.service - Apache Tomcat 9 Web Application Server
Loaded: loaded (/lib/systemd/system/tomcat9.service; enabled; vendor preset: enabled)
Drop-In: /etc/systemd/system/tomcat9.service.d
└─xwiki-tomcat9-systemd.conf
Active: active (running) since Wed 2020-11-18 10:27:27 UTC; 1min 42s ago
Docs: https://tomcat.apache.org/tomcat-9.0-doc/index.html
Main PID: 39480 (java)
Tasks: 52 (limit: 2353)
Memory: 524.9M
CGroup: /system.slice/tomcat9.service
└─39480 /usr/lib/jvm/default-java/bin/java -

Djava.util.logging.config.file=/var/lib/tomcat9/conf/logging.properties -Djava.util.l>

Nov 18 10:27:44 server tomcat9[39480]: 2020-11-18 10:27:44,176 [main] WARN
o.e.j.u.s.S.config             - No Client EndPointIdentificationA>
Nov 18 10:27:44 server tomcat9[39480]: 2020-11-18 10:27:44,202 [main] WARN
o.a.s.c.CoreContainer          - Not all security plugins configur>
Nov 18 10:27:47 server tomcat9[39480]: 2020-11-18 10:27:47,618 [main] INFO
o.x.s.s.i.EmbeddedSolr         - Started embedded Solr server.
Nov 18 10:27:52 server tomcat9[39480]: 2020-11-18 10:27:52,832 [main] INFO
o.x.s.f.i.FilesystemStoreTools - Using filesystem store directory >
Nov 18 10:27:54 server tomcat9[39480]: Deployment of deployment descriptor
[/etc/tomcat9/Catalina/localhost/xwiki.xml] has finished in [24,889>
Nov 18 10:27:54 server tomcat9[39480]: Deploying web application directory
[/var/lib/tomcat9/webapps/ROOT]
Nov 18 10:27:55 server tomcat9[39480]: At least one JAR was scanned for
TLDs yet contained no TLDs. Enable debug logging for this logger for a>
Nov 18 10:27:55 server tomcat9[39480]: Deployment of web application directory
[/var/lib/tomcat9/webapps/ROOT] has finished in [926] ms
Nov 18 10:27:55 server tomcat9[39480]: Starting ProtocolHandler ["http-nio-8080"]
Nov 18 10:27:55 server tomcat9[39480]: Server startup in [25,998] milliseconds
By default, Tomcat is listening on port 8080. You can check it with the following command:
ss -antpl | grep 8080
You should get the following output:
LISTEN 0 100 *:8080 *:* users:(("java",pid=39480,fd=39))
Step 3 – Configure Nginx for XWiki
Next, you will need to install and configure Nginx as a reverse proxy to access the XWiki. First, install the Nginx webserver with the following command:
apt-get install nginx -y
Once installed, create a new Nginx virtual host configuration file using the following command:
nano /etc/nginx/sites-available/xwiki.conf
Add the following lines:
server {
listen 80;

server_name xwiki.example.com;

access_log /var/log/nginx/xwiki-access.log;
error_log /var/log/nginx/xwiki-error.log;

location / {
proxy_set_header   X-Real-IP $remote_addr;
proxy_set_header   Host      $host;
proxy_http_version 1.1;
proxy_set_header   Upgrade $http_upgrade;
proxy_set_header   Connection 'upgrade';
proxy_cache_bypass $http_upgrade;
proxy_pass         http://127.0.0.1:8080;
}

}
Save and close the file then activate the Nginx virtual host with the following command:
ln -s /etc/nginx/sites-available/xwiki.conf /etc/nginx/sites-enabled/
Next, you will need to edit the Nginx main configuration file and increase the hash_bucket size:
nano /etc/nginx/nginx.conf
Add the following line below http {:
server_names_hash_bucket_size 64;
Save and close the file then restart the Nginx service to apply the changes:
systemctl restart nginx
Step 4 – Access XWiki Web UI
Now, open your web browser and access the XWiki web interface using the URL http://xwiki.example.com/xwiki. You should see the following page:
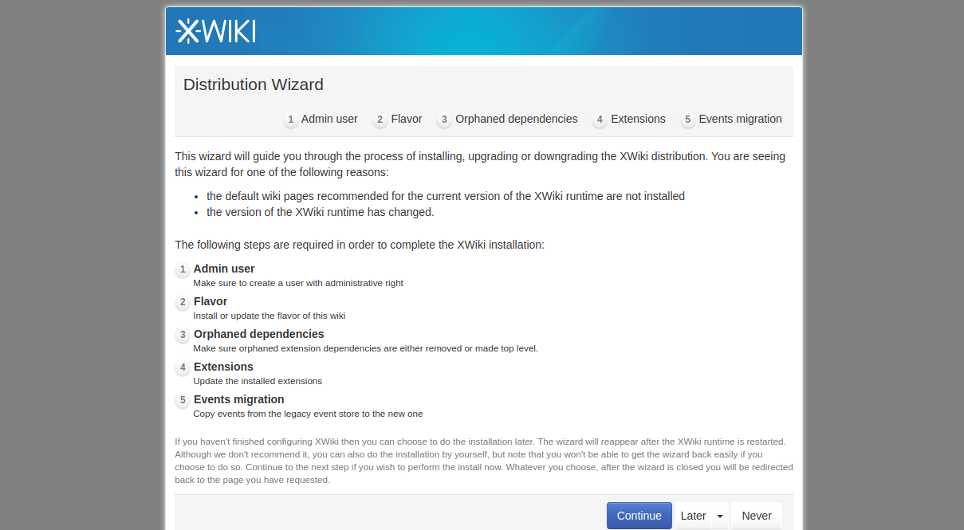
Click on the Continue button. You should see the admin user creation page:
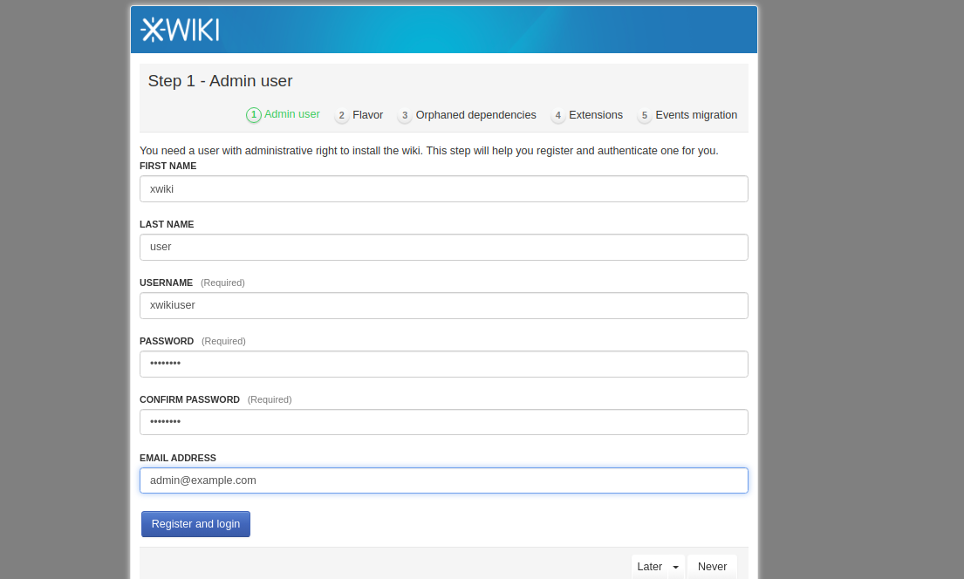
Provide your username, password, and email and click on the Register and Login button. You should see the following page:
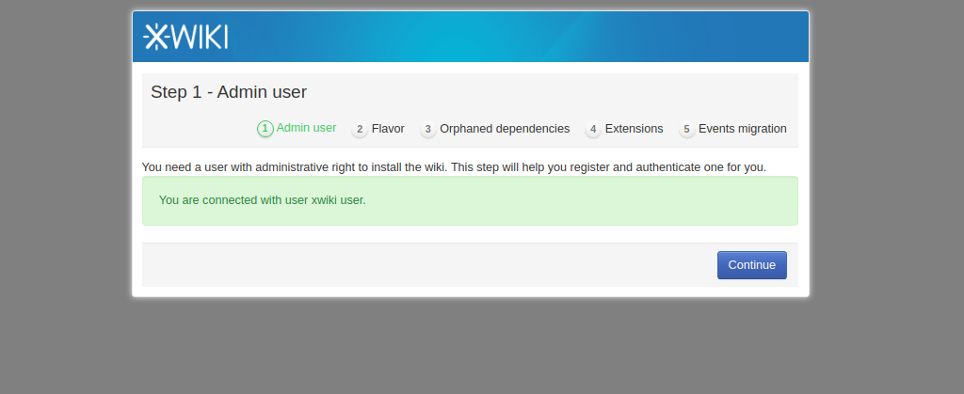
Click on the Continue button. You should see the following page:
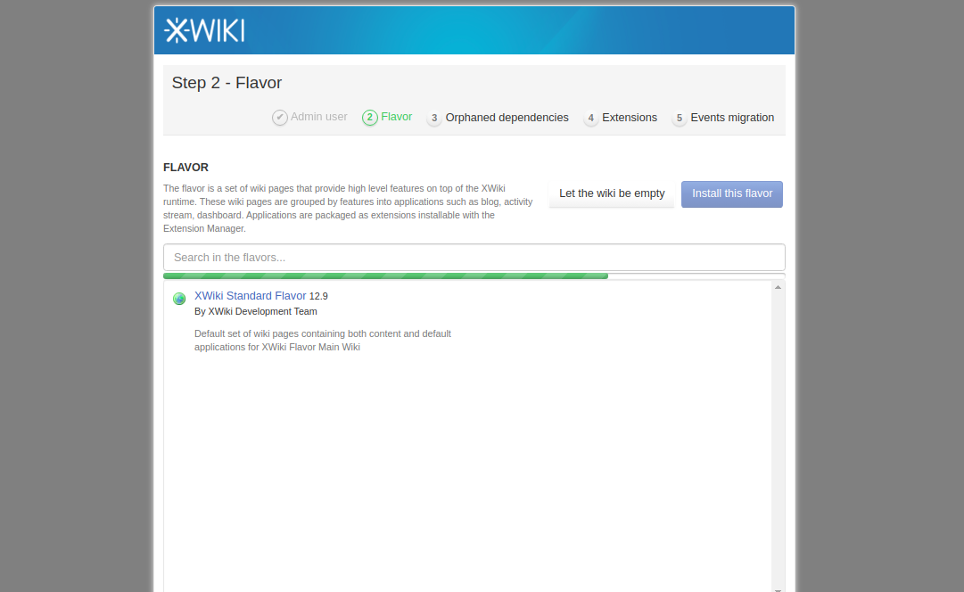
Select your flavor and click on the Install button. Once the installation has been finished, you should see the following page:
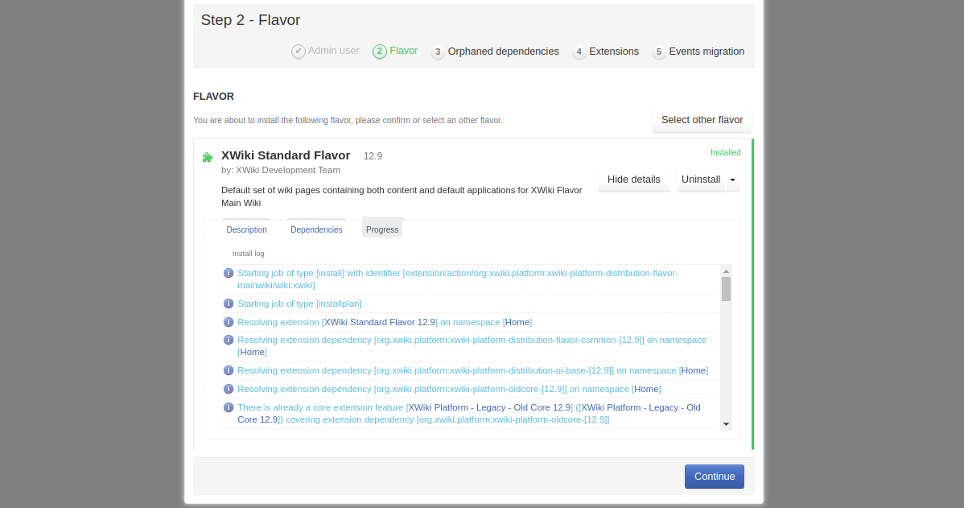
Click on the Continue button. You should see the following page:
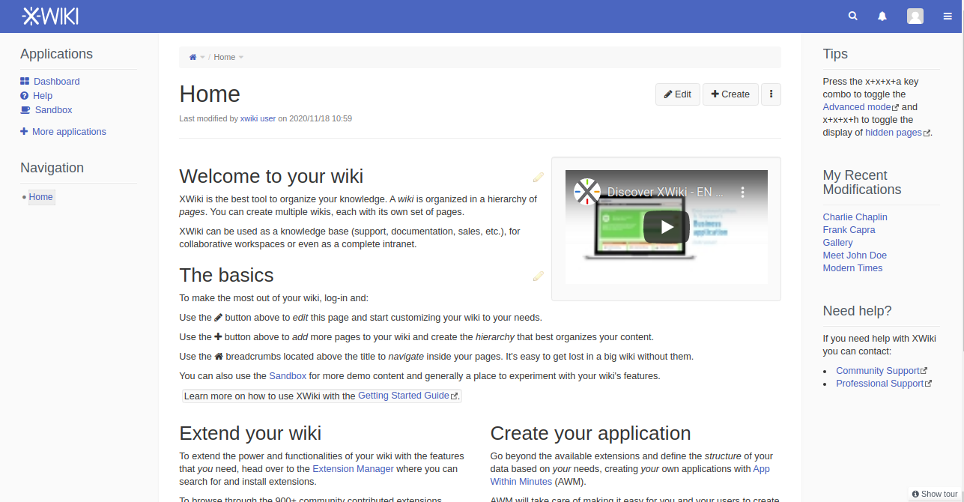
Click on the Continue button. You should see the XWiki default dashboard in the following page:
Conclusion
Congratulations! You have successfully installed and configured XWiki on Ubuntu 20.04. You can now easily deploy your own XWiki in the production environment. Try XWiki on VPS hosting from Atlantic.Net!