Zulip is a free and open-source chat application used for sharing private and public messages. It is very similar to Slack, written in Python, and uses the Django framework. Zulip is a cross-platform software tool able to handle thousands of concurrent chat sessions. It can be integrated with GitHub, Jira, Stripe, Sentry, and more using third-party plugins. Zulip offers a rich set of features including private messaging, group chats, drag-and-drop file uploads, Emoji, audible notifications, missed-message emails, and more.
In this tutorial, we will show you how to install a Zulip chat server on Ubuntu 20.04.
Prerequisites
- A fresh Ubuntu 20.04 VPS
- A valid domain pointed to your server IP
- A root password configured on your server
Step 1 – Download Zulip
First, you will need to download the latest version of Zulip from its official website. You can download it with the following command:
wget https://www.zulip.org/dist/releases/zulip-server-latest.tar.gz
Once the download is completed, extract the downloaded file with the following command:
tar -xvzf zulip-server-latest.tar.gz
Once the downloaded file is extracted, you can proceed to the next step.
Step 2 – Install Zulip Server
You can start the Zulip installation by specifying your valid email address and an FQDN as shown below:
./zulip-server-3.1/scripts/setup/install --certbot [email protected] --
hostname=zulip.example.com
Once the Zulip server is installed successfully, you should get the following output along with Zulip URL:
+ '[' -e /var/run/supervisor.sock ']'
+ supervisorctl restart all
zulip-django: started
zulip-tornado: started
process-fts-updates: started
zulip-workers:zulip_events_deferred_work: started
zulip-workers:zulip_events_digest_emails: started
zulip-workers:zulip_events_email_mirror: started
zulip-workers:zulip_events_embed_links: started
zulip-workers:zulip_events_embedded_bots: started
zulip-workers:zulip_events_error_reports: started
zulip-workers:zulip_events_invites: started
zulip-workers:zulip_events_email_senders: started
zulip-workers:zulip_events_missedmessage_emails: started
zulip-workers:zulip_events_missedmessage_mobile_notifications: started
zulip-workers:zulip_events_outgoing_webhooks: started
zulip-workers:zulip_events_signups: started
zulip-workers:zulip_events_user_activity: started
zulip-workers:zulip_events_user_activity_interval: started
zulip-workers:zulip_events_user_presence: started
zulip-workers:zulip_deliver_enqueued_emails: started
zulip-workers:zulip_deliver_scheduled_messages: started
+ set +x
+ su zulip -c '/home/zulip/deployments/current/manage.py generate_realm_creation_link'
Please visit the following secure single-use link to register your
new Zulip organization:

https://zulip.example.com/new/mmlbpkhig2hnl5kpkzz6hot1
Step 3 – Access Zulip Web Interface
Now, open your web browser and type the URL from the above output https://zulip.example.com/new/mmlbpkhig2hnl5kpkzz6hot1. You should see the following page:
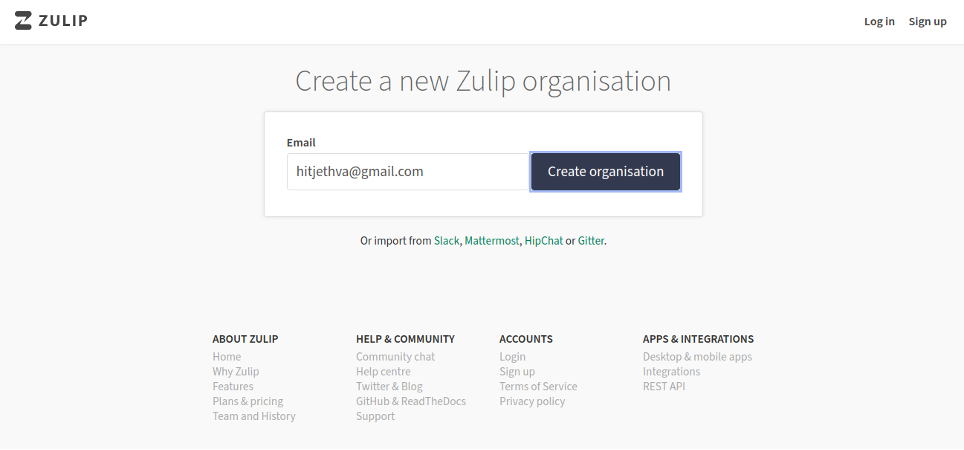
Provide your email address and click on the Create organization button. You should see the following page:
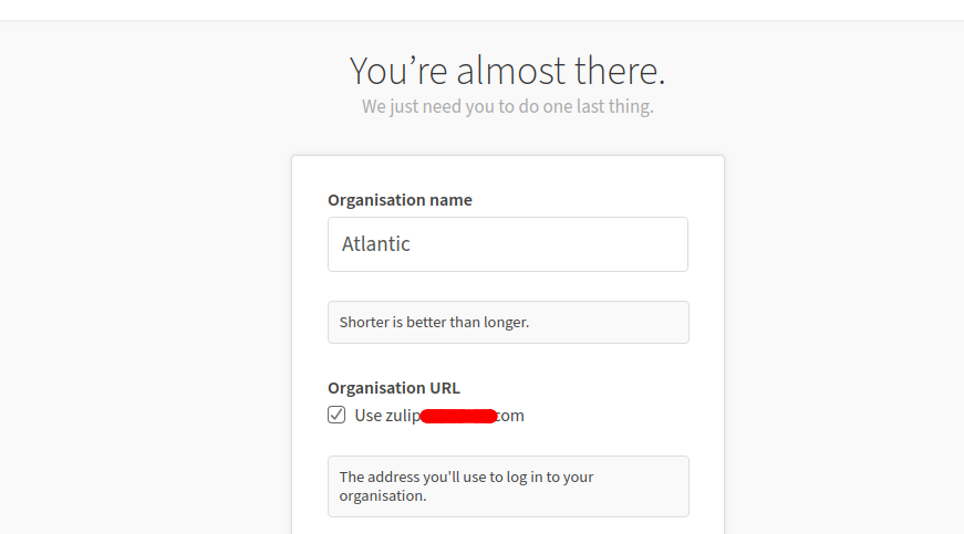

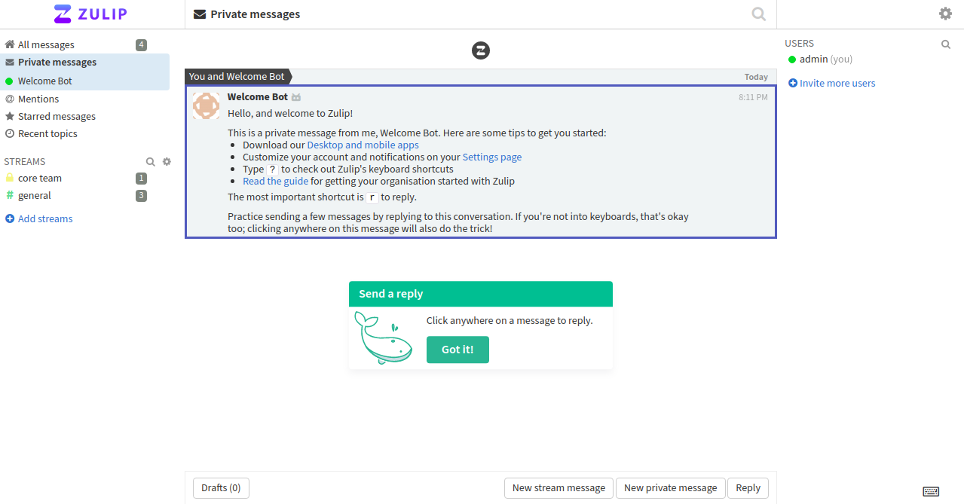
Provide your Organization name, URL, admin username, and password and click on the Login button. You will be redirected to the Zulip dashboard as shown below:
Conclusion
Congratulations! You have successfully installed Zulip chat server with Let’s Encrypt SSL on Ubuntu 20.04. If you’re looking for a simple and cost-effective replacement for Slack or Microsoft Teams then the Zulip chat server is the right choice for you – get started with Zulip on VPS hosting from Atlantic.Net!