sysPass is a free, open-source, web-based password management system. It is cross-platform and available through a web app, mobile app, and browser extension. sysPass provides a simple and user-friendly web interface to generate and manage all passwords. It is written in PHP, providing password management securely and collaboratively.
In this tutorial, we will show you how to install the sysPass password manager on CentOS 8 operating system.
Step 1 – Install Apache Web Server
sysPass runs on a web server. So Apache or Nginx web server must be installed in your system. If not installed, you can install the Apache webserver using the command below:
dnf install httpd -y
After the successful installation, start the Apache web service and enable it to start at system reboot:
systemctl start httpd
systemctl enable httpd
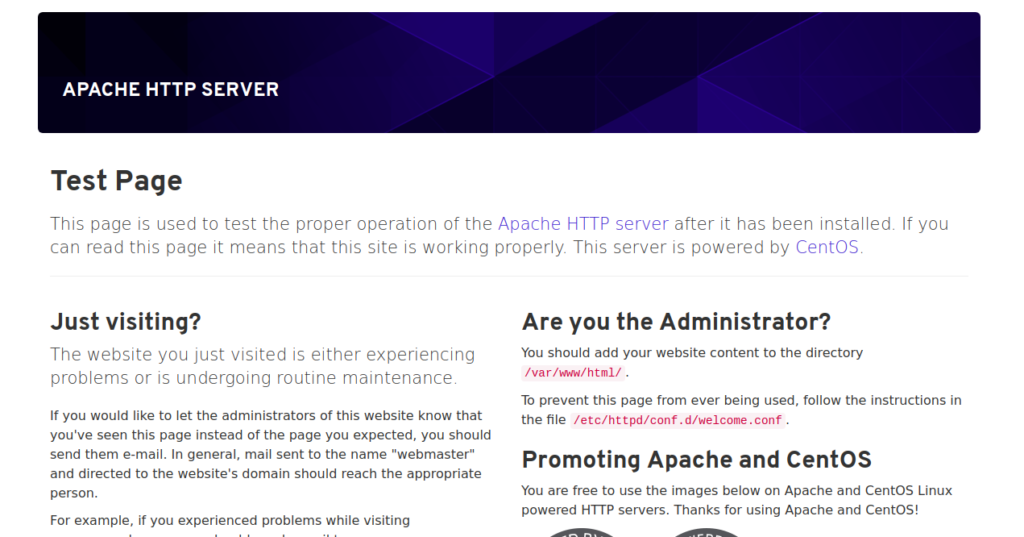
Now, open your web browser and type the URL http://your-server-ip to test the Apache webserver. If everything is fine, you should see the Apache webserver test page as shown below:
Step 2 – Install PHP
sysPass is written in the PHP language, so you will need to install PHP and other required PHP extensions in your system. sysPass is compatible with PHP version 7.3 to 7.4. Both PHP versions are not available in the CentOS 8 default repository, so you will need to add EPEL and REMI repository to your system.
First, add both repositories using the command below:
dnf install https://dl.fedoraproject.org/pub/epel/epel-release-latest-8.noarch.rpm
dnf install https://rpms.remirepo.net/enterprise/remi-release-8.rpm
Once installed, run the following command to list all available PHP versions:
dnf module list php
You can see all PHP versions in the following output:
CentOS Linux 8 - AppStream                                                                                     1.7 MB/s | 6.3 MB     00:03
CentOS Linux 8 - BaseOS                                                                                        8.5 MB/s | 2.3 MB     00:00
Remi's Modular repository for Enterprise Linux 8 - x86_64                                                      455 kB/s | 732 kB     00:01
Safe Remi's RPM repository for Enterprise Linux 8 - x86_64                                                     943 kB/s | 1.6 MB     00:01
CentOS Linux 8 - AppStream
Name                     Stream                         Profiles                                      Summary
php                      7.2 [d][e]                     common [d], devel, minimal                    PHP scripting language
php                      7.3                            common [d], devel, minimal                    PHP scripting language
php                      7.4                            common [d], devel, minimal                    PHP scripting language

Remi's Modular repository for Enterprise Linux 8 - x86_64
Name                     Stream                         Profiles                                      Summary
php                      remi-7.2                       common [d], devel, minimal                    PHP scripting language
php                      remi-7.3                       common [d], devel, minimal                    PHP scripting language
php                      remi-7.4                       common [d], devel, minimal                    PHP scripting language
php                      remi-8.0                       common [d], devel, minimal                    PHP scripting language
Next, run the following command to reset the PHP default repository and enable the PHP REMI repository for version 7.4.
dnf module reset php
dnf module enable php:7.4
Now, install PHP 7.4 along with all necessary modules using the command below:
dnf install php php-mysqli php-pdo php-pear php php-cgi php-cli php-common php-gd php-json php-readline php-curl php-intl php-ldap php-xml php-mbstring git -y
Once the installation is completed, edit the php.ini file make some changes:
nano /etc/php.ini
Change the following values:
post_max_size = 100M
upload_max_filesize = 100M
max_execution_time = 7200
memory_limit = 512M
date.timezone = Etc/UTC
Save the file when you are finished.
Step 3 – Install and Configure MariaDB Database
sysPass uses a MariaDB/MySQL database to store all passwords, so a MariaDB server must be installed in your system.
Run the following command to install the MariaDB server:
dnf install mariadb-server -y
Once installed, start the MariaDB service and enable it to start at system reboot:
systemctl start mariadb
systemctl enable mariadb
Next, you will need to create a database and user for sysPass.
First, connect the MariaDB using the command below:
mysql
Once connected, create a database and user using the command below:
create database syspass;
grant all privileges on syspass.* to syspass@localhost identified by "securepassword";
Next, flush the privileges and exit from the MariaDB with the following command:
flush privileges;
exit;
Step 4 – Install sysPass
Next, download the sysPass code from the Git Hub repository:
git clone https://github.com/nuxsmin/sysPass.git
Once the download is completed, move the downloaded directory to the Apache web root directory:
mv sysPass /var/www/html/syspass
Next, set proper permissions and ownership to the sysPass directory:
chown -R apache:apache /var/www/html/syspass
chmod 750 /var/www/html/syspass/app/{config,backup}
Next, create a Composer installation script:
nano /var/www/html/syspass/install-composer.sh
Add the following code:
#!/bin/sh
 EXPECTED_SIGNATURE="$(wget -q -O - https://composer.github.io/installer.sig)"
 php -r "copy('https://getcomposer.org/installer', 'composer-setup.php');"
 ACTUAL_SIGNATURE="$(php -r "echo hash_file('sha384', 'composer-setup.php');")"
 if [ "$EXPECTED_SIGNATURE" != "$ACTUAL_SIGNATURE" ]
 then
     >&2 echo 'ERROR: Invalid installer signature'
     rm composer-setup.php
     exit 1
 fi
 php composer-setup.php --quiet
 RESULT=$?
 rm composer-setup.php
 exit $RESULT
Save the file, then change the directory to sysPass and run the script as shown below:
cd /var/www/html/syspass/
sh install-composer.sh
Once the Composer is installed, run the following command to install all PHP dependencies required for sysPass:
php composer.phar install --no-dev
Step 5 – Configure Apache to Host sysPass
Next, create an Apache virtual host configuration file to host the sysPass.
nano /etc/httpd/conf.d/syspass.conf
Add the following codes:
<VirtualHost *:80>
ServerAdmin [email protected]
DocumentRoot "/var/www/html/syspass"
ServerName syspass.your-domain.com
<Directory "/var/www/html/syspass/">
Options MultiViews FollowSymlinks
AllowOverride All
Order allow,deny
Allow from all
</Directory>
TransferLog /var/log/httpd/syspass_access.log
ErrorLog /var/log/httpd/syspass_error.log
</VirtualHost>
Save and close the file when you are finished.
Note: replace syspass.your-domain.com with your own fully qualified domain name.
Finally, restart the Apache service to apply the configuration changes:
systemctl restart httpd
Step 6 – Access sysPass Web UI
Now, open your web browser and type the URL http://syspass.your-domain.com to access the sysPass. You will be redirected to the sysPass web installation wizard:
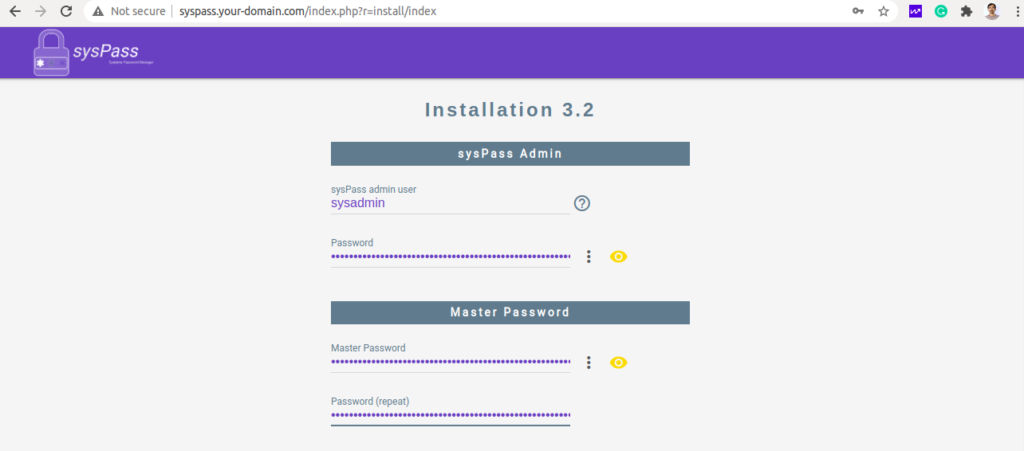
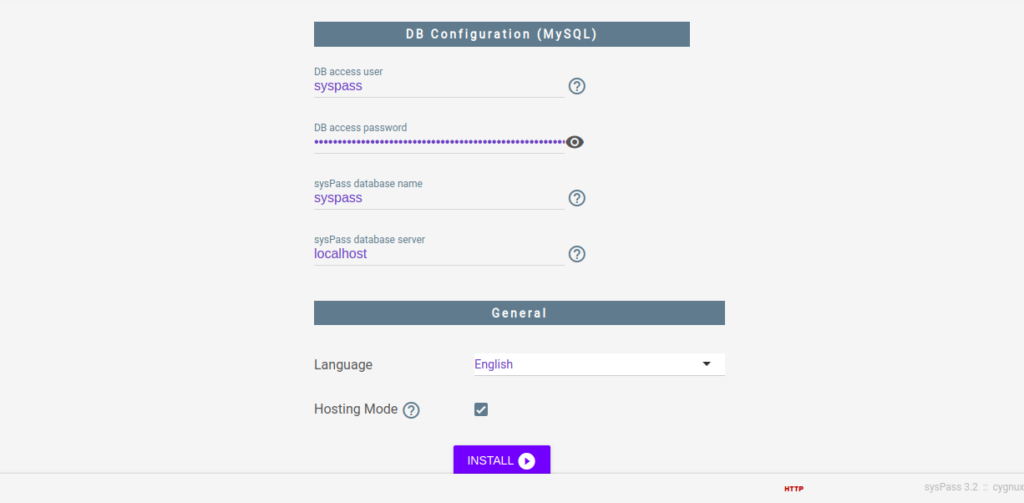
Provide your admin username, password, master password, database name, database username, password, then select HOSTING MODE and click on the INSTALL button to start the installation. Once the sysPass has been installed, you will be redirected to the sysPass login page:
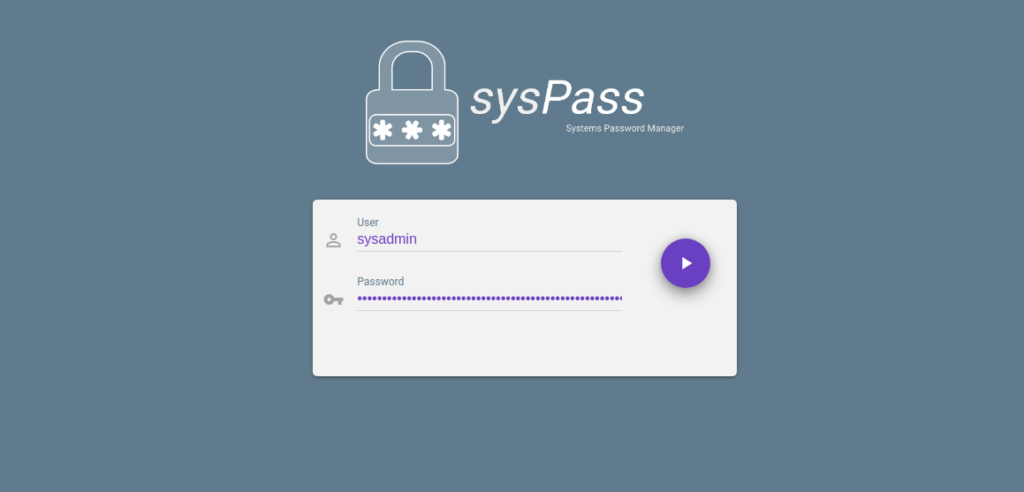
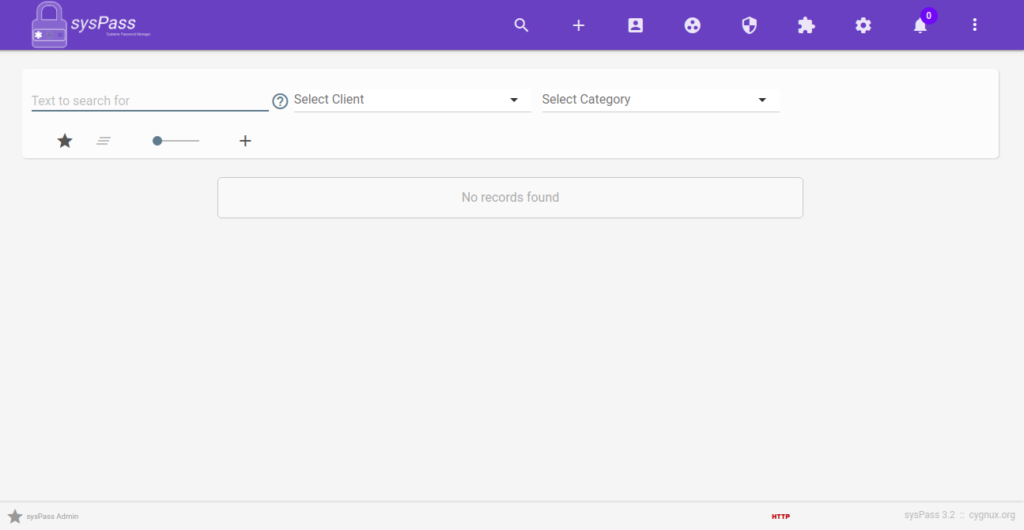
Provide your sysPass admin username, password and hit Enter. You should see the sysPass dashboard on the following page.
Congratulations! You have successfully installed sysPass password manager on CentOS 8 operating system. You can now add your all account passwords and manage them through the web browser. Try it on your dedicated server from Atlantic.Net today!