OpenCart is an open-source e-commerce platform written in PHP. It is simple, lightweight, user-friendly, and provides a web interface to manage it from the web browser. It allows you to easily manage product inventory, orders, affiliates, discounts, product reviews, payment gateways, and more. OpenCart comes with a lot of plugins and themes that help you to make your store more attractive and powerful. If you are looking to host your own online store, then OpenCart is a great choice for you.
In this tutorial, we will show you how to install OpenCart on Rocky Linux 8.
Step 1 – Install Apache, MariaDB, and PHP
First, you will need to install Apache web server and MariaDB to your system. You can install them using the following command:
dnf install httpd mariadb-server -y
After installing both packages, you will also need to install PHP version 8.0 and all required extensions. By default, PHP 8.0 is not included in the Rocky Linux default repo, so you will need to install the PHP REMI repository to your system.
First, install the EPEL and REMI package with the following command:
dnf install epel-release -y
dnf install http://rpms.remirepo.net/enterprise/remi-release-8.rpm
Next, reset the PHP default module and enable the PHP REMI 8.0 module with the following command:
dnf module reset php
dnf module enable php:remi-8.0
Finally, install PHP 8.0 with all required extensions using the following command:
dnf install php php-gd php-ldap php-zip php-odbc php-pear php-xml php-xmlrpc php-mbstring php-mysqlnd php-snmp php-soap curl curl-devel unzip git -y
Once all the packages are installed, start the Apache and MariaDB service and enable them to start at system reboot:
systemctl start httpd
systemctl enable httpd
systemctl start mariadb
systemctl enable mariadb
Step 2 – Create OpenCart Database
OpenCart uses MariaDB as a database backend, so you will need to create a database and user for OpenCart.
First, secure the MariaDB installation and set the MariaDB root password using the following command:
mysql_secure_installation
Answer all the questions as shown below:
Enter current password for root (enter for none):
Set root password? [Y/n] Y
New password:
Re-enter new password:
Remove anonymous users? [Y/n] Y
Disallow root login remotely? [Y/n] Y
Remove test database and access to it? [Y/n] Y
Reload privilege tables now? [Y/n] Y
Next, log in to MariaDB using the following command:
mysql -u root -p
Once you are logged in, create a user and database with the following command:
CREATE DATABASE opencart;
CREATE USER 'opencart'@'localhost' IDENTIFIED BY 'password';
Next, grant all the privileges to the OpenCart database with the following command:
GRANT ALL PRIVILEGES ON opencart.* TO 'opencart'@'localhost';
Next, flush the privileges and exit from MariaDB with the following command:
FLUSH PRIVILEGES;
EXIT;
Step 3 – Download OpenCart
You can download the latest version of the OpenCart from the GitHub repository using the following command:
git clone https://github.com/opencart/opencart.git
Once the download is completed, change the directory to the downloaded directory and copy the upload directory to Apache web root directory:
cd opencart
mv upload /var/www/html/opencart
You will also need to copy the sample configuration file:
cp /var/www/html/opencart/config-dist.php /var/www/html/opencart/config.php
cp /var/www/html/opencart/admin/config-dist.php /var/www/html/opencart/admin/config.php
Next, set proper permissions and ownership using the following command:
chown -R apache:apache /var/www/html/opencart
chmod -R 755 /var/www/html/opencart
Step 4 – Configure Apache to Host OpenCart
Next, you will need to create an Apache virtual host configuration file to host OpenCart on the internet:
nano /etc/httpd/conf.d/opencart.conf
Add the following lines:
<VirtualHost *:80>
ServerAdmin [email protected]
DocumentRoot /var/www/html/opencart/
ServerName opencart.yourdomain.com
<Directory /var/www/html/opencart/>
Options FollowSymLinks
AllowOverride All
Order allow,deny
allow from all
</Directory>
ErrorLog /var/log/httpd/yourdomain.com-error_log
CustomLog /var/log/httpd/yourdomain.com-access_log common
</VirtualHost>
Save and close the file, then restart the Apache service to apply the changes:
systemctl restart httpd
Step 5 – Configure Firewall
If you are using firewalld then you will need to allow HTTP and HTTPS services through the firewall. You can allow them using the following command:
firewall-cmd --permanent --add-service=http
firewall-cmd --permanent --add-service=https
Next, reload firewalld to apply the changes:
firewall-cmd --reload
Step 6 – Access OpenCart Web UI
You can now access the OpenCart Web UI using the URL http://opencart.yourdomain.com. You should see the following page:
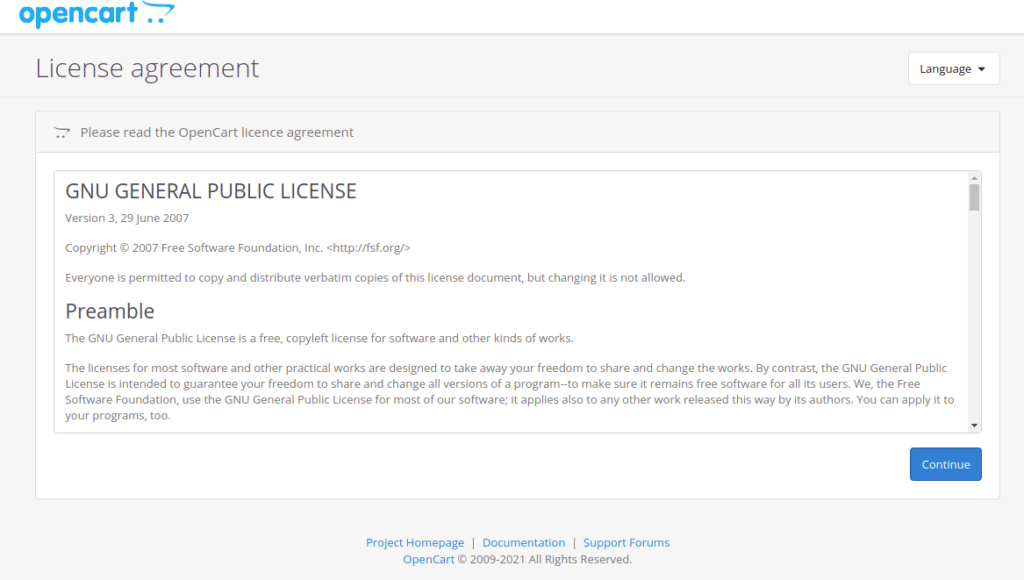
Accept the license agreement and click on the Continue button. You should see the following page:

Make sure all PHP extensions are installed then click on the Continue button. You should see the following page:
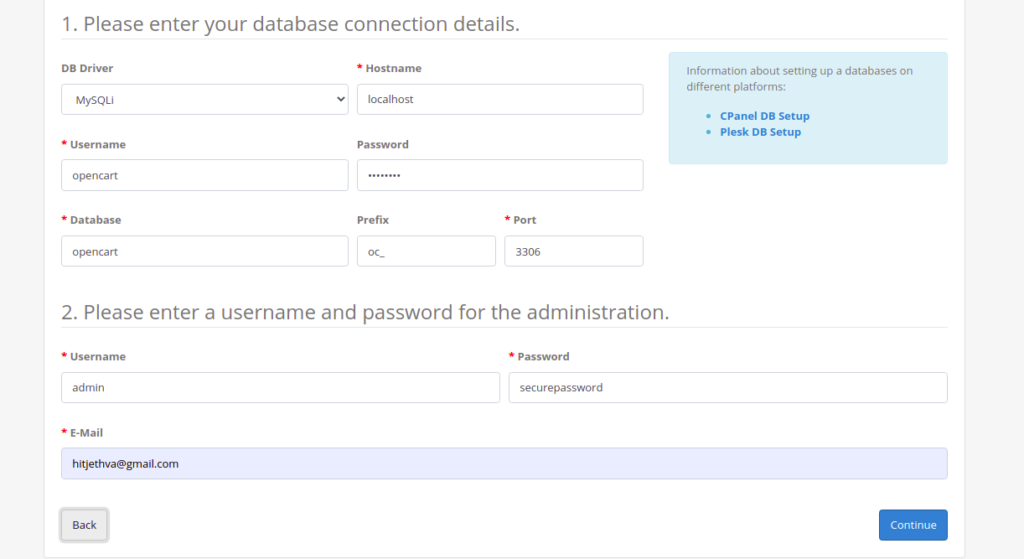
Provide your database details, admin username, password, and click on the Continue button. You should see the following page:
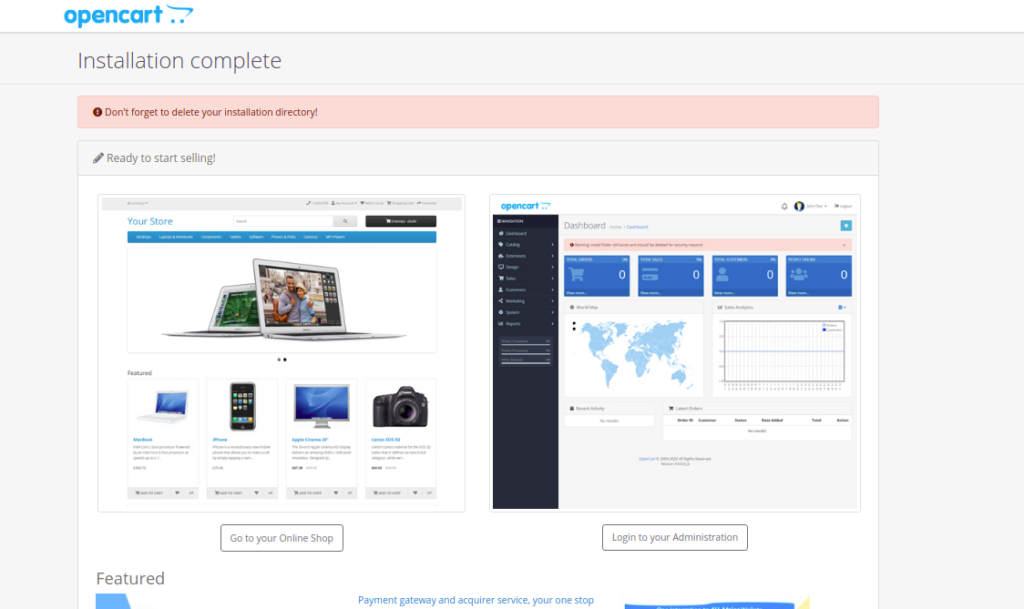
Now, open your terminal and remove the install directory using the following command:
rm -rf /var/www/html/opencart/install
Next, go back to the OpenCart web interface and click on Login to your Administration. You should see the OpenCart login page:
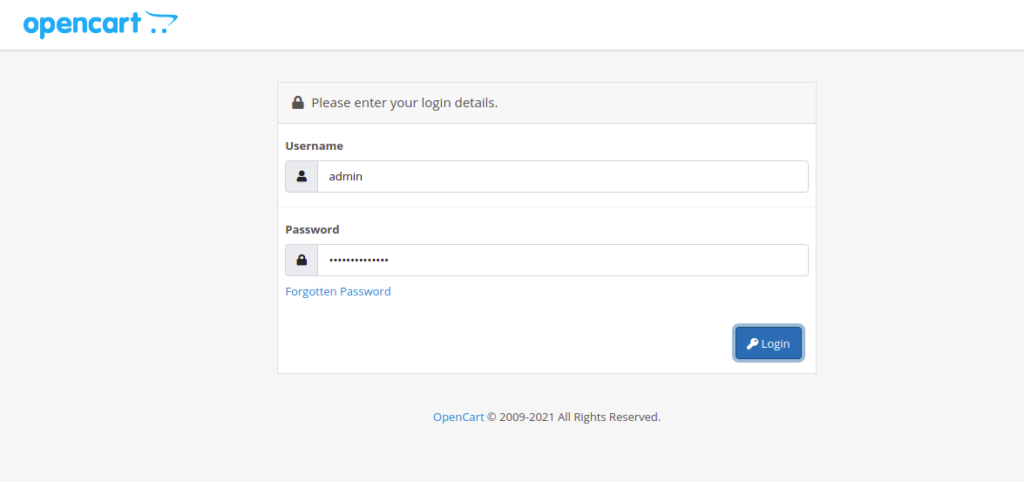
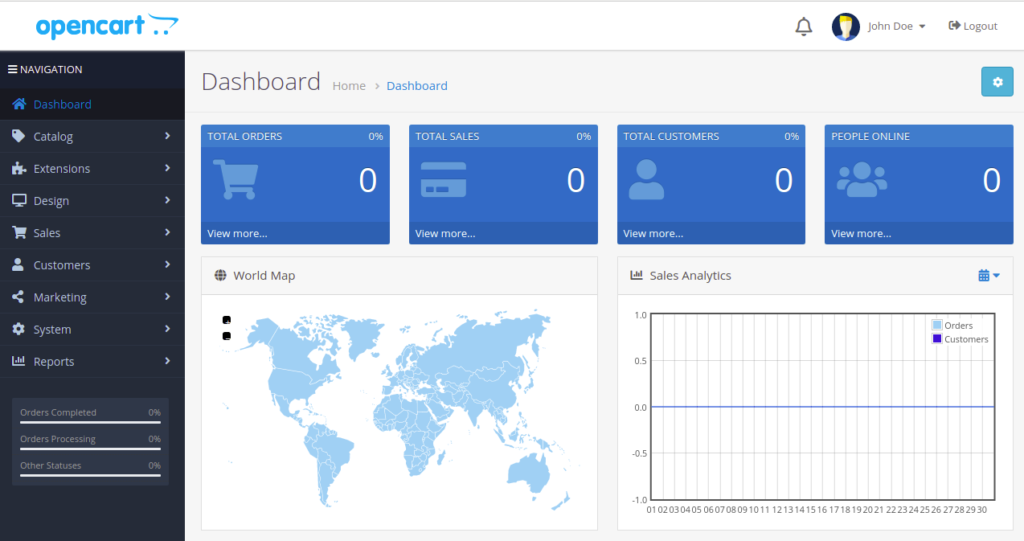
Provide your admin username, password and click on the Login button. You should see the OpenCart dashboard on the following page:
Conclusion
Congratulations! Your OpenCart platform is now ready to use. You can now deploy your own online store using OpenCart. Get started on dedicated hosting from Atlantic.Net.