Memcached is a free and open-source in-memory caching service. You can use it with your web application to increase the speed of applications by caching session data, user authentication tokens, and API calls in memory. It is multithreaded, scales vertically, and allows you to share a large amount of data across multiple application instances. Some major companies including Facebook, Youtube, and Twitter use Memcached as a caching service.
In this post, we will show you how to install Memcached on Oracle Linux 8.
Step 1 – Install Memcached on Oracle Linux 8
The memcached package is included in the Oracle Linux 8 default repo, so you can install it easily by running the following command:
dnf install memcached libmemcached -y
Once the Memcached is installed, you can see the detailed information of Memcached with the following command:
rpm -qi memcached
Sample output:
Name        : memcached
Epoch       : 0
Version     : 1.5.22
Release     : 2.el8
Architecture: x86_64
Install Date: Wednesday 22 June 2022 12:21:28 PM EDT
Group       : System Environment/Daemons
Size        : 414767
License     : BSD
Signature   : RSA/SHA256, Sunday 02 August 2020 01:50:39 AM EDT, Key ID 82562ea9ad986da3
Source RPM  : memcached-1.5.22-2.el8.src.rpm
Build Date  : Sunday 02 August 2020 01:50:04 AM EDT
Build Host  : jenkins-10-147-72-125-33c0adfe-729e-4329-8974-7885a317ca02.appad2iad.osdevelopmeniad.oraclevcn.com
Relocations : (not relocatable)
Vendor      : Oracle America
URL         : https://www.memcached.org/
Summary     : High Performance, Distributed Memory Object Cache
Description :
memcached is a high-performance, distributed memory object caching
system, generic in nature, but intended for use in speeding up dynamic
web applications by alleviating database load.
Step 2 – Manage Memcached Service
By default, the Memcached service is managed by systemd. You can use the systemctl command to manage the Memcached service. To start the Memcached service, run the following command:
systemctl start memcached
To enable the Memcached service to start after the reboot, run the following command:
systemctl enable memcached
To check the status of the Memcached service, run the following command:
systemctl status memcached
Sample output:
● memcached.service - memcached daemon
   Loaded: loaded (/usr/lib/systemd/system/memcached.service; disabled; vendor preset: disabled)
   Active: active (running) since Wed 2022-06-22 12:21:53 EDT; 7s ago
 Main PID: 53667 (memcached)
    Tasks: 10 (limit: 23694)
   Memory: 7.6M
   CGroup: /system.slice/memcached.service
           └─53667 /usr/bin/memcached -p 11211 -u memcached -m 64 -c 1024 -l 127.0.0.1,::1

Jun 22 12:21:53 oraclelinux8 systemd[1]: Started memcached daemon.
Step 3 – Configure Memcached
The Memcached default configuration file is located at /etc/sysconfig/memcached. You can edit it with the following command:
nano /etc/sysconfig/memcached
The default configuration is shown below. You can change it per your requirements:
PORT="11211"
USER="memcached"
MAXCONN="1024"
CACHESIZE="64"
OPTIONS="-l 127.0.0.1,::1"
Save and close the file, then restart the Memcached service to apply the changes:
systemctl restart memcached
Step 4 – Install Memcached PHP Extension
You can use Memcached as a caching service for all PHP-based applications. To do so, you will need to install the Memcached extension for PHP.
First, install the EPEL and Remi repositories with the following command:
dnf install epel-release -y
dnf install https://rpms.remirepo.net/enterprise/remi-release-8.rpm -y
Next, disable the default PHP repo and enable the Remi PHP repo with the following command:
dnf module list reset php
dnf module enable php:remi-7.4 -y
Next, install the Memcached PHP extensions using the following command:
dnf install php-pecl-memcache php-pecl-memcached -y
Step 5 – Verify Memcached for PHP
To verify the Memcached integration with PHP, you will need to install the Nginx web server and PHP package to your server.
dnf install nginx php php-cli -y
Next, create an info.php file with the following command:
nano /var/www/html/info.php
Add the following code:
<?php
phpinfo();
?>
Save and close the file, then create a symbolic link of info.php file to the Nginx default web root directory:
ln -s /var/www/html/info.php /usr/share/nginx/html/
Next, restart the Nginx service to apply the changes:
systemctl start nginx
Now, open your web browser and type the URL http://your-server-ip/info.php. You should see the following page:
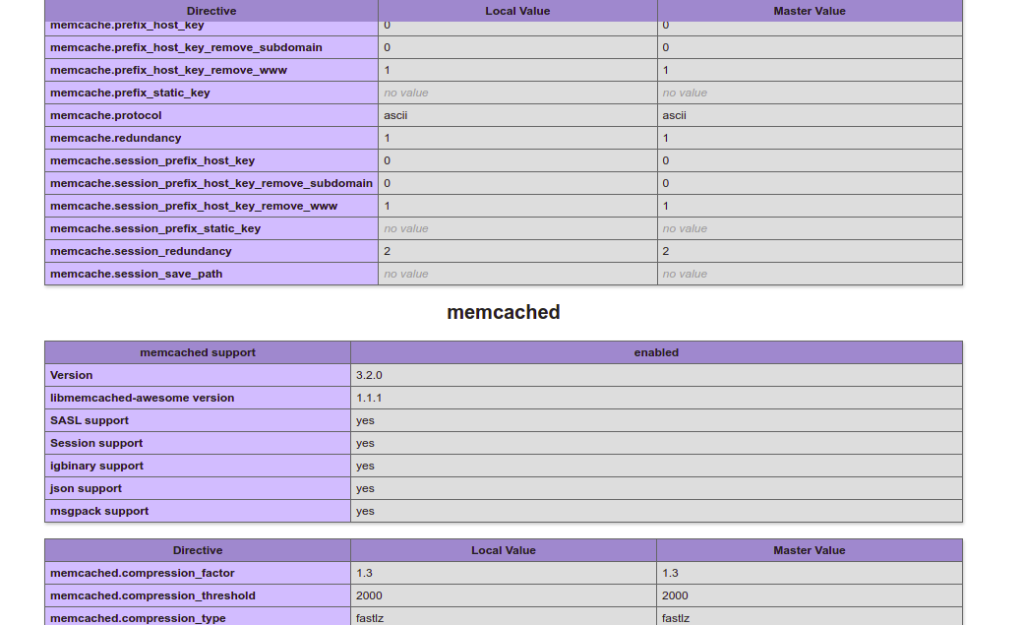
As you can see, both Memcache and Memcached PHP extensions are enabled.
Conclusion
In this post, we explained how to install Memcached on Oracle Linux 8. We also explained how to integrate Memcached with PHP applications. You can now use Memcached to speed up your web application. Try it on VPS hosting from Atlantic.Net!