Nginx also known as engine-X, is a free and open-source web server used to host a website on the web. Simple and lightweight, it is often used as a reverse proxy, an HTTP cache, for load balancing, and for media streaming. Nginx uses an asynchronous, event-driven approach instead of creating new processes for each web request. Nginx is known for its high performance, security, stability, rich feature set, simple configuration, and low resource consumption.
In this post, we will show you how to install the Nginx web server on Arch Linux.
Step 1 – Configure Repository
By default, the default repository is outdated in Arch Linux, so you will need to modify the default mirror list. You can do it by editing the mirrorlist configuration file:
nano /etc/pacman.d/mirrorlist
Remove all lines and add the following lines:
## Score: 0.7, United States
Server = http://mirror.us.leaseweb.net/archlinux/$repo/os/$arch
## Score: 0.8, United States
Server = http://lug.mtu.edu/archlinux/$repo/os/$arch
Server = http://mirror.nl.leaseweb.net/archlinux/$repo/os/$arch
## Score: 0.9, United Kingdom
Server = http://mirror.bytemark.co.uk/archlinux/$repo/os/$arch
## Score: 1.5, United Kingdom
Server = http://mirrors.manchester.m247.com/arch-linux/$repo/os/$arch
Server = http://archlinux.dcc.fc.up.pt/$repo/os/$arch
## Score: 6.6, United States
Server = http://mirror.cs.pitt.edu/archlinux/$repo/os/$arch
## Score: 6.7, United States
Server = http://mirrors.acm.wpi.edu/archlinux/$repo/os/$arch
## Score: 6.8, United States
Server = http://ftp.osuosl.org/pub/archlinux/$repo/os/$arch
## Score: 7.1, India
Server = http://mirror.cse.iitk.ac.in/archlinux/$repo/os/$arch
## Score: 10.1, United States
Server = http://mirrors.xmission.com/archlinux/$repo/os/$arch
Save and close the file, then update all the package indexes with the following command:
pacman -Syu
Step 2 – Install Nginx Web Server
By default, the Nginx web server package is included in the Arch Linux default repository. You can install it using the following command:
pacman -S nginx-mainline
Once Nginx is installed, start and enable the Nginx service using the following command:
systemctl start nginx
systemctl enable nginx
You can check the status of Nginx with the following command:
systemctl status nginx
You should see the following output:
● nginx.service - A high performance web server and a reverse proxy server
     Loaded: loaded (/usr/lib/systemd/system/nginx.service; disabled; preset: disabled)
     Active: active (running) since Tue 2022-09-27 04:46:29 UTC; 4s ago
    Process: 54784 ExecStart=/usr/bin/nginx -g pid /run/nginx.pid; error_log stderr; (code=exited, status=0/SUCCESS)
   Main PID: 54785 (nginx)
      Tasks: 2 (limit: 2362)
     Memory: 2.1M
     CGroup: /system.slice/nginx.service
             ├─54785 "nginx: master process /usr/bin/nginx -g pid /run/nginx.pid; error_log stderr;"
             └─54786 "nginx: worker process"

Sep 27 04:46:29 archlinux systemd[1]: Starting A high performance web server and a reverse proxy server...
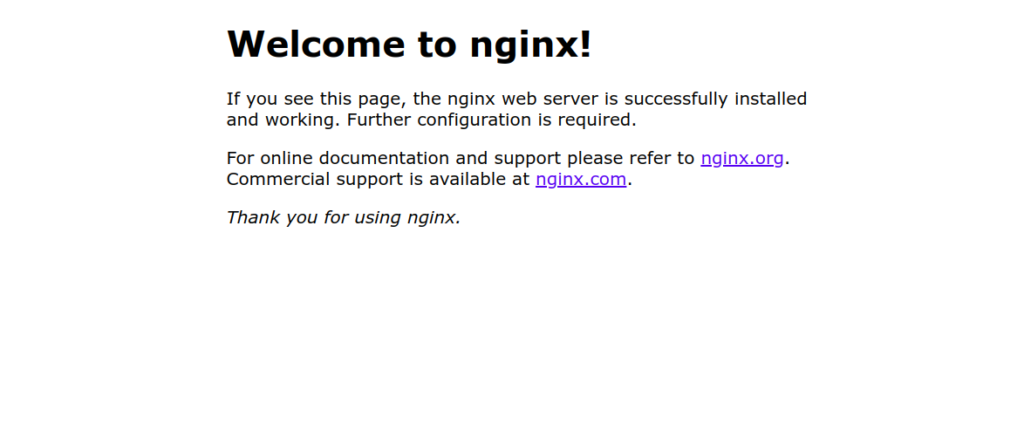
Now, open your web browser and access the Nginx test page using the URL http://your-server-ip. You should see the following page:
Step 3 – Create an Nginx Virtual Host
With Nginx virtual hosting feature, you can host multiple websites on a single server. First, create your website directory using the following command:
mkdir /usr/share/nginx/example.com
Next, create an index.html file for your website using the following command:
nano /usr/share/nginx/example.com/index.html
Add the following codes:
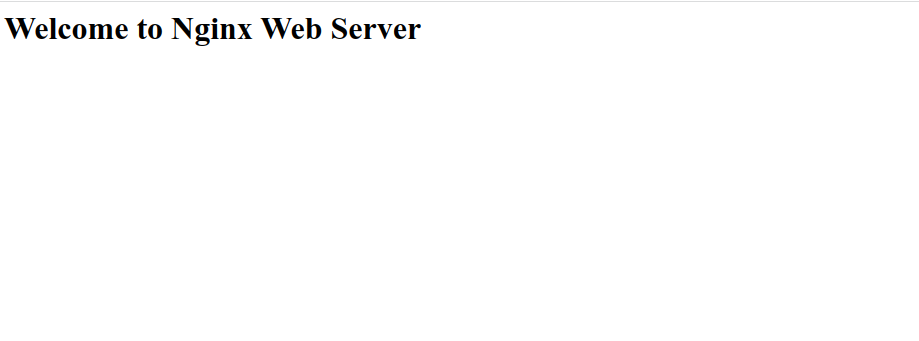
<html>
 <title>Nginx Web Server</title>
  <body>
   <h1>Welcome to Nginx Web Server</h1>
  </body>
</html>
Next, create a directory to store your website content:
mkdir /etc/nginx/sites-enabled
Next, create an Nginx virtual host configuration file with the following command:
nano /etc/nginx/sites-enabled/example.com
Add the following configurations:
server {
    listen 80;
    server_name test.example.com;

    location / {
        root /usr/share/nginx/example.com;
        index  index.html index.htm;
    }
}
Save and close the file, then edit the Nginx main configuration file:
nano /etc/nginx/nginx.conf
Add the following lines below the line http{:
include sites-enabled/*;
server_names_hash_bucket_size 64;
Save and close the file then verify Nginx for any syntax configuration error:
nginx -t
You will get the following output:
nginx: the configuration file /etc/nginx/nginx.conf syntax is ok
nginx: configuration file /etc/nginx/nginx.conf test is successful
Finally, restart the Nginx service to apply the changes:
systemctl restart nginx
Step 4 – Verify Nginx Virtual Host
Now, open your web browser and access your Nginx website using the URL http://test.example.com. You should see the Nginx website page on the following screen:
Conclusion
In this post, we explained how to install the Nginx web server on Arch Linux. We also explained how to create a website using the Nginx virtual hosting feature. You can now host multiple websites on a single server using Nginx. Now, try the Nginx web server on dedicated hosting from Atlantic.Net!