Verified and Tested 03/19/2015
Introduction
In this how-to, we will walk you through How-To Enable RDP in Windows Server 2012.
Remote Desktop Protocol (RDP) is a protocol expanded by Microsoft that allows you to connect and control another computer via an existing network making it a remote connection.
Prerequisites
– A Server with Windows Server 2012.
Enable RDP in Windows Server
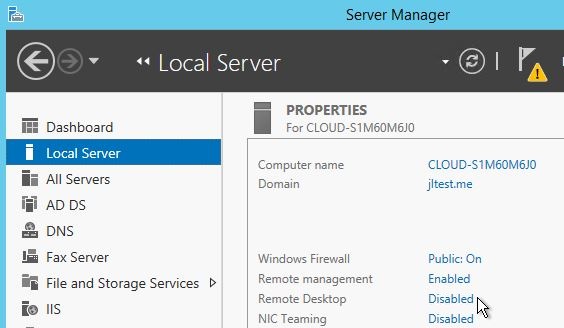
Open the Server Manager from the taskbar/ Click on Local Server / Locate Remote Desktop under Properties which is currently Disabled, and Click on Disabled.
Local Server
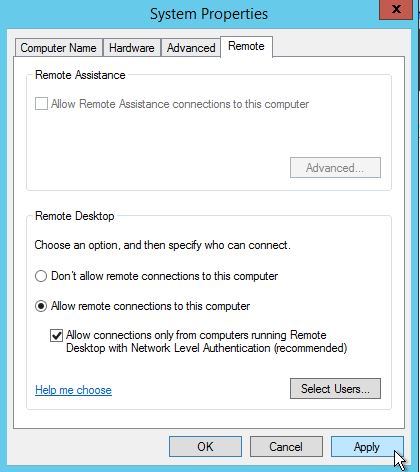
The System Properties window will appear. Select Allow remote connections to this computer, and it’s recommended to check the box below.
Properties
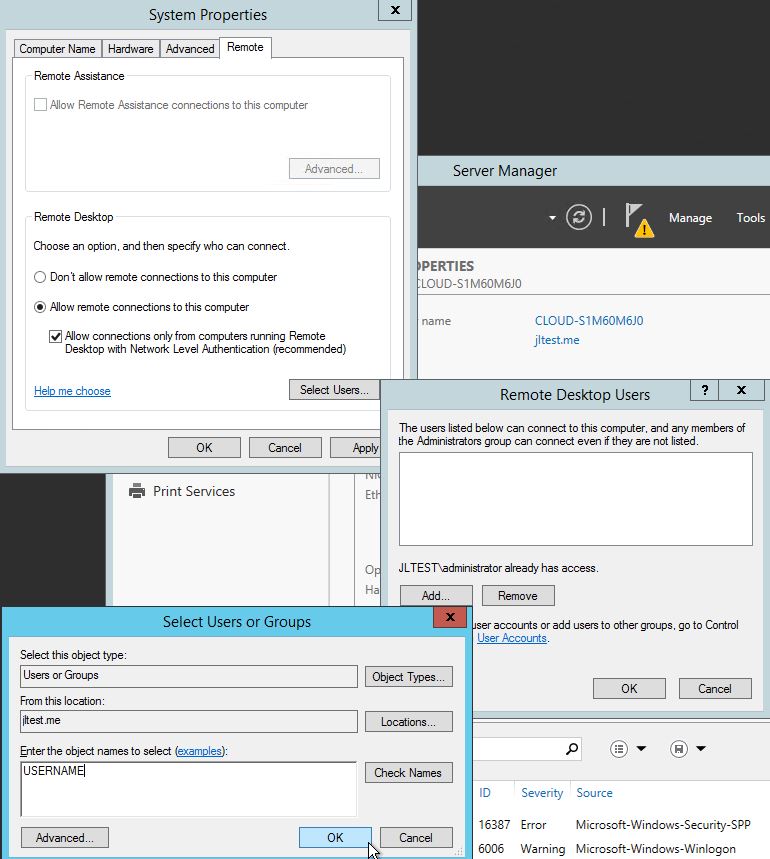
You can also add specific users in the Select Users tab. By default, the administrator is allowed. You can add other users by clicking Select Users/ Click Add/ insert a username and click OK.
Remote Desktop Scope
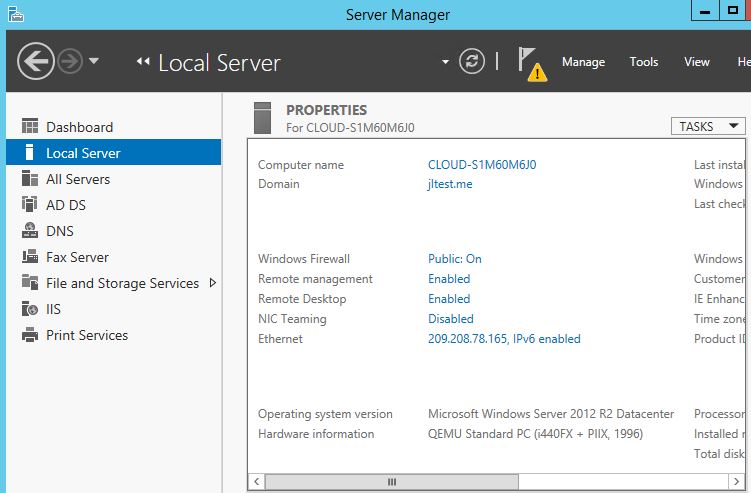
You can now verify that RDP is enabled, and you can see that the status went from Disabled to Enabled.
Verify
Congratulations! You have just Enabled RDP in Windows Server 2012. Thank you for following along in this How-To. Take a look at the following article – How to: Custom RDP Port in Windows 2012.
Learn more about our VPS hosting services and Virtual private servers.
* This post is for informational purposes only and does not constitute professional, legal, financial, or technical advice. Each situation is unique and may require guidance from a qualified professional.
Readers should conduct their own due diligence before making any decisions.