Introduction
Arch Linux is a Linux distribution composed predominantly of free and open-source software that expects a little more from its user. You must be willing to make some effort to understand the system’s operation. But, if you want more control over what gets installed on that system and how it runs, then this distribution might be for you. (This distribution is not ideal for Linux beginners unless you enjoy doing things the hard way!) Arch Linux uses a rolling release model, such that a regular system update is all that is needed to obtain the latest Arch software. For people who have run other Linux versions, some of the first differences users will notice are the setup/management of networking and package management.
Basic Arch Linux Commands
This article will cover some basics to give you start with Arch Linux, including setting the hostname, using basic network adapter functions, and using the Arch Linux package manager, called, simply enough, “pacman.”
Setting the Arch Linux hostname:
To change your server’s hostname, use the hostnamectl command (with most of these commands, you will likely need to either prepend sudo or already be logged in as root).
hostnamectl set-hostname "your hostname"
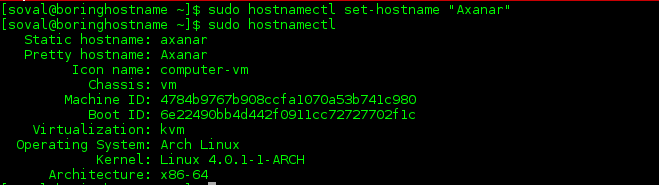
Arch Linux change of hostname
The quotation marks are only necessary if you use a hostname with a space in it.
Using the Arch Linux network adapters
Enabling and disabling interfaces:
To verify which interfaces are on your server and what state they are in, you can use the ip link command:
ip link
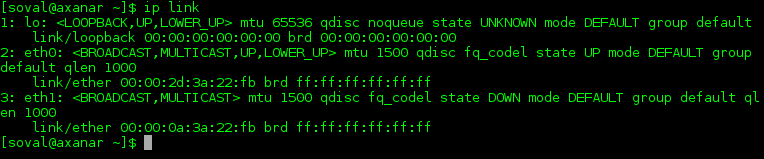
Arch Linux network interface list
To see the IP addresses configured on these interfaces, use ip addr instead.
To enable or disable a particular interface, use the appropriate ip link command, substituting your interface name for the interface you want to affect.
ip link set eth0 upip link set eth0 down
(Pro-Tip: Remember which interface you are using to access this server, for example, if you are accessing this server remotely via ssh. If you disable the wrong interface, you could knock your session offline!)
Network interface file location:
If you’d like to make any changes to the interface file, open up the following file using your text editor of choice:
/etc/netctl/eth0
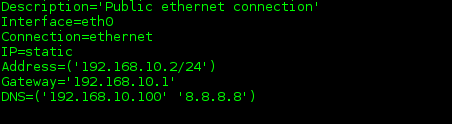
Arch Linux: /etc/netctl/eth0
Restarting networking
If you’ve made changes to your /etc/netctl/eth0 file, for example, you can get those changes to take effect by restarting networking on that interface:
netctl restart eth0
Using the Arch Linux package manager (pacman)
Refreshing the package list
This command is similar to apt-get update in Debian/Ubuntu-based systems and should be run similarly before installing any new packages.
pacman -Sy
Installing a package
If you know the name of a package, you can install it with just the -S option (think “synchronize”).
pacman -S <package-name>
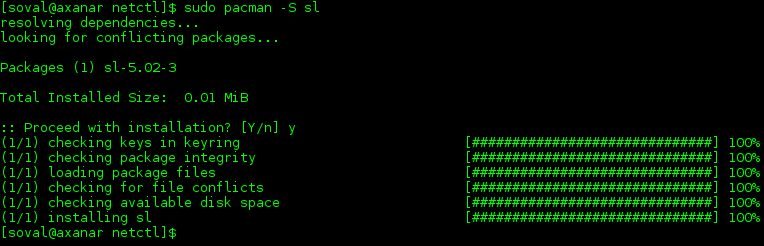
Arch Linux package installation
* The ‘sl’ package is a fun little addition that, when installed and invoked, gives you an animated ASCII steam locomotive. It’s best utilized if you’re prone to mistyping ‘ls’ as ‘sl.’
Searching for available packages
If you’re unsure of the package name, you can search with the -Ss options.
pacman -Ss <search term>
Removing a package
Removing a package requires the use of the -R option:
pacman -R <package-name>
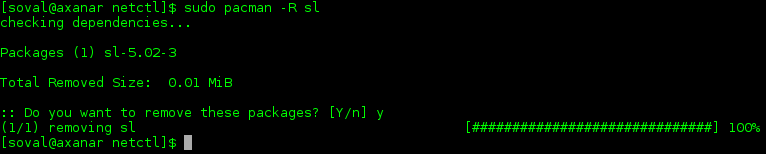
Arch Linux package removal
Upgrading all packages
To update all packages installed on your system, the command takes the additional -u option. If, as above, you are familiar with Debian/Ubuntu, this command is the equivalent of apt-get upgrade.
pacman -Syu
Thank you for following along, and feel free to check back with us for further updates and related posts – like How to Install Apache, MySQL, PHP (LAMP) On Arch Linux – or learn more about our reliable VPS hosting servers.