When you are shopping or banking online, you want to make sure the websites you are on are using HTTPS, which you can verify by noting a green padlock icon is in the address bar. HTTPS is the secure version of HTTP, a protocol used between a browser and a web server. Technically, HTTPS refers to HTTP over Secure Socket Layer (SSL). HTTPS means all communications between your browser and the web server are encrypted.
Behind HTTPS, an SSL certificate plays an important role in building trust between a browser and a web server.
In short, an SSL certificate is a web server’s digital certificate issued by a third party that verifies the identity of the web server and its public key.
A self-signed certificate is a certificate that is not signed by a certificate authority (CA). It is used internally within labs or business environments. However, this certificate has the same level of encryption as trusted certificates.
In this tutorial, we will show you how to generate a self-signed certificate and configure Apache to use this certificate.
Step 1 – Install Apache Web Server
Before starting, an Apache webserver must be installed on your server. If not installed, you can install it with the following command:
apt-get install apache2 openssl -y
Once Apache is installed, you can proceed to the next step.
Step 2 – Generate Self-Signed Certificate
SSL uses public and private keys. The private key resides on the server and is used to encrypt the content, while the public key is used to decrypt the content and is shared among the clients.
First, you will need to generate a private key and a certificate signing request (CSR) for your domain. You can generate it with the following command:
openssl req -nodes -newkey rsa:2048 -keyout /etc/ssl/private/private.key -out
/etc/ssl/private/request.csr
You will be asked to provide your certificate information including Common Name, Organization, City, State, and Country as shown below:
Generating a RSA private key
..........................................................................+++++
............................................................................................+++++
writing new private key to '/etc/ssl/private/private.key'
-----
You are about to be asked to enter information that will be incorporated
into your certificate request.
What you are about to enter is what is called a Distinguished Name or a DN.
There are quite a few fields but you can leave some blank
For some fields there will be a default value,
If you enter '.', the field will be left blank.
-----
Country Name (2 letter code) [AU]:US
State or Province Name (full name) [Some-State]:Newyork
Locality Name (eg, city) []:Newyork
Organization Name (eg, company) [Internet Widgits Pty Ltd]:Atlantic
Organizational Unit Name (eg, section) []:IT
Common Name (e.g. server FQDN or YOUR name) []:Atlantic
Email Address []:admin@example.com

Please enter the following 'extra' attributes
to be sent with your certificate request
A challenge password []:
An optional company name []:
Once your request.csr is generated, you can generate the SSL certificate with the following command:
openssl x509 -in /etc/ssl/private/request.csr -out /etc/ssl/private/certificate.crt -req -signkey
/etc/ssl/private/private.key -days 365
You should get the following output:
Signature ok
subject=C = US, ST = Newyork, L = Newyork, O = Atlantic, OU = IT, CN = Atlantic,
emailAddress = admin@example.com
Getting Private key
At this point, the certificate (certificate.crt) and key (private.key) file are ready to be used with the Apache webserver.
Step 3 – Configure Apache to Use SSL
Now, you will need to configure Apache to use the certificate which you have generated in the previous step.
First, open the Apache default SSL configuration file:
nano /etc/apache2/sites-available/default-ssl.conf
Define your domain name and SSL certificate as shown below:
<IfModule mod_ssl.c>
<VirtualHost _default_:443>
ServerAdmin admin@example.com
ServerName your-server-ip
DocumentRoot /var/www/html

ErrorLog ${APACHE_LOG_DIR}/error.log
CustomLog ${APACHE_LOG_DIR}/access.log combined

SSLEngine on
SSLCertificateFile /etc/ssl/private/certificate.crt
SSLCertificateKeyFile /etc/ssl/private/private.key

<FilesMatch "\.(cgi|shtml|phtml|php)$">
SSLOptions +StdEnvVars
</FilesMatch>
<Directory /usr/lib/cgi-bin>
SSLOptions +StdEnvVars
</Directory>

</VirtualHost>
</IfModule>
Save and close the file, then enable the virtual host file with the following command:
a2ensite default-ssl.conf
Next, open the Apache default virtual host configuration file as shown below:
nano /etc/apache2/sites-available/000-default.conf
Define your domain name and add a Redirect directive, pointing all traffic to the SSL version of the site:
<VirtualHost *:80>

ServerAdmin admin@example.com
ServerName your-server-ip
DocumentRoot /var/www/html

ErrorLog ${APACHE_LOG_DIR}/error.log
CustomLog ${APACHE_LOG_DIR}/access.log combined

Redirect "/" "https://your-server-ip/
</VirtualHost>
Next, enable the SSL and header module with the following command:
a2enmod ssl
a2enmod headers
Finally, reload the Apache service to implement the changes:
systemctl reload apache2
At this point, your Apache web server is configured to use an SSL certificate.
Step 4 – Verify Your SSL Server
Now, open your web browser and type the URL https://your-server-ip. You will be redirected to the warning page:
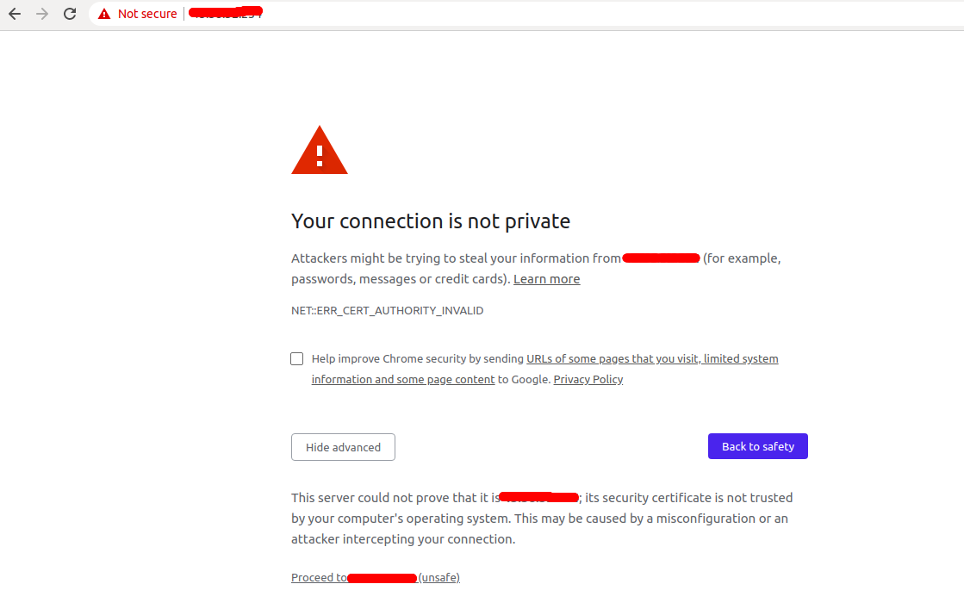
This is because your certificate is not signed by trusted certificate authorities. This is expected and normal. Just ignore it and click on the proceed to your host. You will be redirected to the Apache default page:
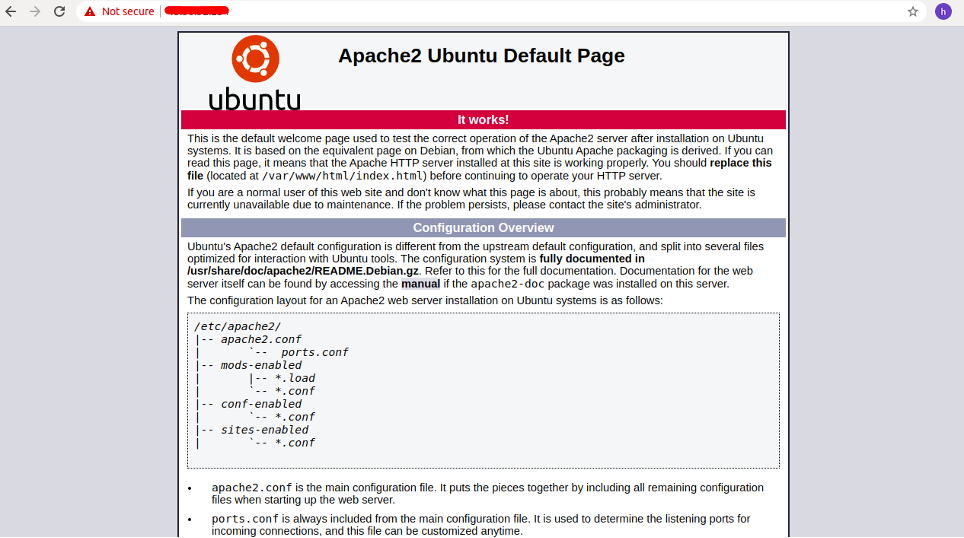
In the browser address bar, you will see a lock with a “not secure” notice. That means the certificate is not validated but is still encrypting your connection.
Conclusion
In this guide, you learned how to generate a self-signed certificate and configure your Apache web server to use this certificate for client connections. You can now easily deploy the SSL in your internal network and encrypt the connections. Try out a self-signed certificate on dedicated server hosting from Atlantic.Net!
Learn more about our dedicated servers.
* This post is for informational purposes only and does not constitute professional, legal, financial, or technical advice. Each situation is unique and may require guidance from a qualified professional.
Readers should conduct their own due diligence before making any decisions.