A LAMP stack is made from four open-source software components: Linux, Apache, MariaDB/MySQL, and PHP. LAMP uses Apache as a web server, Linux as an operating system, MariaDB as a database backend, and PHP as a processing language. Developers and web hosting owners use LAMP to host a website online. It is customizable, so users can replace any component with another open-source solution per their needs.
This post will show you how to install a LAMP stack on Fedora 34.
Step 1 – Install Apache Web Server
Apache web server is the first and most important component of the LAMP server. You can install it using the following commands.
dnf update -y
dnf install httpd -y
Once installed, start and enable the Apache service using the following command.
systemctl start httpd
systemctl enable httpd
Next, verify the Apache status using the following command.
systemctl status httpd
You will get the following output.
● httpd.service - The Apache HTTP Server
     Loaded: loaded (/usr/lib/systemd/system/httpd.service; disabled; vendor preset: disabled)
     Active: active (running) since Thu 2023-04-13 23:01:38 EDT; 1s ago
       Docs: man:httpd.service(8)
   Main PID: 1995 (httpd)
     Status: "Started, listening on: port 80"
      Tasks: 177 (limit: 4666)
     Memory: 14.1M
        CPU: 100ms
     CGroup: /system.slice/httpd.service
             ├─1995 /usr/sbin/httpd -DFOREGROUND
             ├─1996 /usr/sbin/httpd -DFOREGROUND
             ├─1997 /usr/sbin/httpd -DFOREGROUND
             ├─1998 /usr/sbin/httpd -DFOREGROUND
             └─1999 /usr/sbin/httpd -DFOREGROUND
Step 2 – Install MariaDB Database Server
MariaDB is a database server used as a database backend for any web application. You can install the MariaDB server with the following command.
dnf install mariadb-server -y
Next, start and enable the MariaDB server with the following command.
systemctl start mariadb
systemctl enable mariadb
By default, the MariaDB server listens on port 3306. You can check it with the following command.
ss -antpl | grep 3306
You will get the following output.
LISTEN 0 80 *:3306 *:* users:(("mariadbd",pid=4542,fd=20))
Next, run the following script to secure the MariaDB installation.
mysql_secure_installation
You will be asked to provide your current password:
Enter current password for root (enter for none):
Just press the Enter key. You will be asked to change the root password.
OK, successfully used password, moving on...

Setting the root password or using the unix_socket ensures that nobody
can log into the MariaDB root user without the proper authorisation.

You already have your root account protected, so you can safely answer 'n'.

Switch to unix_socket authentication [Y/n] n
 ... skipping.

You already have your root account protected, so you can safely answer 'n'.

Change the root password? [Y/n] Y
New password:
Re-enter new password:
Set your new password and press the Enter key. You will be asked to remove the anonymous users:
Password updated successfully!
Reloading privilege tables..
 ... Success!


By default, a MariaDB installation has an anonymous user, allowing anyone
to log into MariaDB without having to have a user account created for
them.  This is intended only for testing, and to make the installation
go a bit smoother.  You should remove them before moving into a
production environment.

Remove anonymous users? [Y/n] Y
Type Y and press the Enter key. You will be asked to disallow root login remotely.
 ... Success!

Normally, root should only be allowed to connect from 'localhost'.  This
ensures that someone cannot guess at the root password from the network.

Disallow root login remotely? [Y/n] Y
Type Y and press the Enter key. You will be asked to remove the test database.
 ... Success!

By default, MariaDB comes with a database named 'test' that anyone can
access.  This is also intended only for testing, and should be removed
before moving into a production environment.

Remove test database and access to it? [Y/n] Y
Type Y and press the Enter key. You will be asked to reload the privilege tables.
 - Dropping test database...
 ... Success!
 - Removing privileges on test database...
 ... Success!

Reloading the privilege tables will ensure that all changes made so far
will take effect immediately.

Reload privilege tables now? [Y/n] Y
Type Y and press the Enter key to finish the process.
 ... Success!

Cleaning up...

All done!  If you've completed all of the above steps, your MariaDB
installation should now be secure.

Thanks for using MariaDB!
Step 3 – Install PHP
By default, PHP 7.4 is included in the Fedora 34 default repo. You can install PHP with other extensions using the following command.
dnf install php php-common php-mysqlnd php-curl php-xml php-json php-gd php-mbstring -y
After the successful installation, verify the PHP version with the following command.
php -v
You should see the PHP version in the following output.
PHP 7.4.28 (cli) (built: Feb 15 2022 13:23:10) ( NTS )
Copyright (c) The PHP Group
Zend Engine v3.4.0, Copyright (c) Zend Technologies
    with Zend OPcache v7.4.28, Copyright (c), by Zend Technologies
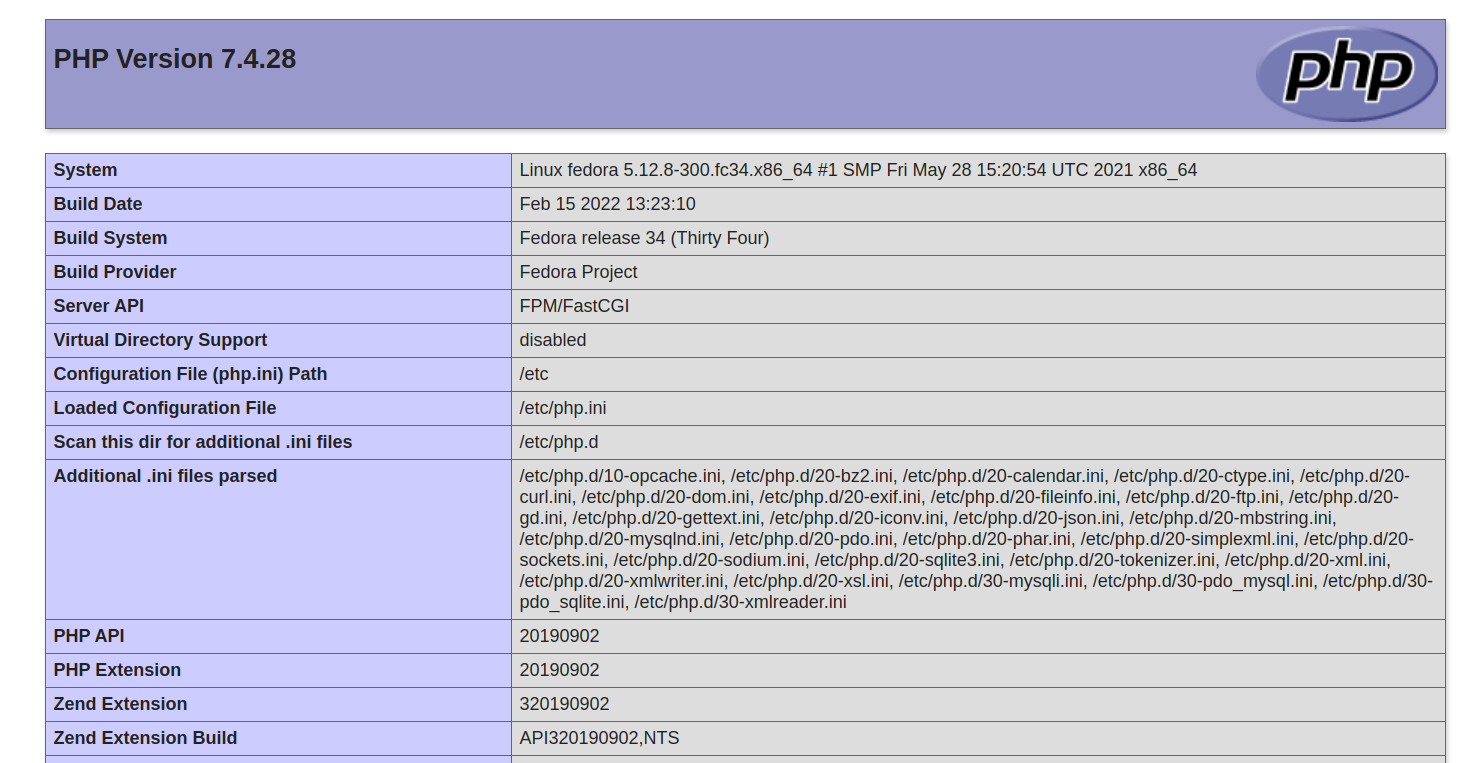
Step 4 – Verify PHP Installation
To verify the PHP installation, create an info.php file.
nano /var/www/html/info.php
Add the following code.
<?php phpinfo(); ?>
Save and close the file, then create an Apache virtual host.
nano /etc/httpd/conf.d/phpinfo.conf
Add the following configuration:
<VirtualHost *:80>
    ServerName phpinfo.example.com
    DocumentRoot /var/www/html/
    DirectoryIndex info.php
    ErrorLog /var/log/httpd/example.com_error.log
    CustomLog /var/log/httpd/example.com_requests.log combined
</VirtualHost>
Save and close the file, then restart the Apache service to apply the changes.
systemctl restart httpd
Now, open your web browser and verify the PHP installation using the URL http://phpinfo.example.com. You should see your PHP information on the following screen.
Conclusion
In this post, we explained how to install Apache, MariaDB, and PHP on Fedora 34. We also showed you how to verify the PHP version using the Apache server. You can now try to deploy the LAMP server on dedicated server hosting from Atlantic.Net!
* This post is for informational purposes only and does not constitute professional, legal, financial, or technical advice. Each situation is unique and may require guidance from a qualified professional.
Readers should conduct their own due diligence before making any decisions.