Free, open-source Apache is one of the most popular web server software solutions available. It is developed and maintained by the Apache Foundation. It is used by approximately 47% of websites all over the world. It’s easy to use, customizable, and designed to host dynamic websites. It is cross-platform software and can be installed on Windows, macOS, and Linux.
In this guide, we will show you how to install the Apache web server on Fedora 34.
Step 1 – Install Apache Web Server
By default, the Apache package is included in the Fedora 34 default repo. You can install it with the following command.
dnf update -y
dnf install httpd -y
After the successful installation, you can see detailed information about Apache with the following command.
rpm -qi httpd
You will get the following output.
Name        : httpd
Version     : 2.4.53
Release     : 1.fc34
Architecture: x86_64
Install Date: Thursday 13 April 2023 10:58:31 PM
Group       : Unspecified
Size        : 4932592
License     : ASL 2.0
Signature   : RSA/SHA256, Thursday 17 March 2022 01:00:49 PM, Key ID 1161ae6945719a39
Source RPM  : httpd-2.4.53-1.fc34.src.rpm
Build Date  : Thursday 17 March 2022 12:43:53 PM
Build Host  : buildvm-x86-27.iad2.fedoraproject.org
Packager    : Fedora Project
Vendor      : Fedora Project
URL         : https://httpd.apache.org/
Bug URL     : https://bugz.fedoraproject.org/httpd
Summary     : Apache HTTP Server
Description :
The Apache HTTP Server is a powerful, efficient, and extensible
web server.
Step 2 – Manage Apache Service
By default, the Apache service is managed by systemd. You can easily start, stop and enable the Apache service via systemctl command.
To start the Apache service, run the following command.
systemctl start httpd
To enable the Apache service, run the following command.
systemctl enable httpd
To check the status of the Apache service, run the following command.
systemctl status httpd
You will get the following output.
● httpd.service - The Apache HTTP Server
     Loaded: loaded (/usr/lib/systemd/system/httpd.service; disabled; vendor preset: disabled)
     Active: active (running) since Thu 2023-04-13 22:58:51 EDT; 4s ago
       Docs: man:httpd.service(8)
   Main PID: 1539 (httpd)
     Status: "Started, listening on: port 80"
      Tasks: 177 (limit: 4666)
     Memory: 14.2M
        CPU: 99ms
     CGroup: /system.slice/httpd.service
             ├─1539 /usr/sbin/httpd -DFOREGROUND
             ├─1540 /usr/sbin/httpd -DFOREGROUND
             ├─1541 /usr/sbin/httpd -DFOREGROUND
             ├─1542 /usr/sbin/httpd -DFOREGROUND
             └─1543 /usr/sbin/httpd -DFOREGROUND

Apr 13 22:58:51 fedora systemd[1]: Starting The Apache HTTP Server...
To stop the Apache service, run the following command.
systemctl stop httpd
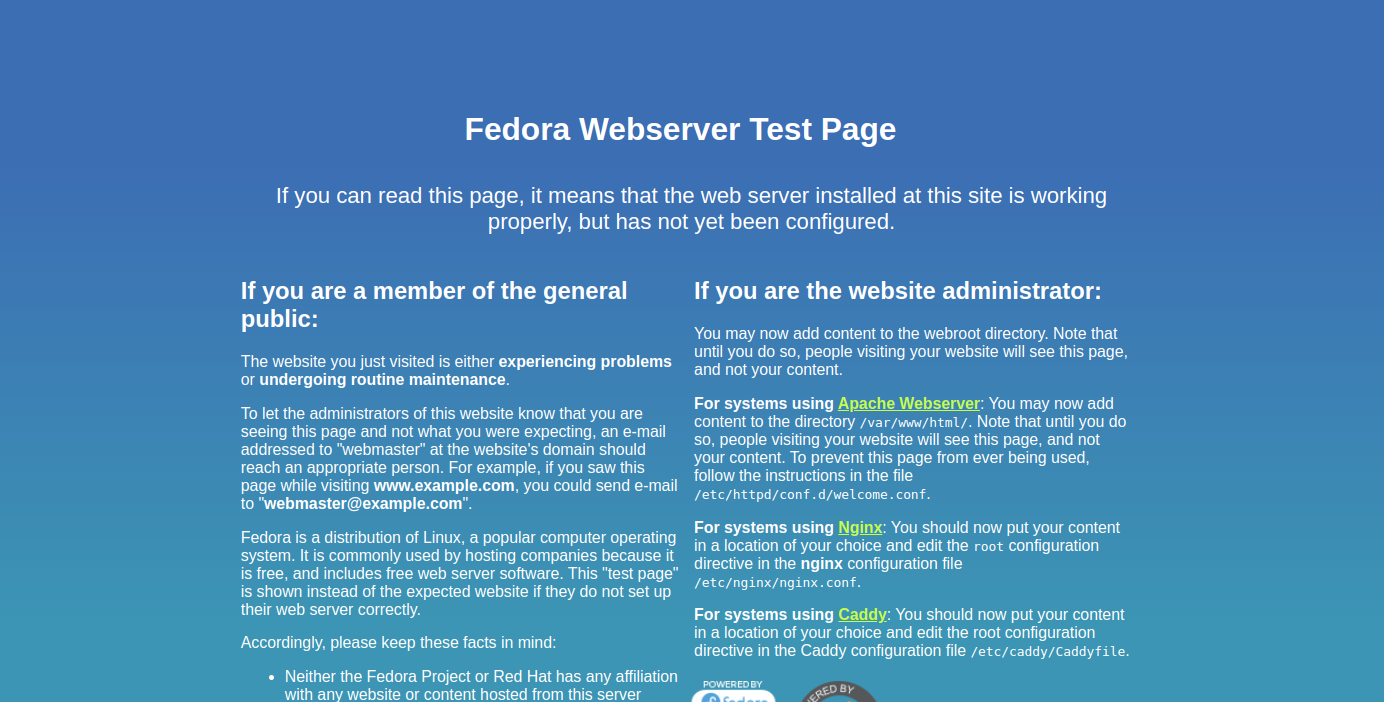
Step 3 – Access the Apache Test Page
At this point, the Apache web server is started and listening on port 80. You can verify it with the following command.
ss -antpl | grep :80
You should see the Apache listening port in the following output.
LISTEN 0 511 *:80 *:* users:(("httpd",pid=1543,fd=4),("httpd",pid=1542,fd=4),("httpd",pid=1541,fd=4),("httpd",pid=1539,fd=4))
Now, open your web browser and access the Apache test page using the URL http://your-server-ip.
Step 4 – Create and Host a Simple Website with Apache
First, create an Apache website directory using the following command.
mkdir /var/www/html/website
Next, create an index.html file:
nano /var/www/html/website/index.html
Add the following content:
<html>
  <head>
    <h2>Welcome to Apache Web Server</title>
  </h2>
  <body>
    <h3>Success! Apache server on Fedora is working!</h3>
  </body>
</html>
Next, set the permissions and ownership to the Apache website directory.
chown -R apache:apache /var/www/html/website
chmod -R 755 /var/www/html/website
Next, create an Apache virtual host configuration file.
nano /etc/httpd/conf.d/web.conf
Add the following configuration:
<VirtualHost *:80>
    ServerName web.example.com
    DocumentRoot /var/www/html/website
    DirectoryIndex index.html
    ErrorLog /var/log/httpd/example.com_error.log
    CustomLog /var/log/httpd/example.com_requests.log combined
</VirtualHost>
Save and close the file, then restart the Apache service to apply the changes.
systemctl restart httpd
Step 5 – Access Apache Website
At this point, the Apache web server is configured to serve HTML websites. You can now access it using the URL http://web.example.com. You should see your website on the following screen.

Conclusion
In this post, we showed you how to install the Apache web server on Fedora 34. We also created a simple website and host it using an Apache web server. You can now easily use Apache to host your own website on the internet. You can try Apache on dedicated server hosting from Atlantic.Net!
* This post is for informational purposes only and does not constitute professional, legal, financial, or technical advice. Each situation is unique and may require guidance from a qualified professional.
Readers should conduct their own due diligence before making any decisions.