InvoiceNinja is free, open-source, low-cost invoicing software that allows you to create and send invoices to your client with your own branding. It is written in PHP and JavaScript and designed for invoicing and billing customers. InvoiceNinja offers a lot of useful features such as recurring invoices, creating tasks, proposals, and projects, invoice designs, multiple payment options and more.
In this post, we will show you how to install InvoiceNinja on Oracle Linux 8.
Step 1 – Install Apache, MariaDB, and PHP
First, you will need to install the Apache and MariaDB service on your system. You can install both packages using the following command:
dnf install httpd mariadb-server -y
Next, you will need to install the latest version of PHP on your server.
First, reset the default PHP module with the following command:
dnf module reset php
Next, install the EPEL and PHP Remi repositories with the following command:
dnf install epel-release  -y
dnf install dnf-utils http://rpms.remirepo.net/enterprise/remi-release-8.rpm
Next, enable the PHP 8.1 repository with the following command:
dnf module enable php:remi-8.1
Next, install PHP with other required extensions using the following command:
dnf install php php-{cli,fpm,gd,mbstring,curl,zip,xml,pdo,mysqlnd,pear,bcmath,gmp,json} --nogpgcheck
Next, start and enable the Apache, MariaDB, and PHP-FPM services with the following command:
systemctl start httpd mariadb php-fpm
systemctl enable httpd mariadb php-fpm
Step 2 – Create a Database for InvoiceNinja
InvoiceNinja uses MariaDB/MySQL as a database backend, so you will need to create a database and user for InvoiceNinja.
First, log in to the MariaDB shell with the following command:
mysql
Next, create a database and user with the following command:
CREATE DATABASE invoiceninja;
GRANT ALL ON invoiceninja.* TO invoiceninja@localhost IDENTIFIED BY "password";
Next, flush the privileges and exit from the MariaDB shell with the following command:
FLUSH PRIVILEGES;
EXIT;
Step 3 – Install InvoiceNinja
First, you will need to install Composer on your server. You can install it with the following command:
curl -sS https://getcomposer.org/installer -o composer-setup.php
php composer-setup.php --install-dir=/usr/local/bin --filename=composer
Once Composer is installed, verify the Composer version using the following command:
composer -V
You will get the following output:
Composer version 2.4.2 2022-09-14 16:11:15
Next, download the latest version of InvoiceNinja with the following command:
git clone -b v5-stable --single-branch https://github.com/invoiceninja/invoiceninja.git
Once the download is completed, move the downloaded file to the Apache web root:
mv invoiceninja /var/www/html/ninja
Next, change the directory to the InvoiceNinja and install all required dependencies:
cd /var/www/html/ninja
composer create-project --no-dev
Next, edit the .env file and define your database settings:
nano .env
Change the following lines:
DB_HOST=localhost
DB_DATABASE=invoiceninja
DB_USERNAME=invoiceninja
DB_PASSWORD=password
DB_PORT=3306
Save and close the file, then set proper permissions and ownership to the InvoiceNinja directory:
chown -R apache:apache /var/www/html/ninja
chmod -R 755 /var/www/html/ninja/storage/
Step 4 – Configure Apache for InvoiceNinja
Next, you will need to create an Apache virtual host configuration file for InvoiceNinja. You can create it with the following command:
nano /etc/httpd/conf.d/invoice-ninja.conf
Add the following lines:
<VirtualHost *:80>
    ServerName ninja.example.com
    DocumentRoot /var/www/html/ninja/public

    <Directory /var/www/html/ninja/public>
       DirectoryIndex index.php
       Options +FollowSymLinks
       AllowOverride All
       Require all granted
    </Directory>

    CustomLog /var/log/httpd/invoice_ninja_access.log combined
    ErrorLog /var/log/httpd/invoice_ninja_error.log
</VirtualHost>
Save and close the file, then restart the Apache service to apply the changes:
systemctl restart httpd
Step 5 – Access InvoiceNinja Web UI
Now, open your web browser and access the InvoiceNinja web interface using the URL http://ninja.example.com/setup. You should see the following page:
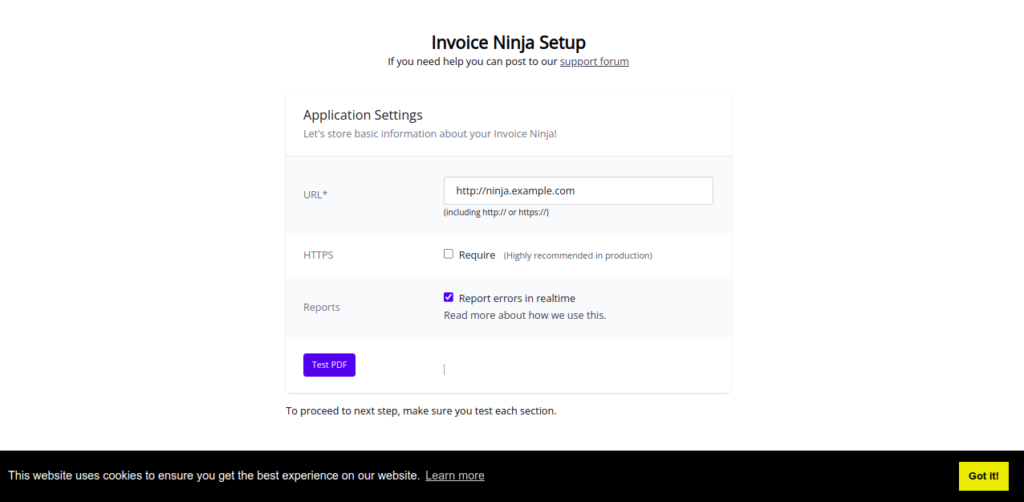
Provide your website URL and click on Test PDF. You should see the following page:
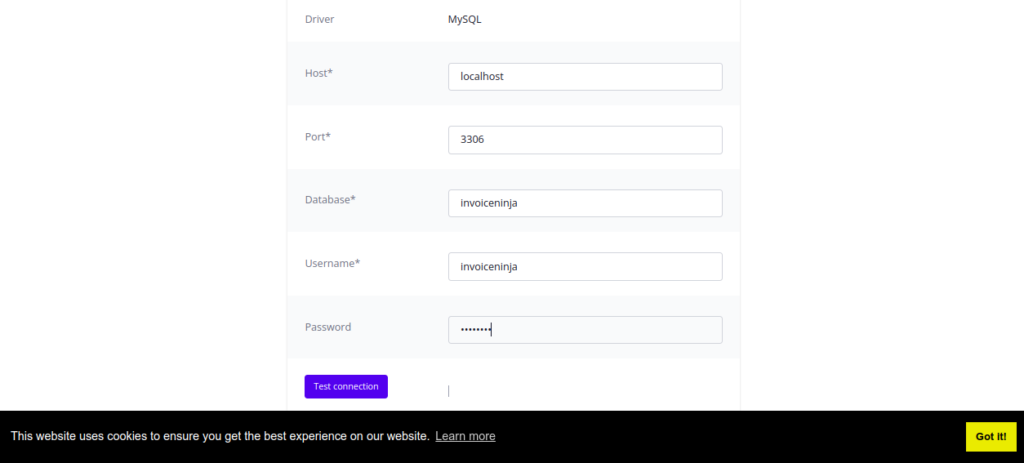
Define your database settings and click on Test connection. You should see the following page:

Define your email settings and click on Send test email. You should see the following page:
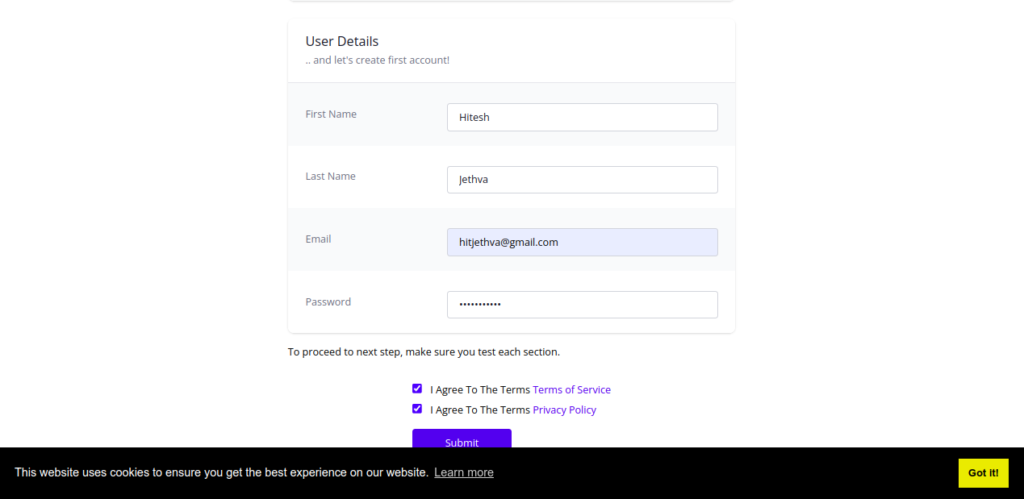
Provide your admin username, email, and password, and click the Submit button. You should see the following page:
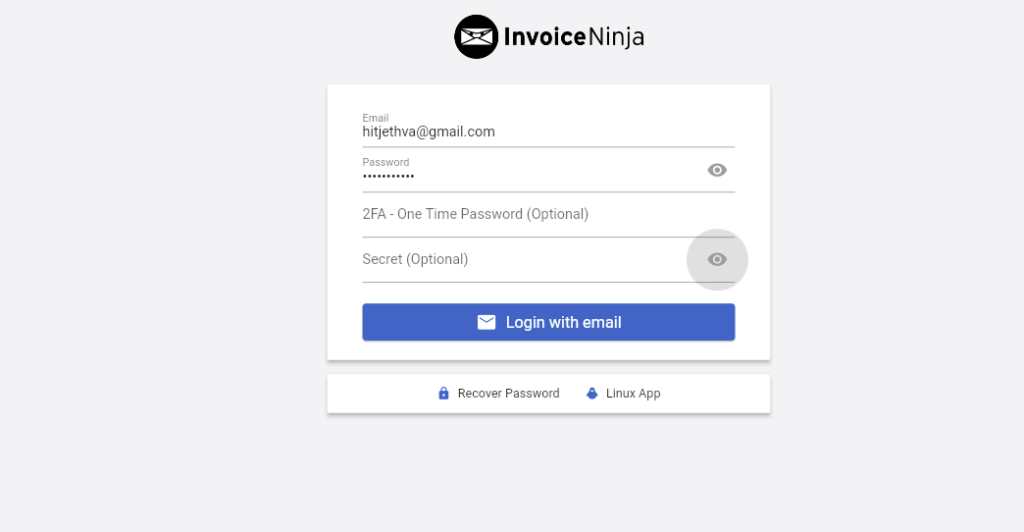
Provide your email and password and click on the Login with email button. You should see the InvoiceNinja welcome page:
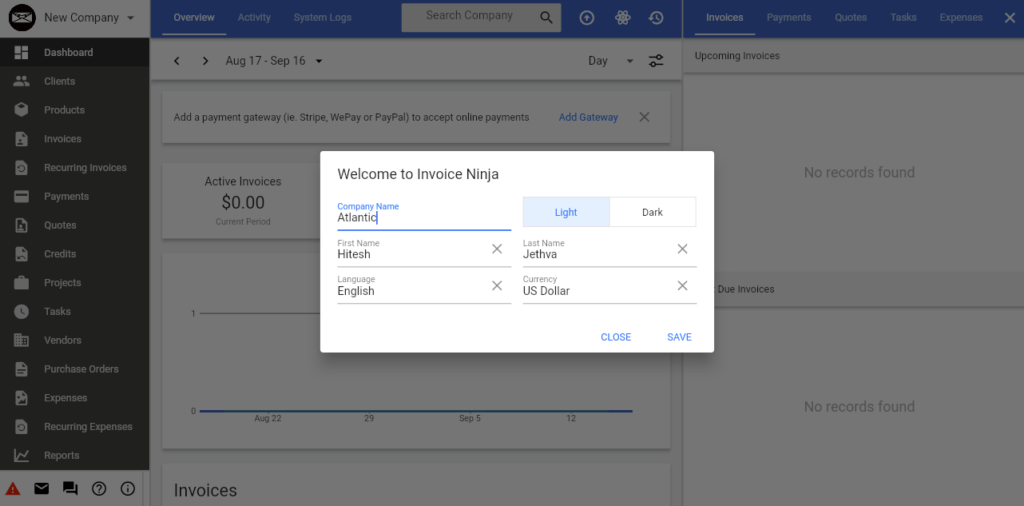
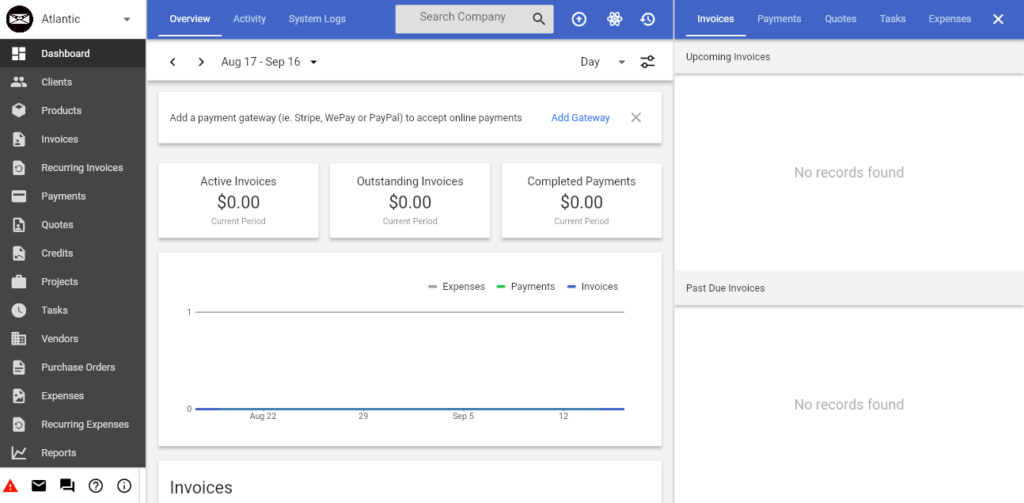
Provide your company name and click on the SAVE button. You should see the InvoiceNinja dashboard on the following page:
Conclusion
In this post, we explained how to install InvoiceNinja on Oracle Linux 8. You can now implement InvoiceNinja in your organization and start managing all invoicing from the central location. Try it on dedicated hosting from Atlantic.Net!