Apache Tomcat is a free, open-source, and extremely popular Servlet container used for deploying Java-based applications on the web. You can run JavaServer (JSP), JavaServlet, and Java Expression languages on the Apache Tomcat platform. It is the first choice of web developers for building and deploying dynamic websites and applications based on Java.
In this post, we will explain how to install Apache Tomcat 10 on Oracle Linux 8.
Step 1 – Install Java
Apache Tomcat is based on Java, so you must install the Java package on your server. You can install it using the following commands:
dnf update -y
dnf install java-11-openjdk -y
Once Java is installed, you can verify the Java version using the following command:
java -version
You will get the following output:
openjdk version "11.0.15" 2022-04-19 LTS
OpenJDK Runtime Environment 18.9 (build 11.0.15+9-LTS)
OpenJDK 64-Bit Server VM 18.9 (build 11.0.15+9-LTS, mixed mode, sharing)
Also Read
How to Install and Manage Java Versions on Oracle Linux 8
Step 2 – Install Apache Tomcat on Oracle Linux
First, it is recommended to add a dedicated user for Tomcat. You can add it using the following command:
useradd -r -d /opt/tomcat/ -s /bin/false -c "Tomcat User" tomcat
Next, go to the Tomcat download page and download the latest version of Apache Tomcat 10 using the wget command:
wget https://dlcdn.apache.org/tomcat/tomcat-10/v10.0.20/bin/apache-tomcat-10.0.20.tar.gz
Once Apache Tomcat is downloaded, create a directory for Tomcat and extract the downloaded file inside the /opt/tomcat directory:
mkdir /opt/tomcat
tar xzf apache-tomcat-10.0.20.tar.gz -C /opt/tomcat --strip-components=1
Next, change the ownership of /opt/tomcat directory to Tomcat:
chown -R tomcat: /opt/tomcat/
Step 3 – Create a Tomcat Administrative User
By default, Tomcat can be accessed without authentication. For security reasons, it is recommended to enable authentication in Tomcat.
You can enable Tomcat authentication and create an admin user by editing the /opt/tomcat/conf/tomcat-users.xml file:
nano /opt/tomcat/conf/tomcat-users.xml
Add the following lines just above the last line:
<role rolename="manager-gui"/>
<user username="admin" password="password" roles="manager-gui,admin-gui"/>
Save and close the file when you are finished.
Step 4 – Configure Tomcat for Remote Access
By default, Tomcat can be accessed only from the local host, so you must configure Tomcat to access it from the remote machine.
To allow the Manager App from the remote host, edit the context.xml file:
nano /opt/tomcat/webapps/manager/META-INF/context.xml
Remove the following lines:
  <Valve className="org.apache.catalina.valves.RemoteAddrValve"
         allow="127\.\d+\.\d+\.\d+|::1|0:0:0:0:0:0:0:1" />
Save and close the file when you are finished.
To allow the Host Manager App from the remote host, edit the context.xml file:
nano /opt/tomcat/webapps/host-manager/META-INF/context.xml
Remove the following lines:
  <Valve className="org.apache.catalina.valves.RemoteAddrValve"
         allow="127\.\d+\.\d+\.\d+|::1|0:0:0:0:0:0:0:1" />
Save and close the file when you are finished.
Step 5 – Create a Systemd Unit File for Apache Tomcat
Next, it is recommended to create a systemd unit file to manage the Tomcat service. You can create it with the following command:
nano /etc/systemd/system/tomcat.service
Add the following lines:
[Unit]
Description=Apache Tomcat Server
After=syslog.target network.target

[Service]
Type=forking
User=tomcat
Group=tomcat

Environment=CATALINA_PID=/opt/tomcat/temp/tomcat.pid
Environment=CATALINA_HOME=/opt/tomcat
Environment=CATALINA_BASE=/opt/tomcat

ExecStart=/opt/tomcat/bin/catalina.sh start
ExecStop=/opt/tomcat/bin/catalina.sh stop

RestartSec=10
Restart=always
[Install]
WantedBy=multi-user.target
Save and close the file, then reload the systemd daemon with the following command:
systemctl daemon-reload
Next, start the Tomcat service and enable it to start at system reboot:
systemctl start tomcat
systemctl enable tomcat
You can verify the status of the Tomcat service with the following command:
systemctl status tomcat
You will get the following output:
● tomcat.service - Apache Tomcat Server
   Loaded: loaded (/etc/systemd/system/tomcat.service; disabled; vendor preset: disabled)
   Active: active (running) since Tue 2022-05-03 09:26:42 EDT; 16s ago
  Process: 23184 ExecStart=/opt/tomcat/bin/catalina.sh start (code=exited, status=0/SUCCESS)
 Main PID: 23195 (java)
    Tasks: 34 (limit: 23694)
   Memory: 98.3M
   CGroup: /system.slice/tomcat.service
           └─23195 /usr/bin/java -Djava.util.logging.config.file=/opt/tomcat/conf/logging.properties -Djava.util.logging.manager=org.apache.j>

May 03 09:26:42 oraclelinux8 systemd[1]: Starting Apache Tomcat Server...
May 03 09:26:42 oraclelinux8 systemd[1]: Started Apache Tomcat Server.
Step 6 – Access Apache Tomcat Web UI
At this point, Apache Tomcat is started and listening on port 8080. You can check it with the following command:
ss -antpl | grep 8080
You will get the Tomcat listening port in the following output:
LISTEN 0 100 *:8080 *:* users:(("java",pid=23195,fd=42))
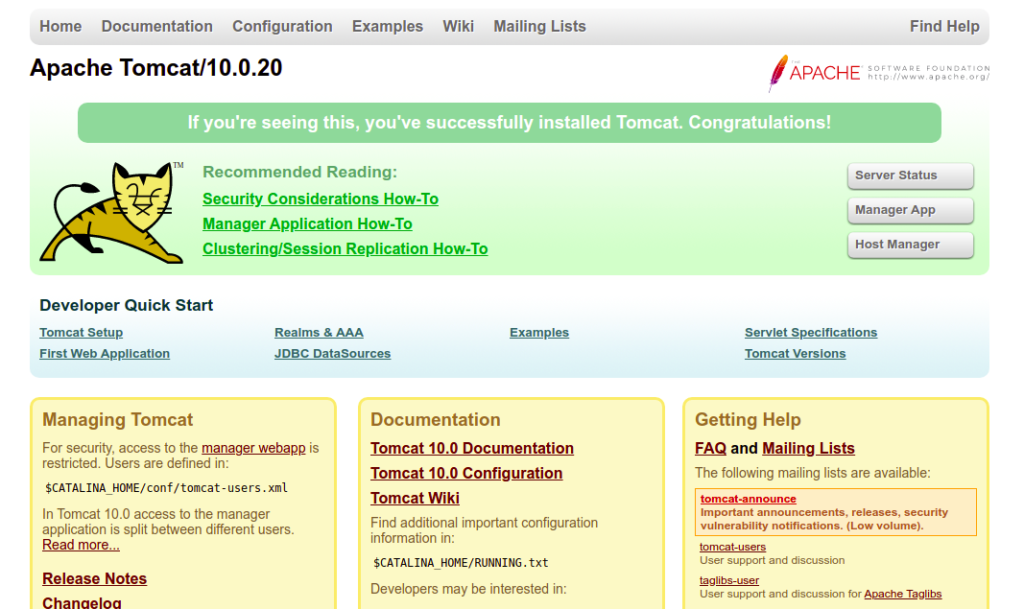
Now, open your web browser and access the Tomcat web UI using the URL http://your-server-ip:8080. You should see the next screen:
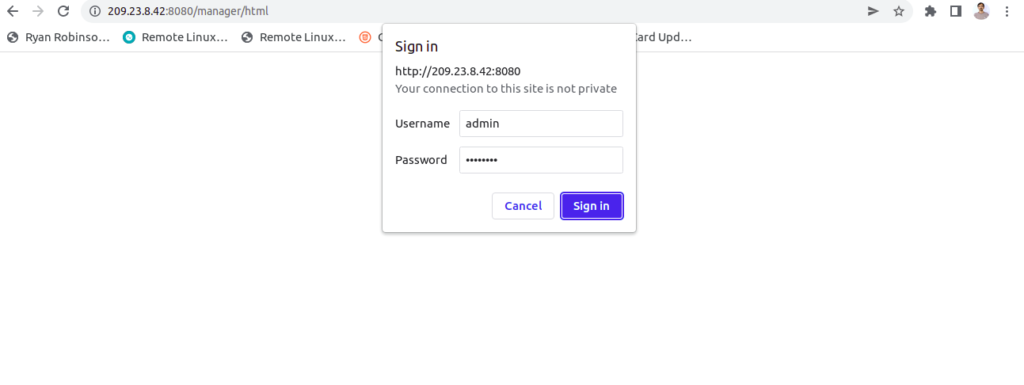
To access the Manager App, click on Manager; you will be asked to provide an admin user and password as shown below:
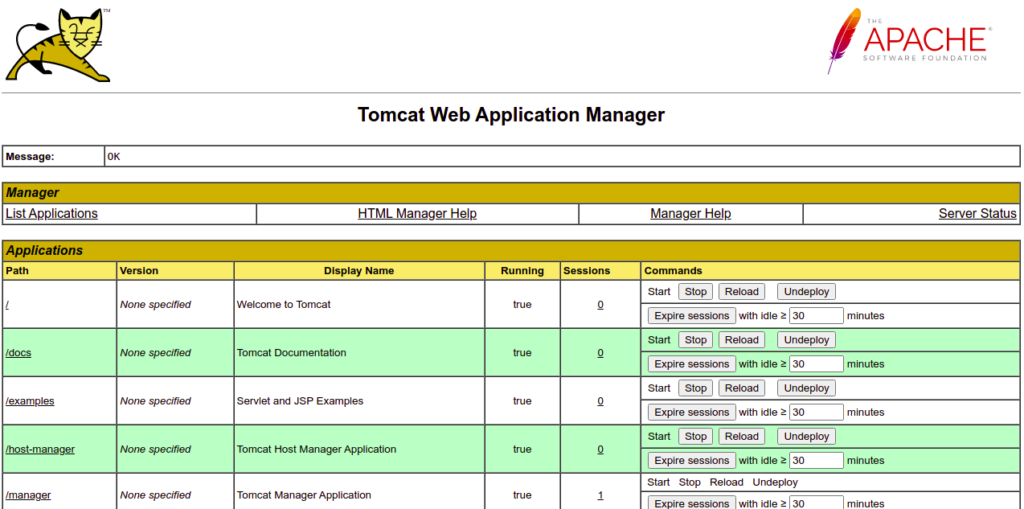
Provide your admin username and password and click on the Sign in button. You should see the following screen:
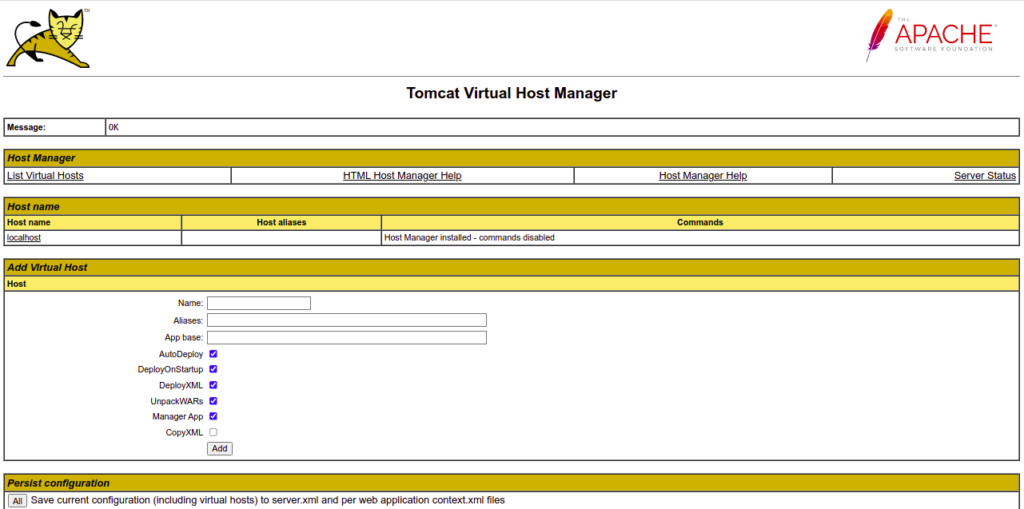
To access the Host Manager App, click on the Host Manager. You should see the following screen:
Conclusion
In this post, we explained how to install the Apache Tomcat 10 on Oracle Linux 8. You can now start building a Java-based application and deploy it using the Apache Tomcat platform. Give it a try on your dedicated server from Atlantic.Net!