Table of Contents
- Step 1 - Install Apache and MariaDB Server
- Step 2 - Install PHP and Other Extensions
- Step 3 - Create a Magento Database
- Step 4 - Install Composer
- Step 5 - Download Magento
- Step 6 - Configure Apache for Magento
- Step 7 - Install Magento on Oracle Linux 8
- Step 8 - Install Magento Cron Jobs
- Step 9 - Access Magento Web UI
- Conclusion
Magento is an open-source, web-based eCommerce platform that helps with the rapid setup of an online shop. It is written in PHP and uses MariaDB to store its contents. Magento comes with an admin control panel that allows beginner users to start an online shopping cart easily. It comes with a variety of plugins and themes to enhance website functionality and customer experience.
In this post, we will show you how to install the Magento eCommerce platform on Oracle Linux 8.
Step 1 – Install Apache and MariaDB Server
First, you will need to install Apache and MariaDB servers on your server. You can install them with the following command:
dnf update -y
dnf install httpd httpd-tools mariadb-server -y
Once both packages are installed, start both the Apache and MariaDB services and enable them to start at system reboot:
systemctl start httpd mariadb
systemctl enable httpd mariadb
Also Read
How to Install and Configure Apache Web Server on Oracle Linux 8
Step 2 – Install PHP and Other Extensions
Next, you will need to install PHP 7.4 and other extensions to your server. The default PHP version is set to PHP 7.2. If you want to install the latest PHP 7.4, you will need to reset the default PHP streams.
Run the following command to reset the default PHP:
dnf module reset php
Next, enable the PHP version 7.4 using the following command:
dnf module enable php:7.4
Next, install PHP 7.4 with other dependencies using the following command:
dnf install php php-cli php-mysqlnd php-opcache php-xml php-gd php-soap php-pdo php-bcmath php-intl php-mbstring php-json php-iconv php-zip unzip git -y
Next, edit the php.ini file and change the default values:
nano /etc/php.ini
Change the following values:
memory_limit = 1024M
upload_max_filesize = 256M
zlib.output_compression = on
max_execution_time = 300
date.timezone = UTC
Save and close the file when you are finished.
Next, you will need to install the PHP sodium extension to your system.
First, install the EPEL repository with the following command:
dnf install epel-release -y
Next, install the required dependencies with the following command:
dnf install php-cli libsodium php-pear php-devel libsodium-devel make -y
Next, install the PHP sodium extension with the following command:
pecl channel-update pecl.php.net
pecl install libsodium
Next, edit the php.ini file and enable the sodium extensions:
nano /etc/php.ini
Add the following line:
extension=sodium.so
Next, verify the sodium extension using the following command:
php -i | grep sodium
Sample output:
sodium
sodium support => enabled
sodium compiled version => 2.0.23
libsodium headers version => 1.0.18
libsodium library version => 1.0.18
Step 3 – Create a Magento Database
Next, you will need to create a database and user for Magento.
To do so, connect to the MariaDB shell with the following command:
mysql
Once you are connected to MariaDB, create a database and user using the following command:
CREATE DATABASE magento;
CREATE USER 'magento'@'localhost' IDENTIFIED BY 'password';
Next, grant all the privileges to the magento database:
GRANT ALL ON magento.* TO 'magento'@'localhost' IDENTIFIED BY 'password' WITH GRANT OPTION;
Next, flush the privileges and exit from the MariaDB shell:
FLUSH PRIVILEGES;
EXIT;
Step 4 – Install Composer
In this post, we will download Magento using Composer, so you will need to install Composer on your system. You can install it using the following command:
curl -sS https://getcomposer.org/installer | php
mv composer.phar /usr/local/bin/composer
Next, verify the Composer installation using the following command:
composer -V
Sample output:
Composer version 2.3.5 2022-04-13 16:43:00
Also Read
How to Install and Use Composer
Step 5 – Download Magento
In this section, we will download Magento version 2.4.3 using the Composer. To do so, you will need to create an access key after logging into the Magento website. Once the access key is created, run the following command to download Magento on your server. If you have any issues, refer to the Magento documentation:
cd /var/www/html
composer create-project --repository-url=https://repo.magento.com/ magento/project-community-edition=2.4.3 magento2
You will be asked to provide your access key as shown below to download the Magento:
    Authentication required (repo.magento.com):
      Username: a6b333ad41629bac913eaabb9b8e053c
      Password:
Do you want to store credentials for repo.magento.com in /root/.config/composer/auth.json ? [Yn] Y
Installing magento/project-community-edition (2.4.3)
  - Downloading magento/project-community-edition (2.4.3)
  - Installing magento/project-community-edition (2.4.3): Extracting archive
Created project in /var/www/html/magento2
Loading composer repositories with package information
Info from https://repo.packagist.org: #StandWithUkraine
Updating dependencies
Once the Magento is downloaded, set proper ownership and permissions to the Magento directory:
chown -R apache:apache /var/www/html/magento2
Next, set the required permissions with the following commands:
cd /var/www/html/magento2
find var generated vendor pub/static pub/media app/etc -type f -exec chmod g+w {} +
find var generated vendor pub/static pub/media app/etc -type d -exec chmod g+ws {} +
chown -R apache:apache .
chmod u+x bin/magento
Step 6 – Configure Apache for Magento
Next, you will need to create an Apache virtual host configuration file to server Magento. You can create it with the following command:
nano /etc/httpd/conf.d/magento.conf
Add the following lines:
<VirtualHost *:80>
ServerAdmin [email protected]
ServerName magento.example.com
DocumentRoot /var/www/html/magento2/
DirectoryIndex index.php
<Directory /var/www/html/magento2/>
Options Indexes FollowSymLinks MultiViews
AllowOverride All
Order allow,deny
allow from all
</Directory>
ErrorLog /var/log/httpd/magento_error.log
CustomLog /var/log/httpd/magento_access.log combined
</VirtualHost>
Save and close the file, then restart the Apache service to apply the changes:
systemctl restart httpd
Step 7 – Install Magento on Oracle Linux 8
Magento web installation has been removed from Magento version 2.2, so you will need to install Magento from the command line.
First, change the directory to magento2 and disable the Elasticsearch module using the following command:
cd /var/www/html/magento2/


Next, install the Magento using the following command:
sudo -u apache bin/magento setup:install --admin-firstname="magento" --admin-lastname="admin" --admin-email="[email protected]" --admin-user="admin" --admin-password="My_Secure@Password123" --db-name="magento" --db-host="localhost" --db-user="magento" --db-password="password" --language=en_US --currency=USD --timezone=UTC --cleanup-database --base-url=http://"magento.example.com"
You will get the following error:
Could not validate a connection to Elasticsearch. No alive nodes found in your cluster
Run the following command to resolve the above error:
sudo -u apache bin/magento module:disable {Magento_Elasticsearch,Magento_Elasticsearch6,Magento_Elasticsearch7}
Next, run the Magento installation command again to finish the installation:
sudo -u apache bin/magento setup:install --admin-firstname="magento" --admin-lastname="admin" --admin-email="[email protected]" --admin-user="admin" --admin-password="My_Secure@Password123" --db-name="magento" --db-host="localhost" --db-user="magento" --db-password="password" --language=en_US --currency=USD --timezone=Asia/Kolkata --cleanup-database --base-url=http://"magento.example.com"
Once Magento has been installed, you should get the following output:
Module 'Magento_WishlistAnalytics':
[Progress: 824 / 831]
Module 'Magento_WishlistGraphQl':
[Progress: 825 / 831]
Enabling caches:
Current status:
layout: 1
block_html: 1
full_page: 1
[Progress: 826 / 831]
Installing admin user...
[Progress: 827 / 831]
Caches clearing:
Cache cleared successfully
[Progress: 828 / 831]
Disabling Maintenance Mode:
[Progress: 829 / 831]
Post installation file permissions check...
For security, remove write permissions from these directories: '/var/www/html/magento2/app/etc'
[Progress: 830 / 831]
Write installation date...
[Progress: 831 / 831]
[SUCCESS]: Magento installation complete.
[SUCCESS]: Magento Admin URI: /admin_z7wnpa
Nothing to import.
Note down the admin URL (/admin_z7wnpa) from the above output. You will require it to access the Magento admin panel.
Step 8 – Install Magento Cron Jobs
Next, you will need to set up Magento cron jobs in order to run correctly.
First, navigate to the Magento root directory with the following command:
cd /var/www/html/magento2
Next, install the Magento cron jobs with the following command:
sudo -u apache bin/magento cron:install
Step 9 – Access Magento Web UI
Now, open your web browser and access the Magento web interface using the URL http://magento.example.com/admin_z7wnpa. You should see the Magento login page:
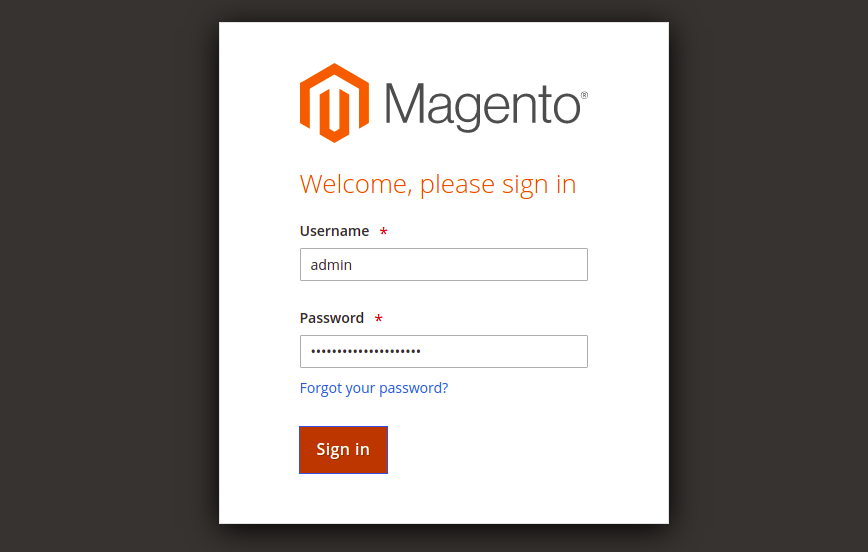
Provide your admin username and password and click on the Sign in button. You should see the Magento dashboard on the following page:

Conclusion
You have successfully installed Magento on Oracle Linux 8. You can now start building your online store using the Magento platform. Give it a try on your dedicated server from Atlantic.Net!