PyTorch is a free, open-source tool used for deep learning tasks like natural language processing and computer vision. It’s easy to use and flexible, making it simple to build and use AI models in different types of projects.
Running a PyTorch workspace on Atlantic.Net lets you take advantage of powerful Cloud GPU servers with NVIDIA A100 and A40 GPUs. This is great for heavy tasks like training models using the torch library. By combining PyTorch with JupyterLab, you get a smooth remote development setup where you can easily work with others on machine learning projects.
This article shows you how to create your own Docker image by starting with a PyTorch image and adding JupyterLab. It also guides you through setting everything up using Docker and Docker Compose on Atlantic.Net Cloud GPU servers with help from the NVIDIA Docker Toolkit.
Prerequisites
Before getting started, ensure you have:
- An Ubuntu 24.04 server with NVIDIA GPU(s).
- NVIDIA drivers installed.
- A non-root user with sudo privileges.
Step 1: Verify GPU Availability
Before starting, make sure your GPU is detected and working.
1. Check GPU on the server.
nvidia-smiThis shows GPU details like model, driver version, and memory usage.
Sat Jun  7 07:20:18 2025
+-----------------------------------------------------------------------------------------+
| NVIDIA-SMI 550.90.07              Driver Version: 550.90.07      CUDA Version: 12.4     |
|-----------------------------------------+------------------------+----------------------+
| GPU  Name                 Persistence-M | Bus-Id          Disp.A | Volatile Uncorr. ECC |
| Fan  Temp   Perf          Pwr:Usage/Cap |           Memory-Usage | GPU-Util  Compute M. |
|                                         |                        |               MIG M. |
|=========================================+========================+======================|
|   0  NVIDIA A40-12Q                 On  |   00000000:06:00.0 Off |                    0 |
| N/A   N/A    P0             N/A /  N/A  |       1MiB /  12288MiB |      0%      Default |
|                                         |                        |                  N/A |
+-----------------------------------------+------------------------+----------------------+

+-----------------------------------------------------------------------------------------+
| Processes:                                                                              |
|  GPU   GI   CI        PID   Type   Process name                              GPU Memory |
|        ID   ID                                                               Usage      |
|=========================================================================================|
|  No running processes found                                                             |
+-----------------------------------------------------------------------------------------+
2. Install required dependencies.
apt install -y python3-pip python3-venv docker-compose docker.io3. Run a temporary PyTorch container.
docker run --rm -it --gpus all pytorch/pytorch:latestExplanation:
- –gpus all allows Docker to use the GPU.
- -it gives you an interactive terminal.
- –rm deletes the container when you exit.
After running the above command, you will get into the container shell as shown below.
root@7117aa4ac0ba:/workspace#4. Connect to the Python shell.
root@7117aa4ac0ba:/workspace# pythonOutput.
Python 3.10.13 (main, Sep 11 2023, 13:44:35) [GCC 11.2.0] on linux
Type "help", "copyright", "credits" or "license" for more information.
>>>
5. Check if PyTorch detects the GPU.
>>> import torch
>>> torch.cuda.is_available()
If the output says True, your GPU is working!
True6. Use the quit() command to quit the Python console and the exit command to exit the container terminal.
Step 2: Build a Custom Docker Image with PyTorch & JupyterLab
We’ll create a new Docker image that includes PyTorch + JupyterLab for easy coding.
1. Create and activate the Python virtual environment.
python3 -m venv venv
source venv/bin/activate
2. Install Jupyter notebook.
pip install jupyter3. Create a new configuration file for Jupyter notebook.
nano config.pyAdd the following content:
c.ServerApp.ip = '0.0.0.0'
c.ServerApp.allow_root = True
c.ServerApp.allow_remote_access = True
c.ServerApp.password = ''
The above setup tells the JupyterLab server to accept remote connections and listen on IP address 0.0.0.0, which allows you to access the workspace using the server’s public IP. You can also add other settings to this file to customize the container before it runs.
4. Create the password hash using the passwd function.
python3 -c "from jupyter_server.auth import passwd; print(passwd('securepassword'))"Output.
argon2:$argon2id$v=19$m=10240,t=10,p=8$+Gm411wZBogCWpF/CyvvMg$w+tQ9IctMYs4P6Zbi6rcwEGx8HVerRxHczhBtFHsSV05. Edit the config.py.
nano config.pyReplace the c.ServerApp.password value in the config.py file with the output.
c.ServerApp.ip = '0.0.0.0'
c.ServerApp.allow_root = True
c.ServerApp.allow_remote_access = True
c.ServerApp.password = 'argon2:$argon2id$v=19$m=10240,t=10,p=8$+Gm411wZBogCWpF/CyvvMg$w+tQ9IctMYs4P6Zbi6rcwEGx8HVerRxHczhBtFHsSV0'
6. Create a Dockerfile.
nano DockerfileAdd the below content.
FROM pytorch/pytorch:latest

RUN pip install jupyterlab
RUN pip install -U ipywidgets ipykernel

COPY config.py /root/.jupyter/jupyter_lab_config.py
EXPOSE 8888

CMD ["bash", "-c", "jupyter lab"]
The above steps use the official PyTorch container image as a starting point. It installs JupyterLab using pip, copies the config file you created earlier, opens port 8888, and runs the JupyterLab server with the bash -c jupyter lab command.
7. Build the Docker image.
docker build -t pytorch-jupyter .This builds a new container image called pytorch-jupyter. You can also upload this image to your private DockerHub account so it’s ready to use anytime you want to quickly launch a PyTorch workspace for heavy tasks like training models.
Step 3: Deploy the Workspace using Docker
In the last section, you created the pytorch-jupyter image by combining JupyterLab and the PyTorch container. This part now shows how to run that image using Docker to set up a temporary workspace or test your setup.
1. Run a temporary container using the pytorch-jupyter image.
docker run --rm -it --gpus all -p 8888:8888 pytorch-jupyterThis command starts a new container using the image you created. The –gpus all option gives the container access to all GPUs on the host machine. The -it option allows you to interact with the container through the terminal. The –rm option makes sure the container is automatically deleted from the system once it stops running.
2. Open your web browser and access the URL http://your-server-ip:8888. You will see the Jupyter notebook login page.

3. Log in to the JupyterLab interface using the password you used to create the password hash in the previous sections.
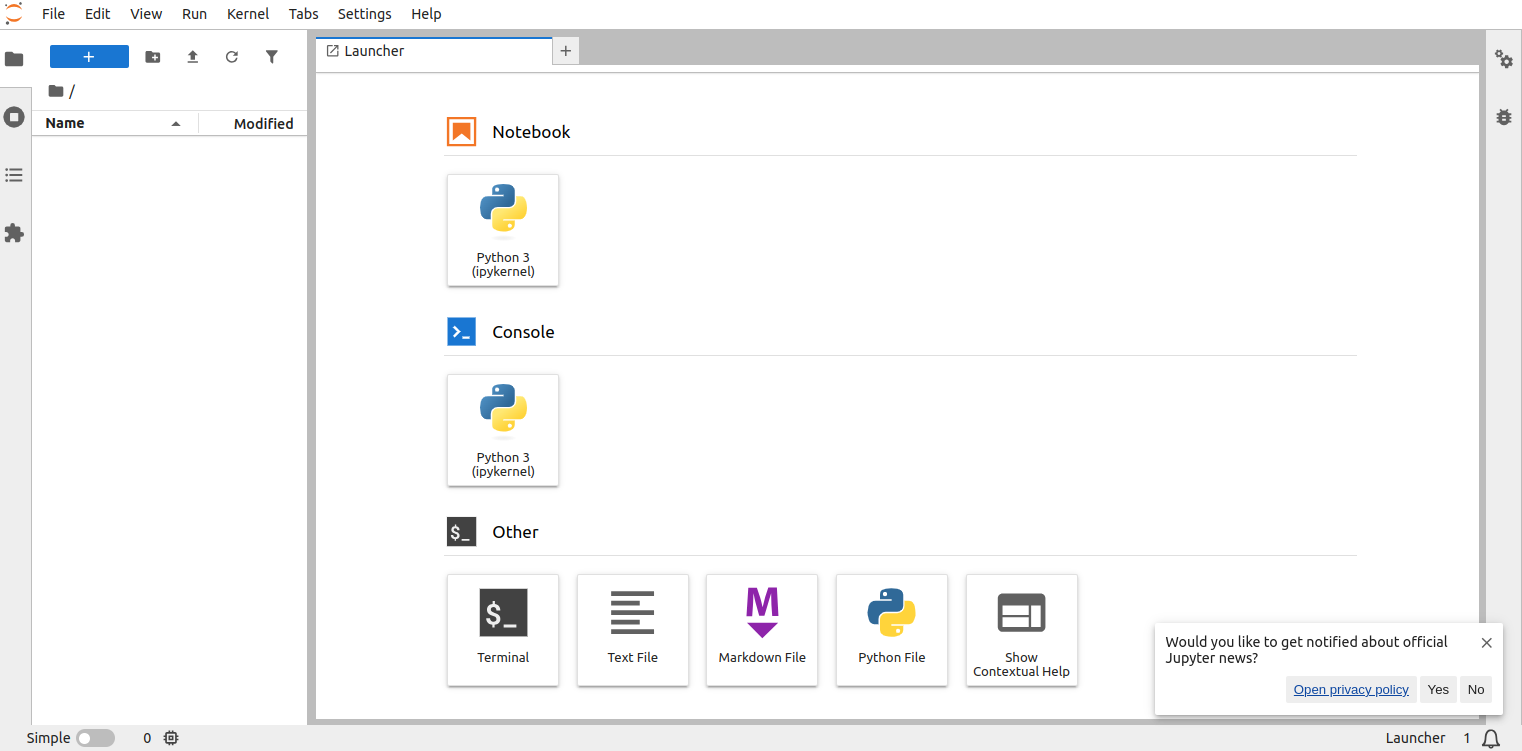
4. Create a new notebook.
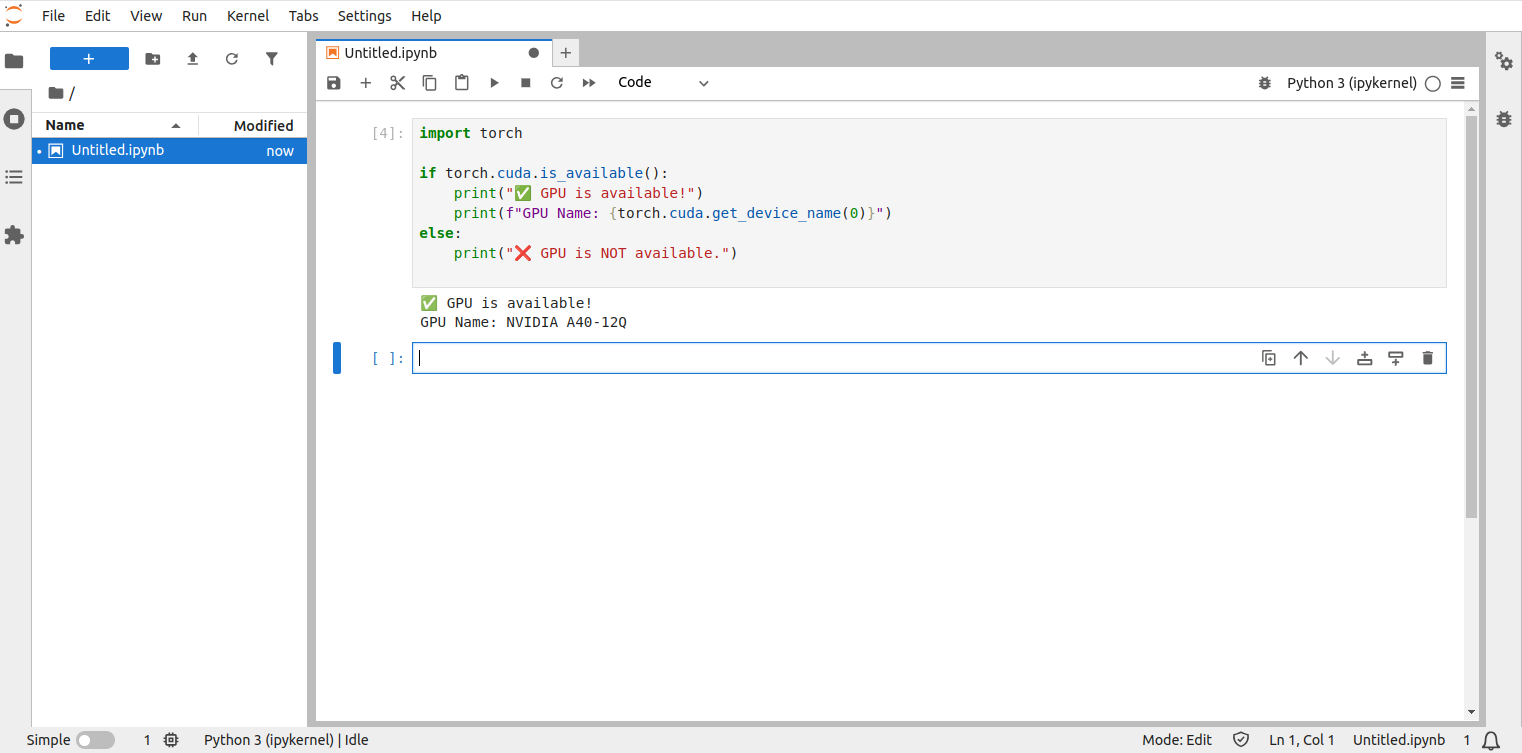
Then add the below function in a new notebook to verify the GPU availability.
import torch

if torch.cuda.is_available():
    print("✅ GPU is available!")
    print(f"GPU Name: {torch.cuda.get_device_name(0)}")
else:
    print("❌ GPU is NOT available.")
5. Run the Notebook. If everything is fine, you will see the message “✅ GPU is available!”.
6. Go back to your terminal and exit the container using Ctrl + C.
Step 4: Deploy a Permanent Workspace (Docker Compose)
In this section, we’ll deploy a persistent PyTorch workspace on an Atlantic.Net Cloud GPU server using Docker Compose.
1. Create and enter a new directory named pytorch-environment.
mkdir ~/pytorch-environment
cd ~/pytorch-environment
2. Create a new file named docker-compose.yaml.
nano docker-compose.yamlAdd the following content:
services:
  jupyter:
    image: pytorch-jupyter
    restart: unless-stopped
    volumes:
      - "/root/workspace:/workspace"
    deploy:
      resources:
        reservations:
          devices:
            - capabilities: [gpu]

  nginx:
    image: nginx
    restart: unless-stopped
    ports:
      - 80:80
      - 443:443
    volumes:
      - ./nginx/nginx.conf:/etc/nginx/nginx.conf
      - ./certbot/conf:/etc/letsencrypt
      - ./certbot/www:/var/www/certbot


  certbot:
    image: certbot/certbot
    container_name: certbot
    volumes:
      - ./certbot/conf:/etc/letsencrypt
      - ./certbot/www:/var/www/certbot
    command: certonly --webroot -w /var/www/certbot --force-renewal --email [email protected] -d pytorch.example.com --agree-tos
The above setup includes three services.
- The jupyter service runs a container with a GPU-powered PyTorch workspace and saves all workspace files in the /root/workspace folder using the volumes setting.
- The nginx service uses the official Nginx image to act as a reverse proxy, directing traffic from users to the Jupyter service.
- The certbot service uses the official Certbot image to request a free SSL certificate from Let’s Encrypt for your domain.
Important: Replace [email protected] and pytorch.example.com with your own email and domain name.
2. Create a new directory named nginx.
mkdir nginx3. Create a new file named nginx/nginx.conf inside the directory.
nano nginx/nginx.confAdd the below content.
user  nginx;
worker_processes  auto;

error_log  /var/log/nginx/error.log warn;
pid        /var/run/nginx.pid;

events {
    worker_connections 1024;
}

http {
    server_tokens off;
    charset utf-8;
    include       /etc/nginx/mime.types;
    default_type  application/octet-stream;

    sendfile        on;
    keepalive_timeout  65;

    access_log  /var/log/nginx/access.log;

    server {
        listen 80;
        server_name pytorch.example.com;

        location /.well-known/acme-challenge/ {
            root /var/www/certbot;
        }

        location / {
            return 404;
        }
    }
}
4. Create required directories.
mkdir -p certbot/www/.well-known/acme-challenge5. Start the PyTorch workspace.
docker-compose up -dThe above command launches the services listed in the docker-compose.yaml file in detached mode. This means the services will run in the background, allowing you to continue using your terminal for other tasks.
6. Verify the generated SSL certificates.
ls certbot/conf/live/pytorch.example.com/Output.
cert.pem chain.pem fullchain.pem privkey.pem README7. Update the nginx.conf file.
nano nginx/nginx.confReplace existing content with the following:
user  nginx;
worker_processes  auto;

error_log  /var/log/nginx/error.log warn;
pid        /var/run/nginx.pid;

events {
    worker_connections 1024;
}

http {
    server_tokens off;
    charset utf-8;
    include       /etc/nginx/mime.types;
    default_type  application/octet-stream;

    sendfile        on;
    keepalive_timeout  65;

    access_log  /var/log/nginx/access.log;

    # HTTP - for Certbot challenge and redirect to HTTPS
    server {
        listen 80;
        server_name pytorch.example.com;

        # Let’s Encrypt challenge path
        location /.well-known/acme-challenge/ {
            root /var/www/certbot;
        }

        # Redirect everything else to HTTPS
        location / {
            return 301 https://$host$request_uri;
        }
    }

    # HTTPS - Secure JupyterLab
    server {
        listen 443 ssl;
        server_name pytorch.example.com;

        ssl_certificate /etc/letsencrypt/live/pytorch.example.com/fullchain.pem;
        ssl_certificate_key /etc/letsencrypt/live/pytorch.example.com/privkey.pem;

        ssl_protocols TLSv1.2 TLSv1.3;
        ssl_ciphers HIGH:!aNULL:!MD5;

        location / {
            proxy_pass http://jupyter:8888;
            proxy_set_header Host $host;
            proxy_set_header X-Real-IP $remote_addr;
            proxy_set_header X-Forwarded-For $proxy_add_x_forwarded_for;
            proxy_set_header X-Forwarded-Proto $scheme;
        }
    }
}
The above setup uses the SSL certificate provided by Certbot. It sets up a reverse proxy server that forwards incoming traffic to the container running on port 8888. It also includes a location block to handle ACME challenge files, which are needed for automatic SSL renewal through a scheduled Cron job.
8. Restart the Nginx service.
docker-compose restart nginx9. You can now confirm the deployment of the workspace by opening https://pytorch.example.com in your web browser.
Conclusion
This article explained how to start with the PyTorch container image and install JupyterLab to create a custom container image. It also guided you through deploying the setup using Docker and Docker Compose on Atlantic.Net Cloud GPU servers. You can also upload your custom image to your DockerHub account, making it easy to launch temporary PyTorch workspaces whenever you need them.
* This post is for informational purposes only and does not constitute professional, legal, financial, or technical advice. Each situation is unique and may require guidance from a qualified professional.
Readers should conduct their own due diligence before making any decisions.