Verified and Tested 10/15/15
Introduction
In this How-To, we are installing a LAMP server using Ubuntu 12.04. LAMP is one of the most widespread and easy to install web server configurations out there. It consists of 4 elements; Linux (In this case Ubuntu), Apache, MySQL, and PHP.
Installing LAMP
Before installing Apache, we should make sure our system is up to date, by running the following command:
sudo apt-get update
Installing Apache
Apache is the web server; its job is to serve web pages to your clients when they request them. Install Apache by running the following command:
sudo apt-get install apache2
When is asks “Do you want to continue?” hit Y and then Enter.
Verify Apache is running by running the following command:
service apache2 status
After the install, Apache creates a default web page that can be viewed by going to your servers IP address.
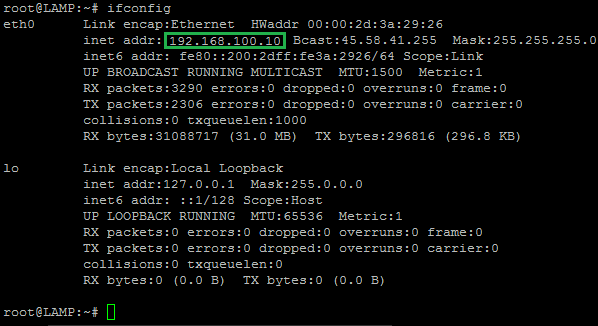
If you do not know your servers IP address, you can run the following command:
ifconfigYou should get an output that looks like the following. You need to look next to where it says “inet addr” for your IP address.
An example of ifconfig showing the IP address 192.168.100.10In our case, we would put http://192.168.100.10 in your browser’s address bar and get the following page:
 An example of ifconfig showing the IP address 192.168.100.10In our case, we would put http://192.168.100.10 in your browser’s address bar and get the following page:
 The default page for Apache on Ubuntu 12.04
Installing MySQL
MySQL is a relation database system, its job is to store data within databases, tables, and records. You can install MySQL with the following command:
sudo apt-get install mysql-server libapache2-mod-auth-mysql php5-mysql
During the install, when is asks “Do you want to continue?” hit Y and then Enter. It will then prompt you to enter a MySQL root password. You should set a strong password of your choice.
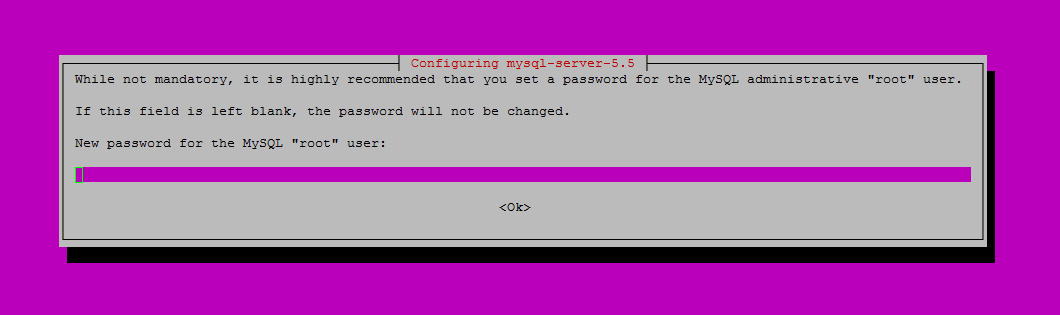 Add a strong password of your choosing and hit EnterOnce you enter your MySQL password, it will prompt you to re-enter it.
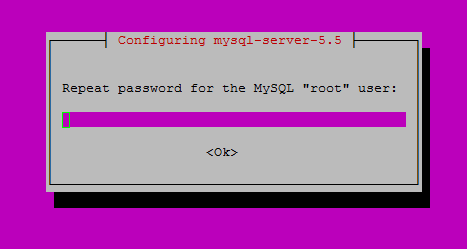 Re-enter the password you set beforeBy default, MySQL has left a few things open to make it easier to set up. However, you do not need these open, and it is suggested to run the MySQL Security installation with the following command:
mysql_secure_installation
It will be prompting you a series of questions Type N for the change root password since you just set it, and most likely you want to hit Y for the
rest.
 An example of what mysql_secure_installation looks likeVerify that MySQL is running with the following command:
service mysql status
Installing PHP
PHP is the scripting language, its job is to interrupt code and to produce outputs. Install PHP with the following command:
apt-get install php5 libapache2-mod-php5
When is asks “Do you want to continue?” hit Y and then Enter.
We are going to create a PHP test file called info.php in /var/www/. For this how-to we are going to accomplish this using Nano, by running the following command:
nano /var/www/info.php
Insert the following code in the text editor:
<?php
phpinfo();
?>
Save the file by hitting Ctrl + X then Hit Y and then Enter.
Since we install PHP, we need to restart Apache so that the changes take effect:
service apache2 restart
You can now test your info.php file by using the following link below, updated with your IP address.
http://youripaddress/info.php
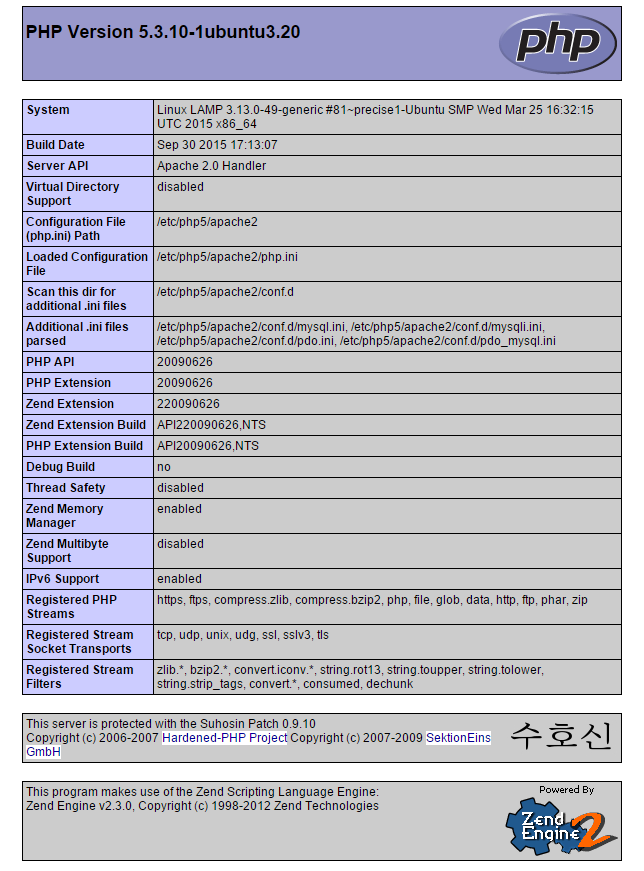 The result of the php.info file you made.Now that you verified PHP is working, it is a good idea to remove the info.php file since hackers can use this to plan attacks against you using this information. Remove it with the following command:
sudo rm /var/www/info.php
Congratulations! On installing LAMP on your Ubuntu 12.04 Server. Thank you for following this How-To, please check back for more updates. If you are running a newer version of Ubuntu, see our helpful how-to’s for Ubuntu 14.04, Ubuntu 15.04 and Ubuntu 16.04.
* This post is for informational purposes only and does not constitute professional, legal, financial, or technical advice. Each situation is unique and may require guidance from a qualified professional.
Readers should conduct their own due diligence before making any decisions.